Léna Piquet
The greasy bloom finally demystified
January 31, 2024
Syndicate is a little guilty pleasure of mine.
It is a game that came out in 2012 as a reboot of another game released in 1993 sharing the same name. It is a fun FPS with a great feel, far from perfect but featuring some nice visuals.
Syndicate became a bit notorious when it released for its excessive bloom effect. Many complained about it [1], and even looked for ways to disable it. Me on the other hand, I loved every aspects of it and became fascinated. Every few years I would replay that game from start to finish just to enjoy its visuals once again. I was always dreaming of one day being able to dissect and analyze its specificities. Hoping I would be able to understand or reverse engineer how it works.
It's now 2024, so 12 years after the game release, and I finally figured out how to capture of frame of the game in RenderDoc.
It is time.

(The official logo fo the game.)
Syndicate is a first person shooter that came out in 2012 on Playstation 3, Xbox 360 and PC and developed by Starbreeze. The game features mainly a singleplayer campaign but it also had a co-op mode (which I personally never tried).
Here is one trailer of the game:
It's a bit "too much", but that trailer ii not that far from the actual game.
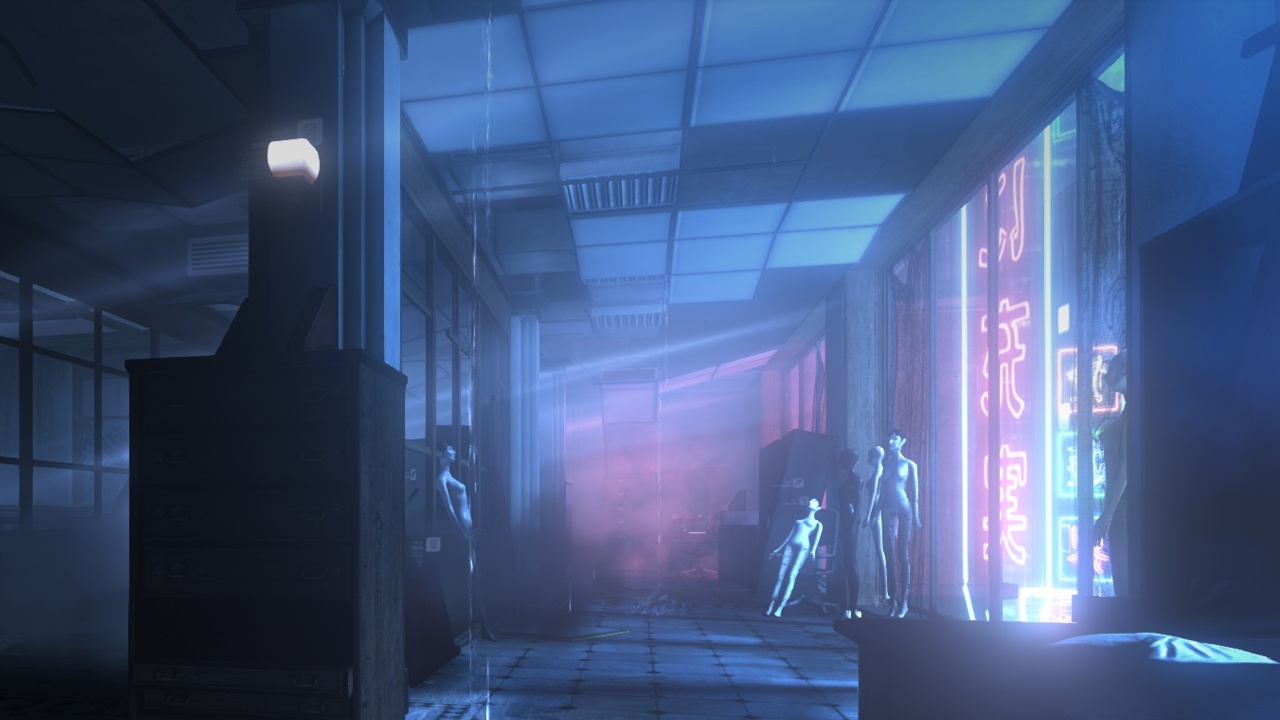
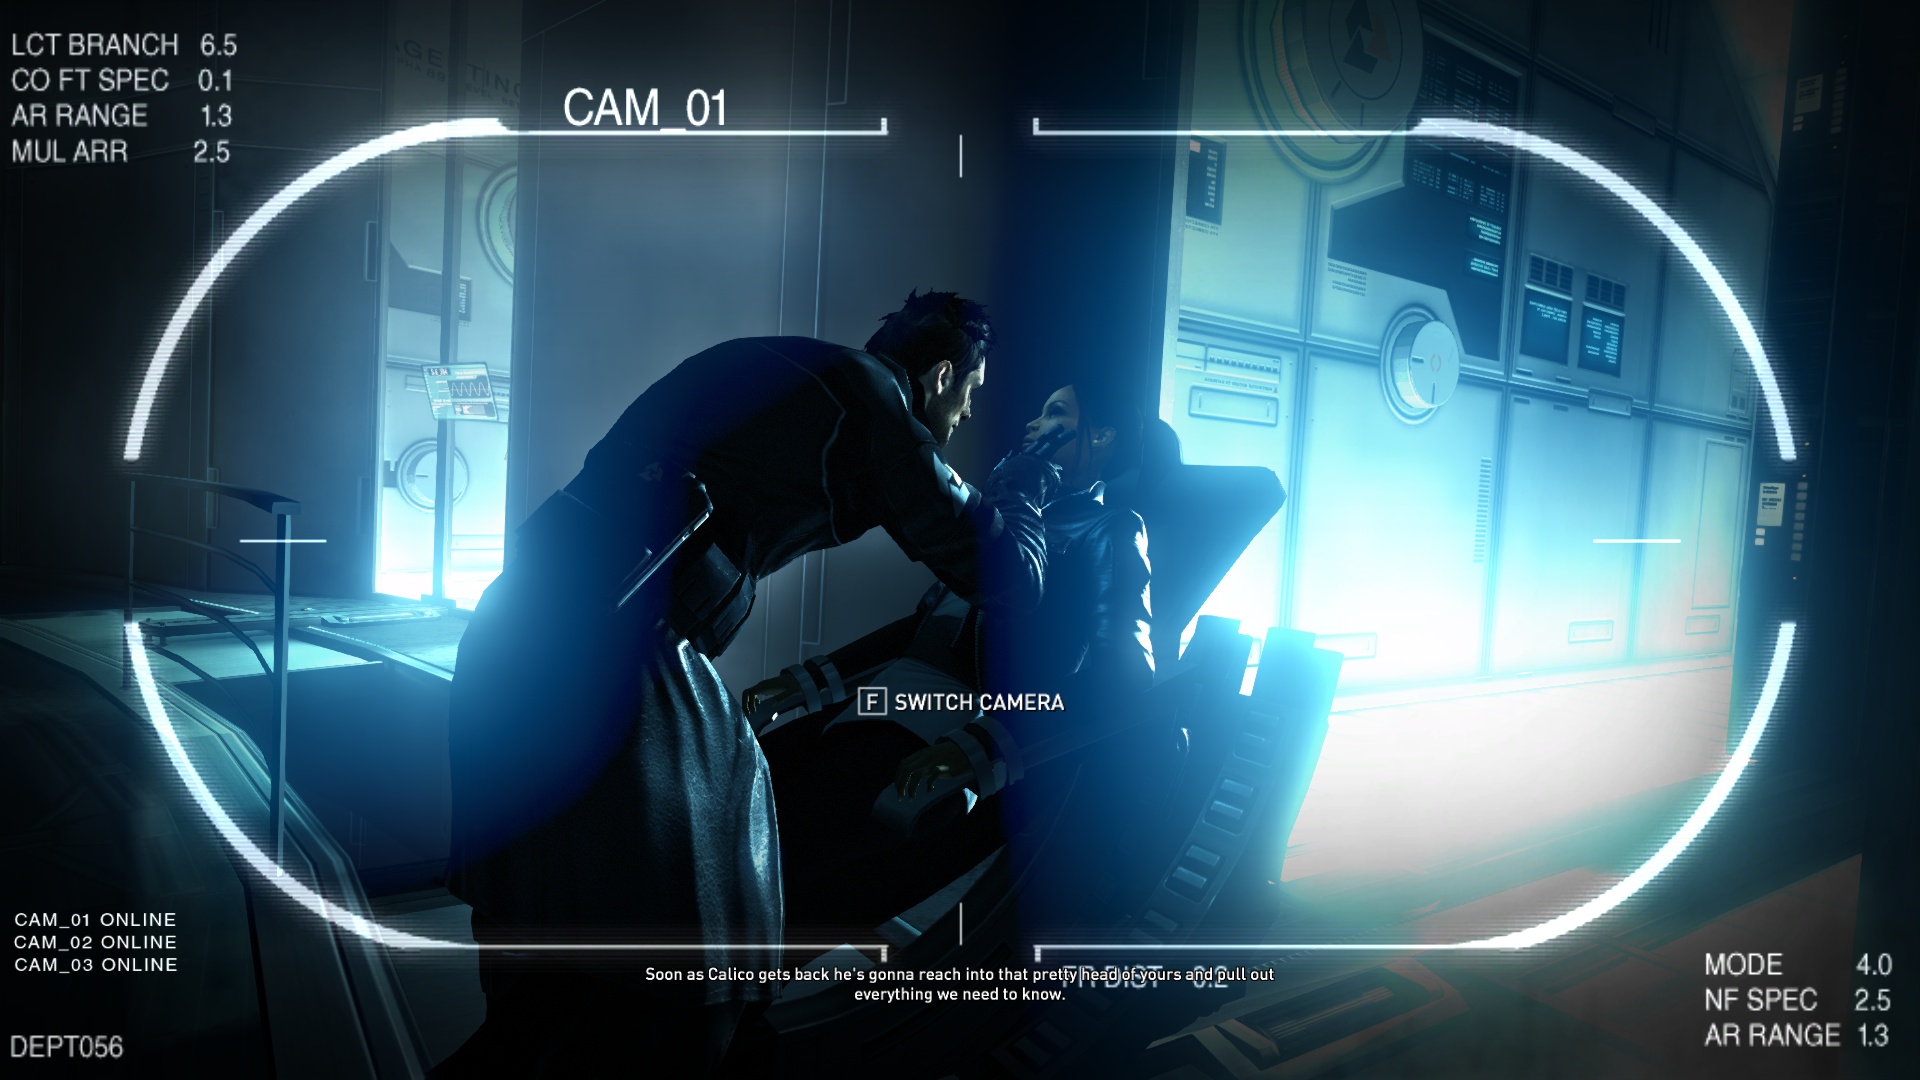
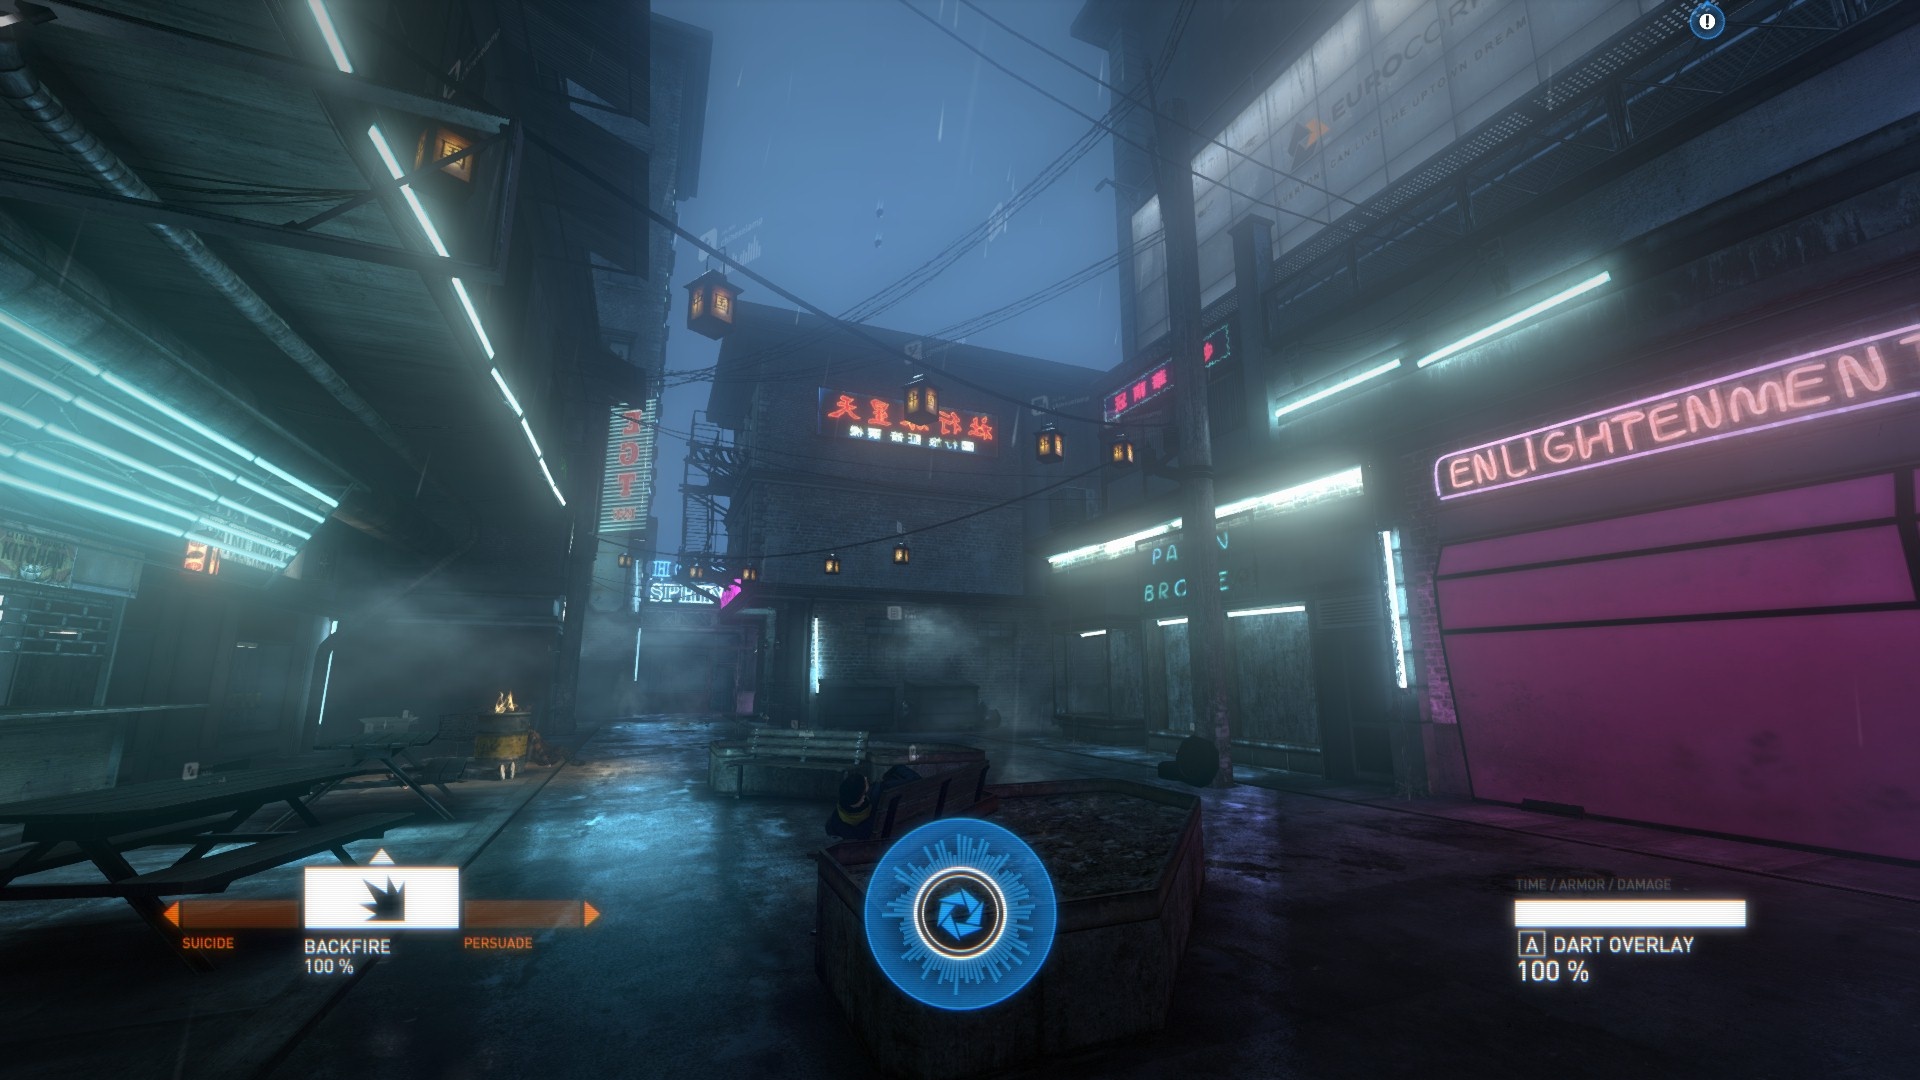
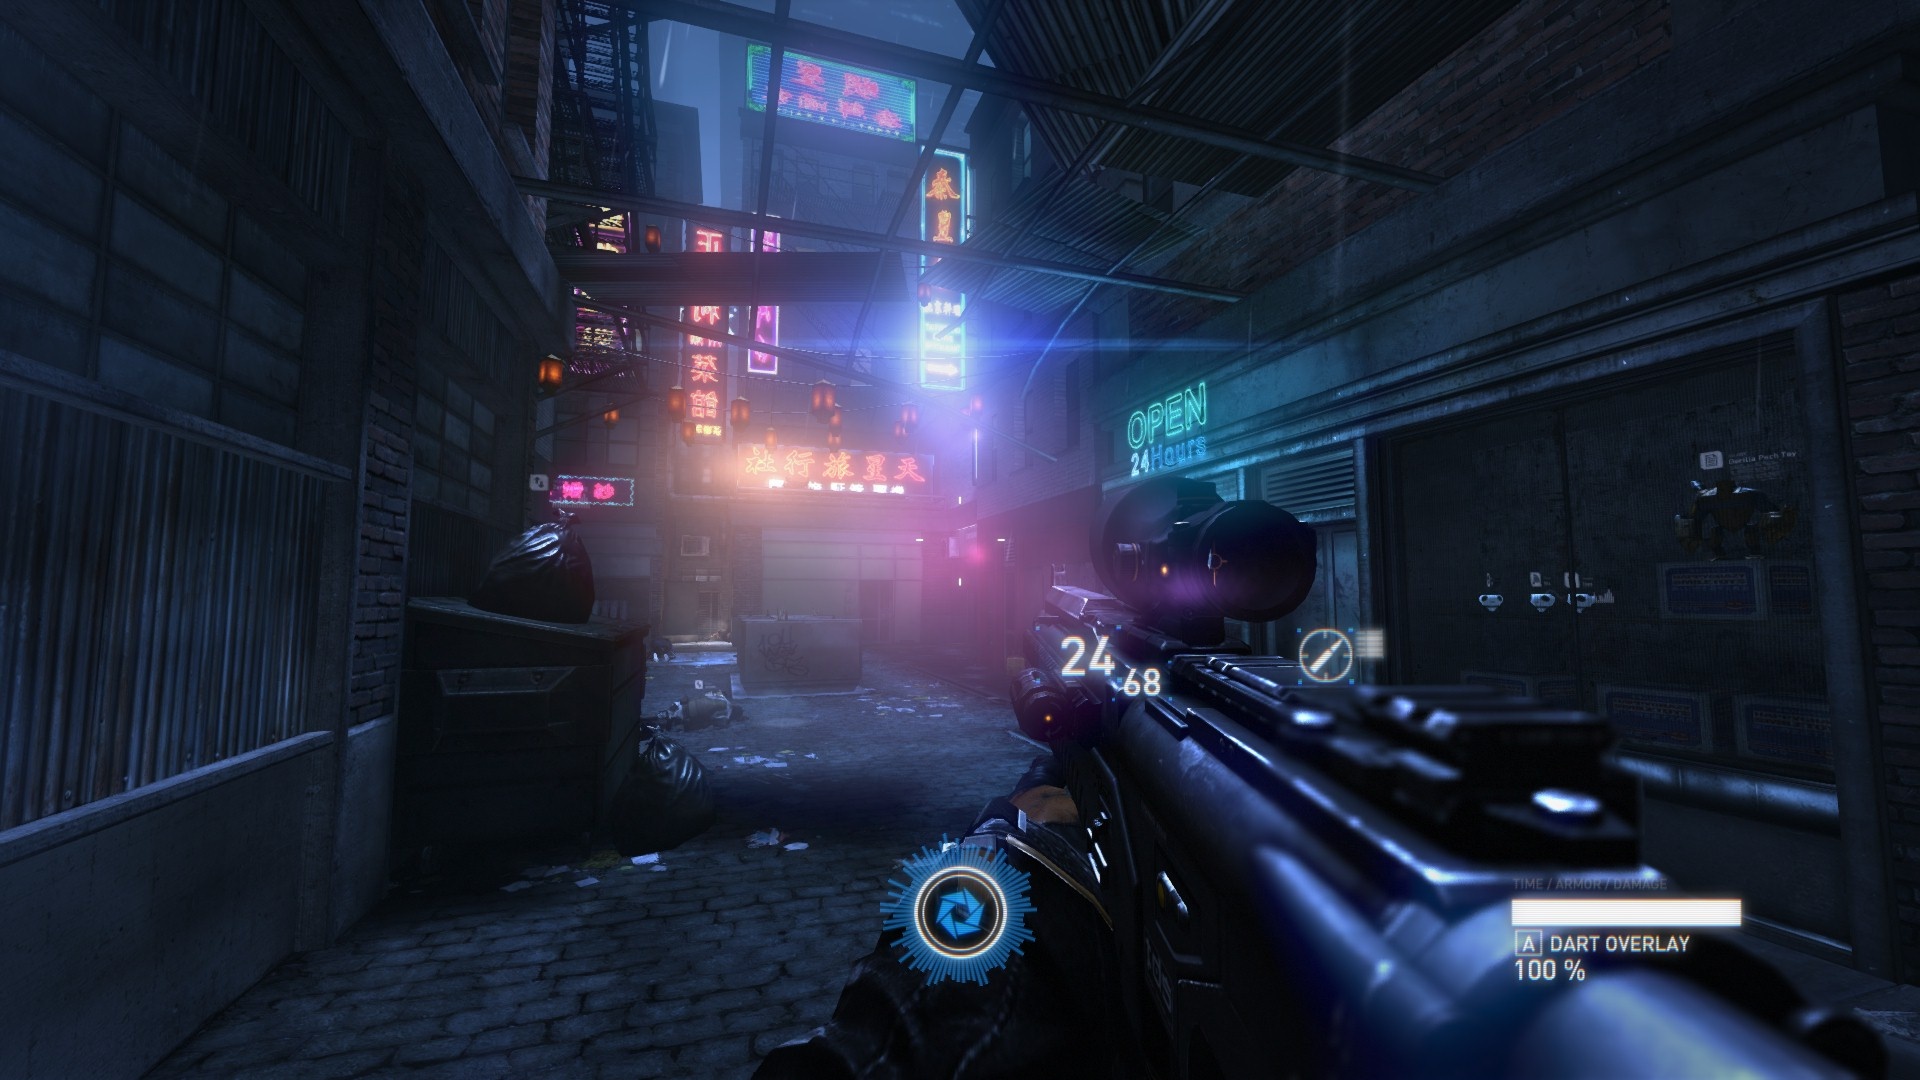
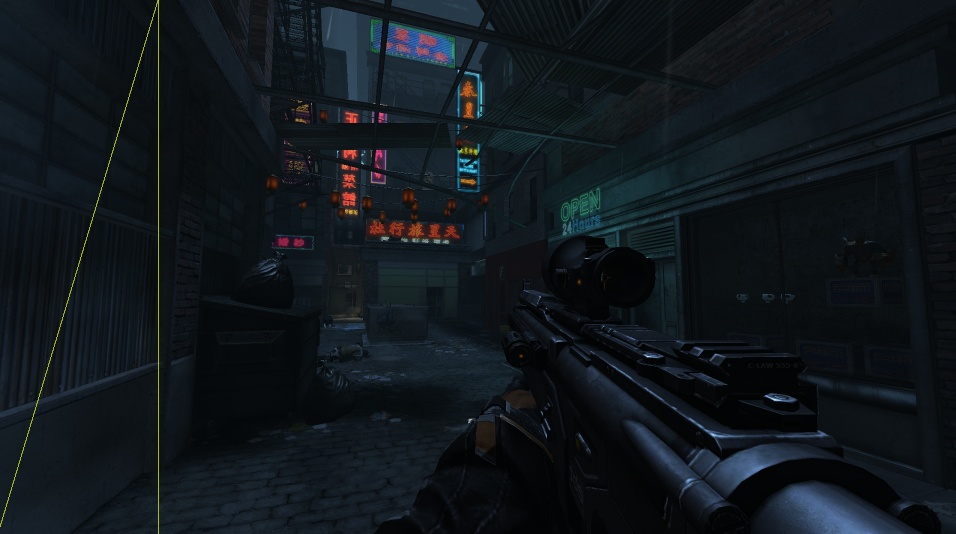
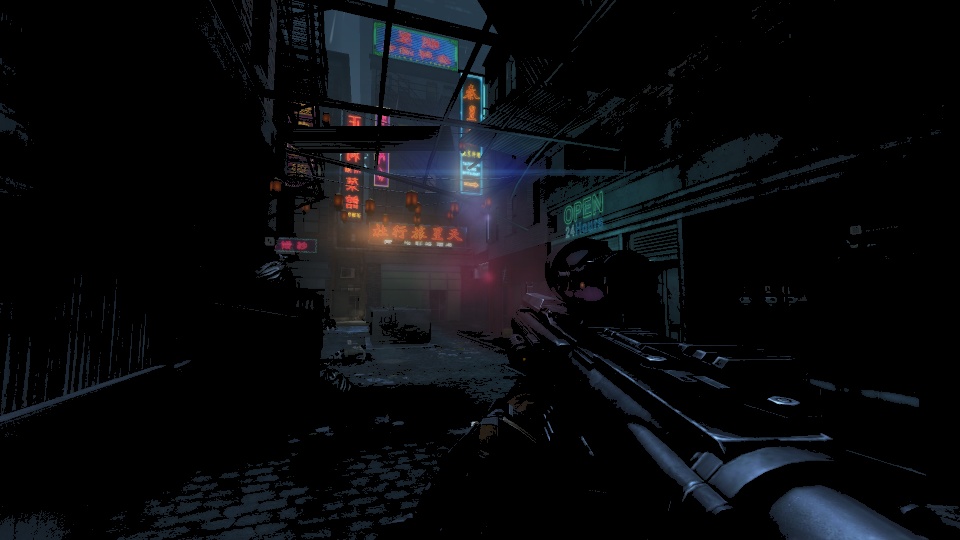
Here are a few screenshots from places across the game. The game features different areas with various styles in a general cyberpunk setting.

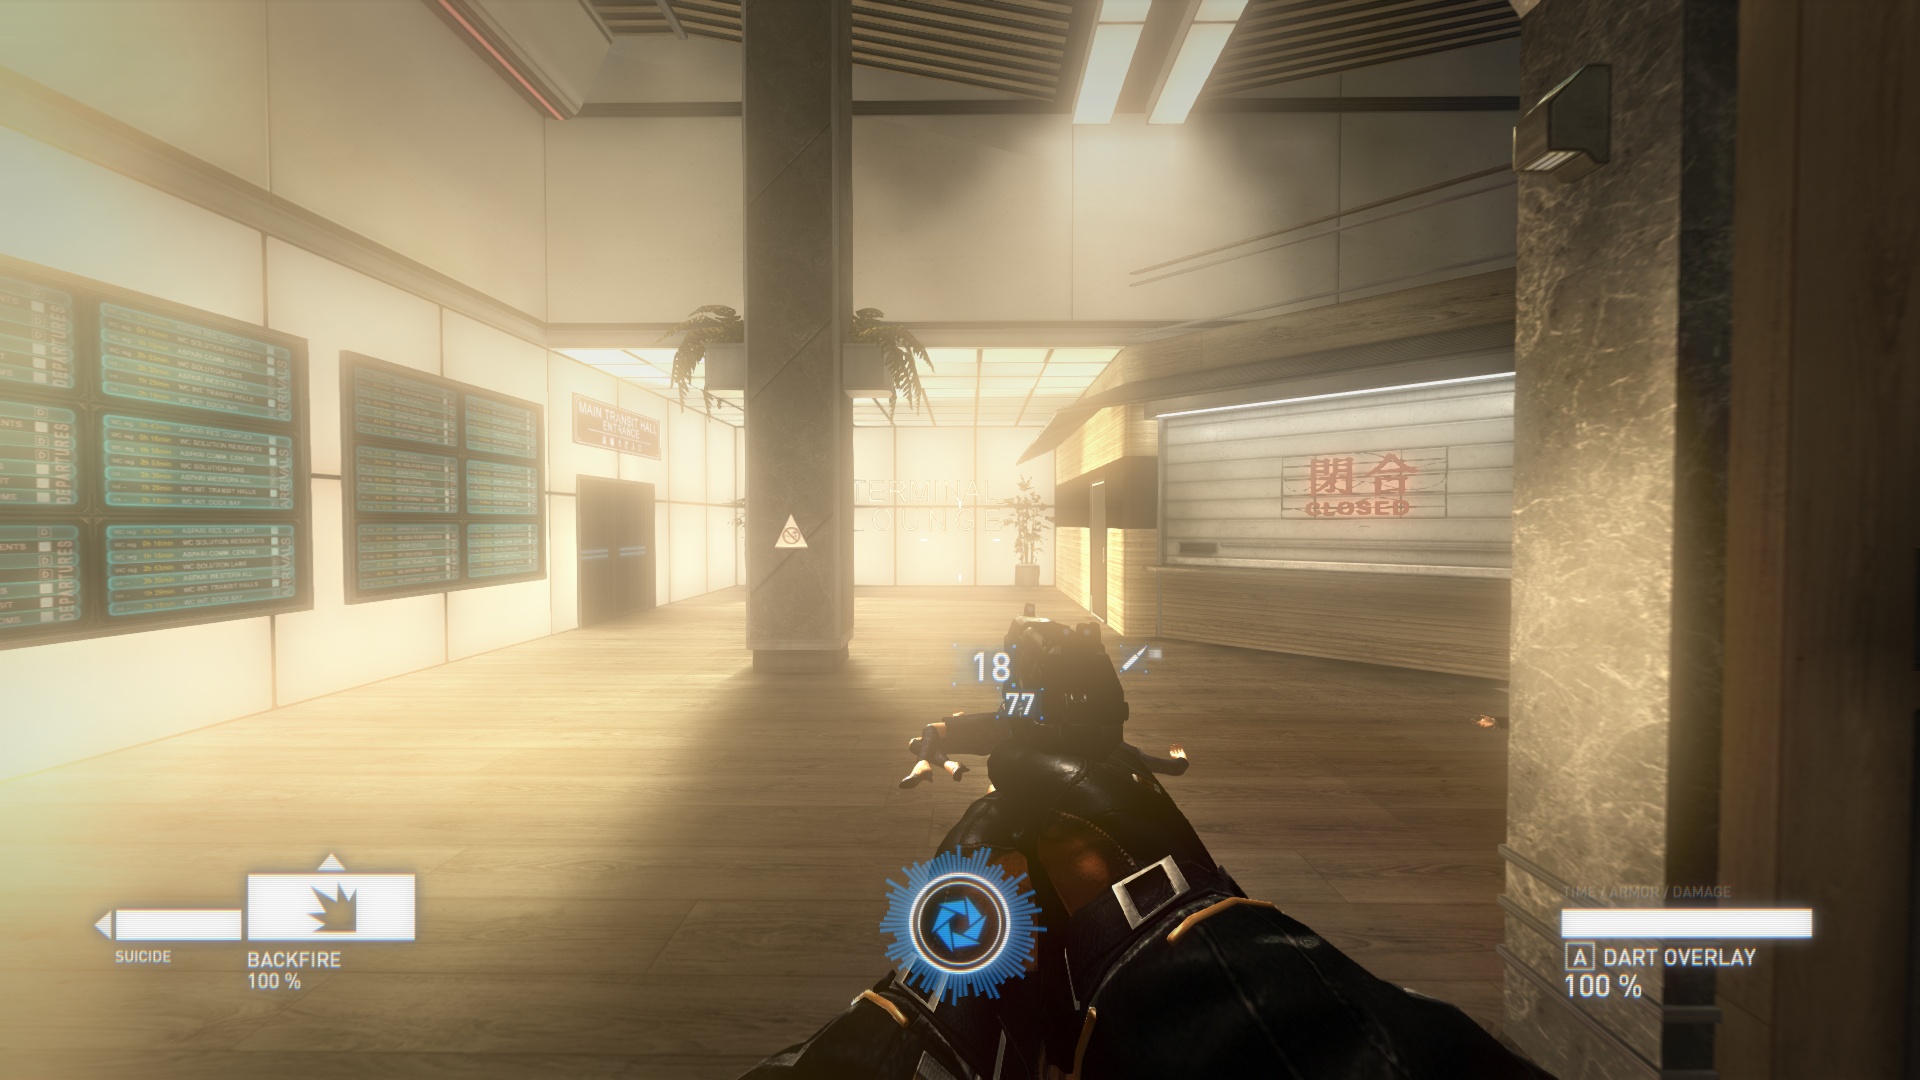
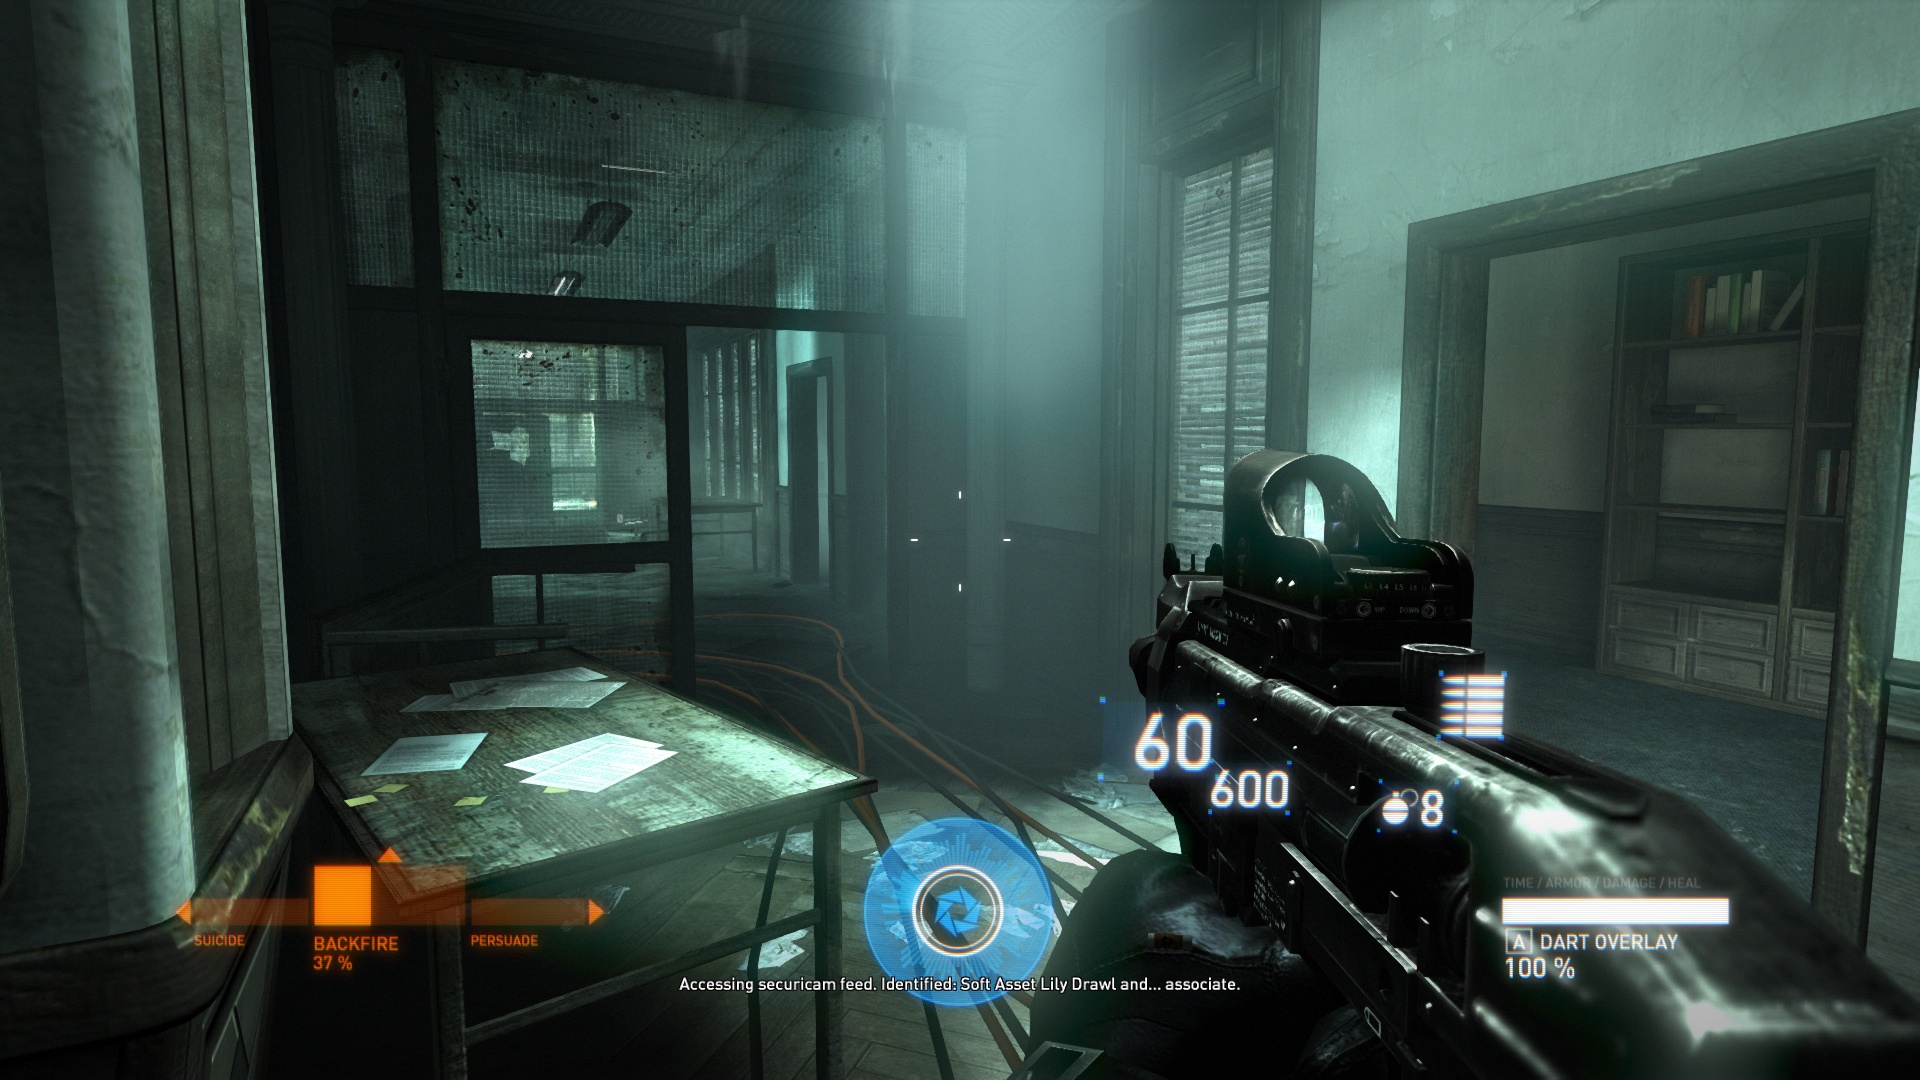
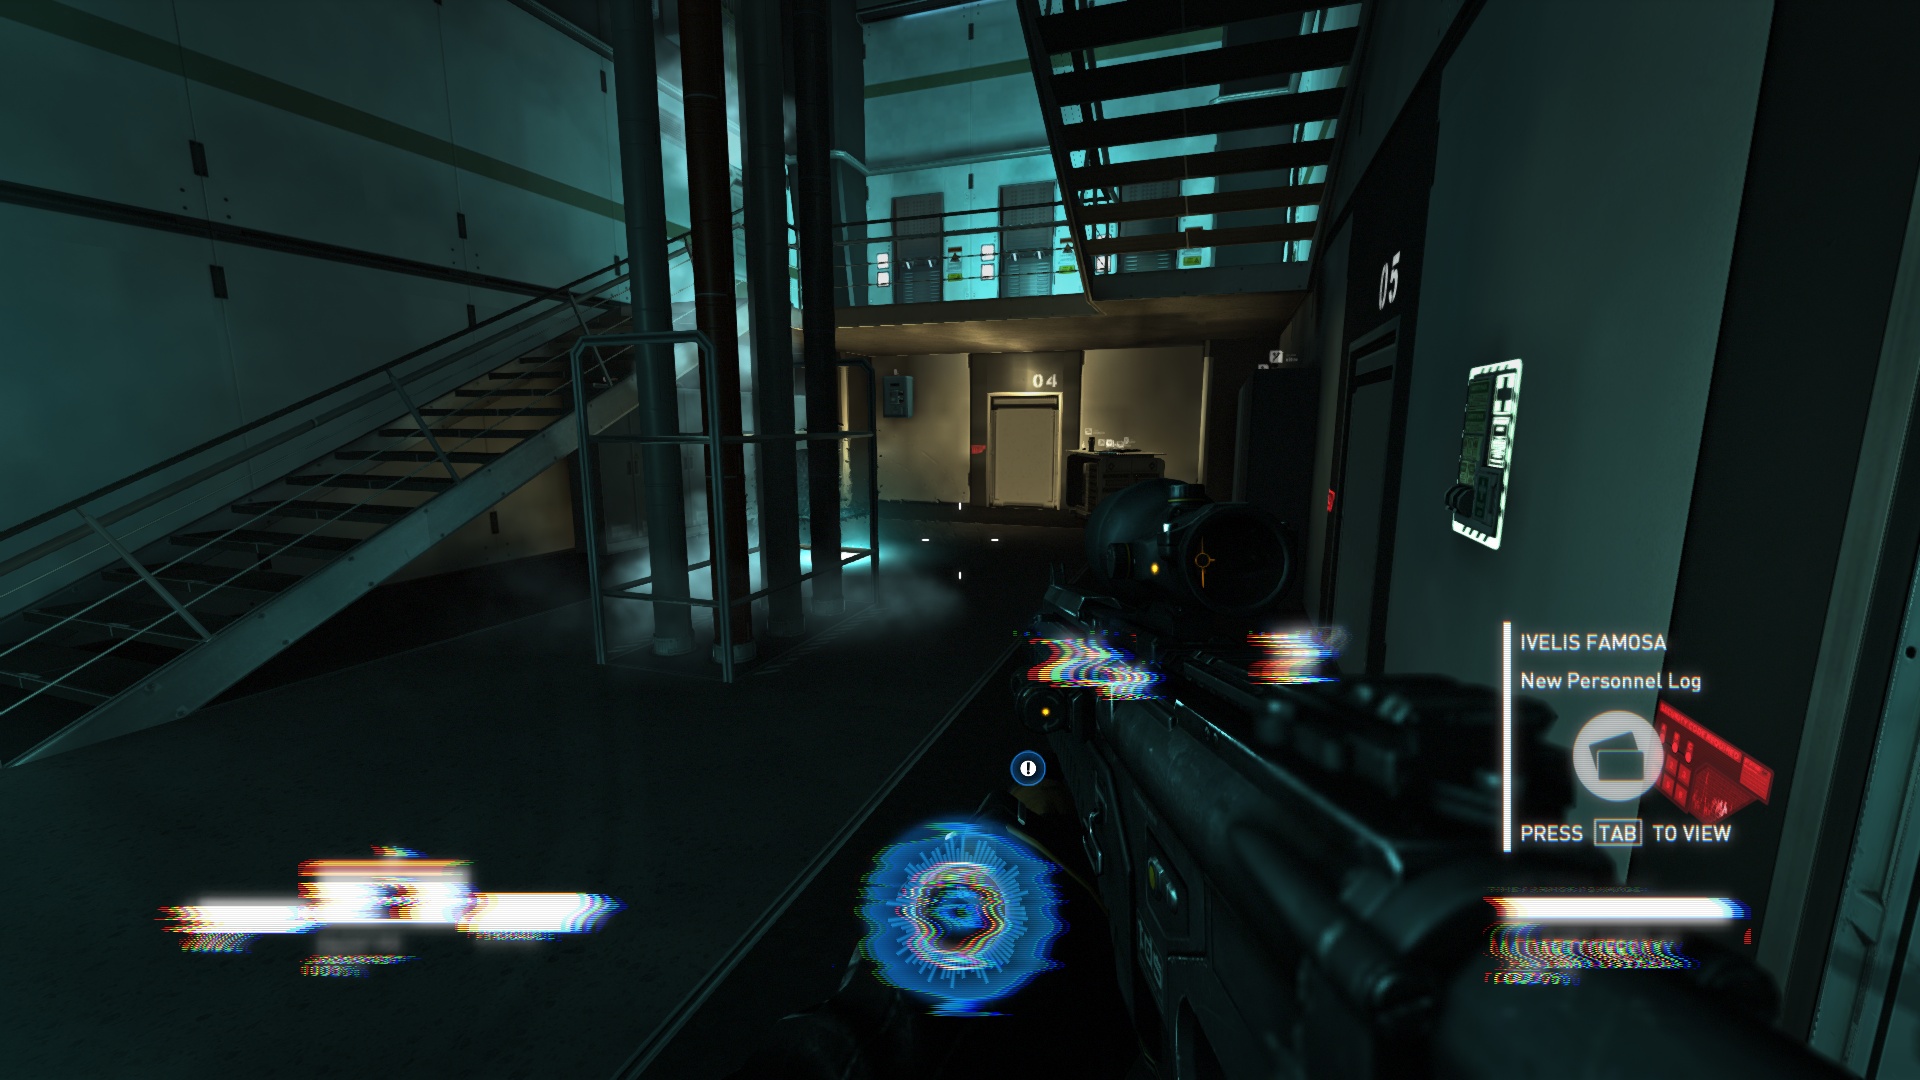
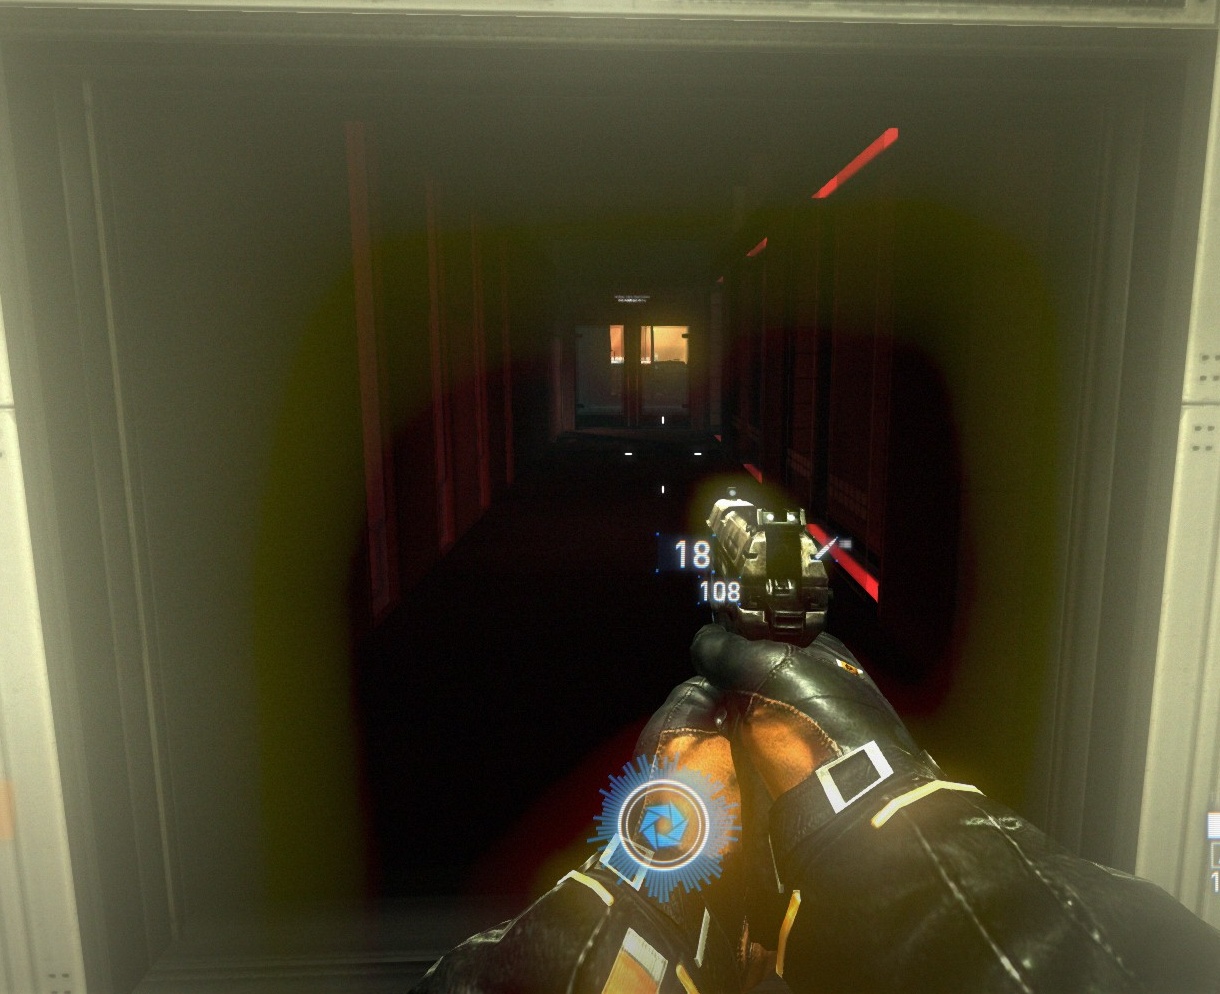
The game UI is also quite nice, being simple but effective. However because of some subtle chromatic aberration effect it can be a bit hard to read.

Syndicate uses a proprietary in-house engine, never released to the public (nor with modding tools). Initially working in OpenGL during production, it ended-up supporting DX9 when it released (even if DX10/DX11 were already available). The developers shared some of these information via interviews:
"Yes, we are still using in house technology for Syndicate. Indeed, one of the reasons EA signed Starbreeze to work on Syndicate was our mature and competitive technology. We continually challenge ourselves and so almost every area of the engine has been improved under-the-hood, to deliver the Syndicate vision. From integrating a global illumination solution (Beast) for more realistic lighting, a new physics solver allowing more physical interaction, an improved networking layer, and an optimized character pipeline to not only deliver more characters, but also improving on the great performance we had in Dark Athena."
"We have been using OpenGL internally for development, but we have also added DirectX support too. One of the reasons we added DirectX was the time and effort we had to spend supporting OpenGL when we shipped Riddick - Assault on Dark Athena. It was very painful and took far too long. It's just a fact that DirectX is now mature and has greater support from the hardware vendors and EA than OpenGL. We will only release a DirectX version of the game as this has had the most QA time devoted to it, so gamers will get a great experience. But the OpenGL renderer is still in there and will not be supported."
"We aren't shipping with DX10/11 support. When we first added support for DirectX, we evaluated both DX9 and DX10, but weren't convinced that DX10 offered much more than DX9. We have considered adding support for DX11, which is a great API, but to really take advantage of DX11 we believe we would have to fundamentally re-architect large areas of our engine, and this was too risky; instead we focused our resources on ensuring the experience we deliver on DX9 is as good as it can be. Look out for future Starbreeze titles supporting DX11 though."
Source: [2]
From what I gathered, you could call the engine either "XRengine" or "Starbreeze Engine" (basically the name of the developers).
In several interviews, developers confirmed that the engine used for Syndicate was an evolution of their in-house engine used for previous projects such as the remaster of Riddick [3] or even Enclave [4]. Most of the time, the engine name is referred as "Starbreeze Engine".
If you dig into the game files for Syndicate, Riddick or Enclave, everything is prefixed by "XR". The mention "XRengine" even appears inside those files. XR could be interpreted in several ways, like "Crosshair Engine", or maybe as "X render engine" (X as in "anything", "extreme" or just because it's cool).
One of the shader file has the following title even:
File: Program for XREngine final framebuffer paste
Note that XR is not related to the X-Ray engine [5] from the S.T.A.L.K.E.R games.
If you go on the wikipedia page of the game [6] you can see in the general listing the mention "Union Engine" as the name of the game engine used:
If you click the link, it redirect to the the Starbreeze wikipedia page, but the Union engine mention has been removed. Some older versions of the Syndicate page even mentions "Union Engine 3.0" but it was reverted as well. In any cases, I wasn't able to find any mentions online or in the game files of "Union Engine".
During the end credits the following middlewares / third parties are mentioned:
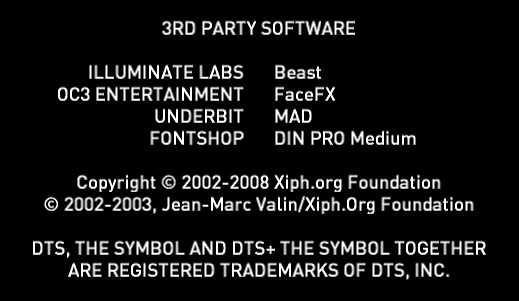
(Extract from the in-game credits)
It is interesting to see that Beast was used to bake the lightmaps of the game, given it was made popular via its use in Mirror's Edge [11].
I decided to dig a bit into the game files for various reasons. One being that it's very easy to do since the game doesn't use a lot of archives. So you can clearly see the filenames and extensions of the game content. It's also easy to drag those files into an hexadecimal editor and look at the few strings in clear to refine your guesses.
The game is structured as follow:
[Syndicate]
 ├─ [__Installer]                       // DirectX redistributable, etc
 |   └─ ...
 ├─ [Content]                           // In-game assets
 │   ├─ [Anim]                          // Everything related to animation
 |   |   ├─ [ACS]                       // Special animations related to in-game upgrades
 |   |   ├─ [AnimGraphs]                // Animation blending hierarchies
 |   |   |   └─ ...
 |   |   ├─ [Base]
 |   |   |   ├─ [AI]                    // Enemies animations
 |   |   |   |   ├─ [Agony]
 |   |   |   |   ├─ [Breached]
 |   |   |   |   ├─ [DeathPoses]
 |   |   |   |   └─ ...
 |   |   |   └─ [Player]                // Player weapon/movement animations
 |   |   |       ├─ [Climbing]
 |   |   |       ├─ [FinishMoves]
 |   |   |       ├─ [Grenade]
 |   |   |       └─ ...
 |   |   ├─ [BelievableWorld]           // NPC animations
 |   |   |   ├─ [AddHead]
 |   |   |   ├─ [Behaviors]
 |   |   |   └─ ...
 |   |   ├─ [CharacterQA]
 |   |   ├─ [Cutscenes]                 // Very few files here
 |   |   ├─ [Events]                    // Actual animations used for cut-scenes
 |   |   ├─ [Facesetup]                 // Several files for facial animations
 |   |   ├─ [Lipsync]                   // Two animation files related to FaceFX
 |   |   ├─ [Special]                   // Animations for animals, items, vehicles, etc.
 |   |   ├─ [World]                     // Animations for cables, security camera, etc.
 │   │   ├─ All.xac                     // Archive of various animations
 │   │   ├─ _AnimCache.XAC
 │   │   ├─ _AnimDescCache.XADC
 │   │   ├─ AudioSyncTest.xsa
 │   │   └─ Parts.xac
 │   ├─ [Dev]                           // Development files, some related to Perforce
 │   ├─ [Dialogues]                     // Single archive of sound files for dialogues
 │   ├─ [Fonts]                         // 6 Fonts (Text, heading, subtitles, etc)
 │   ├─ [GUI]
 |   |   ├─ [Textures]
 |   |   |   └─ GUI.xtc                 // Archives of UI textures (logos, etc.)
 │   │   ├─ GUIWnd.xcr                  // File referencing menu states, images and sounds
 │   │   └─ ...
 │   ├─ [Models]                        // 3D meshes (props, weapons, etc)
 │   │   ├─ [Animals]
 │   │   ├─ [Breach]
 │   │   ├─ [Characters]
 │   │   └─ ...
 │   ├─ [Registry]                      // Various configuration files
 │   ├─ [Skies]                         // Skybox textures plus some config files
 │   ├─ [Surfaces]                      // Single file with all material definitions
 │   ├─ [Textures]                      // Texture files
 │   │   ├─ [Animals]
 │   │   ├─ [Breach]
 │   │   ├─ [Characters]
 │   │   └─ ...
 │   ├─ [Videos]                        // Intro video, but also briefings
 │   ├─ [Waves]                         // Sound files
 │   ├─ [Worlds]                        // Game levels (using BSP)
 |   |   ├─ [sidescene]                 // Likely in-game cut-scenes sections
 |   |   ├─ [gui]                       // One level for the tutorials/UI
 |   |   ├─ COOP_11.xw
 |   |   └─ ...
 │   ├─ [XDF]                           // "Definition" files, related to levels
 │   └─ ...
 ├─ [Content_Eng]
 │   ├─ [Waves]
 │   ├─ [Textures]
 │   ├─ [SfxDesc]
 │   └─ _texturecache.xtsc
 ├─ [Support]                           // Readme, EULA, EA related files
 ├─ [System]                            // Game binaries and shaders
 │   ├─ [D3D9]                          // Few files dedicated to DX9
 │   ├─ [GL]                            // Most of the game shaders are here
 │   ├─ [Sound]                         // Few configurations files
 │   ├─ [Win32_x86_Release]             // Main game binaries
 │   ├─ DefaultVideoSettings.xrg        // Predefined screen resolutions, like 800x600
 │   ├─ OverdrawProfiles.xrg             // Shaders defines per platform
 │   └─ SystemGammaRamp.xrg             // Floating point numbers for VGA, Component, S-Video
 ├─ BuildInfo.txt                       // Date & changelist ID of the game (2012-01-27)
 ├─ Environment.cfg                     // Various settings, like enabling sound or not
 └─ GDFBinary_en_US.dll                 // Game definition file, game properties and base types
Some interesting bits to note:
Driven by my curiosity, I browsed the game files to learn a few more things. Below is a list of filetype and their meaning I saw or deduced by looking into the files with an hexadecimal editor.
(Example of a file showing strings inside an hexadecimal editor.)
| Extension | Description | Notes |
|---|---|---|
| CFG | Configuration | Used for a few configuration files that can be edited by hand. |
| FP | Fragment Program | Fragment/Pixel shader file. |
| OGG | Ogg | Audio or Video, notably in-game videos. |
| VP | Vertex Program | Vertex shader file. |
| WMV | Windows Media Video | Used for a few logo videos. |
| XAC | Animation Cache | ? |
| XADC | Animation Description Cache | ? |
| XAH | Animation Hierarchy | Animation graph, used to blend several animations. |
| XCD | Compressed Dialogues | Archive containing several audio files. |
| XCR | Compressed Resource | Used for various files, maybe as a database/definition format. Used for rig/skeleton files too. |
| XFC | Font Compressed | Font file in vector format instead of bitmap. |
| XMD | Model | 3D Mesh file. |
| XRG | XR Configuration | ASCII file used for various configuration and generic shader files. Some homemade/inspired json format. |
| XSA | Skeletal Animation | Animation for skinned meshes. |
| XTC | Texture Compressed | Texture image compressed in DDS. [13] |
| XTSC | Textures Cache | Related to textures. Only used by the file "_texturecache.xtsc" and contains absolute path to the texture files on where the game is installed. Generated after launching the game. |
| XTX | Texture | Uncompressed texture file ? |
| XW | World | BSP map/level file. |
| XWC | Waves Compressed | Audio files archive compressed in Ogg/Vorbis format. |
Let's dive into the big subject, which is about looking at how the game is rendered.
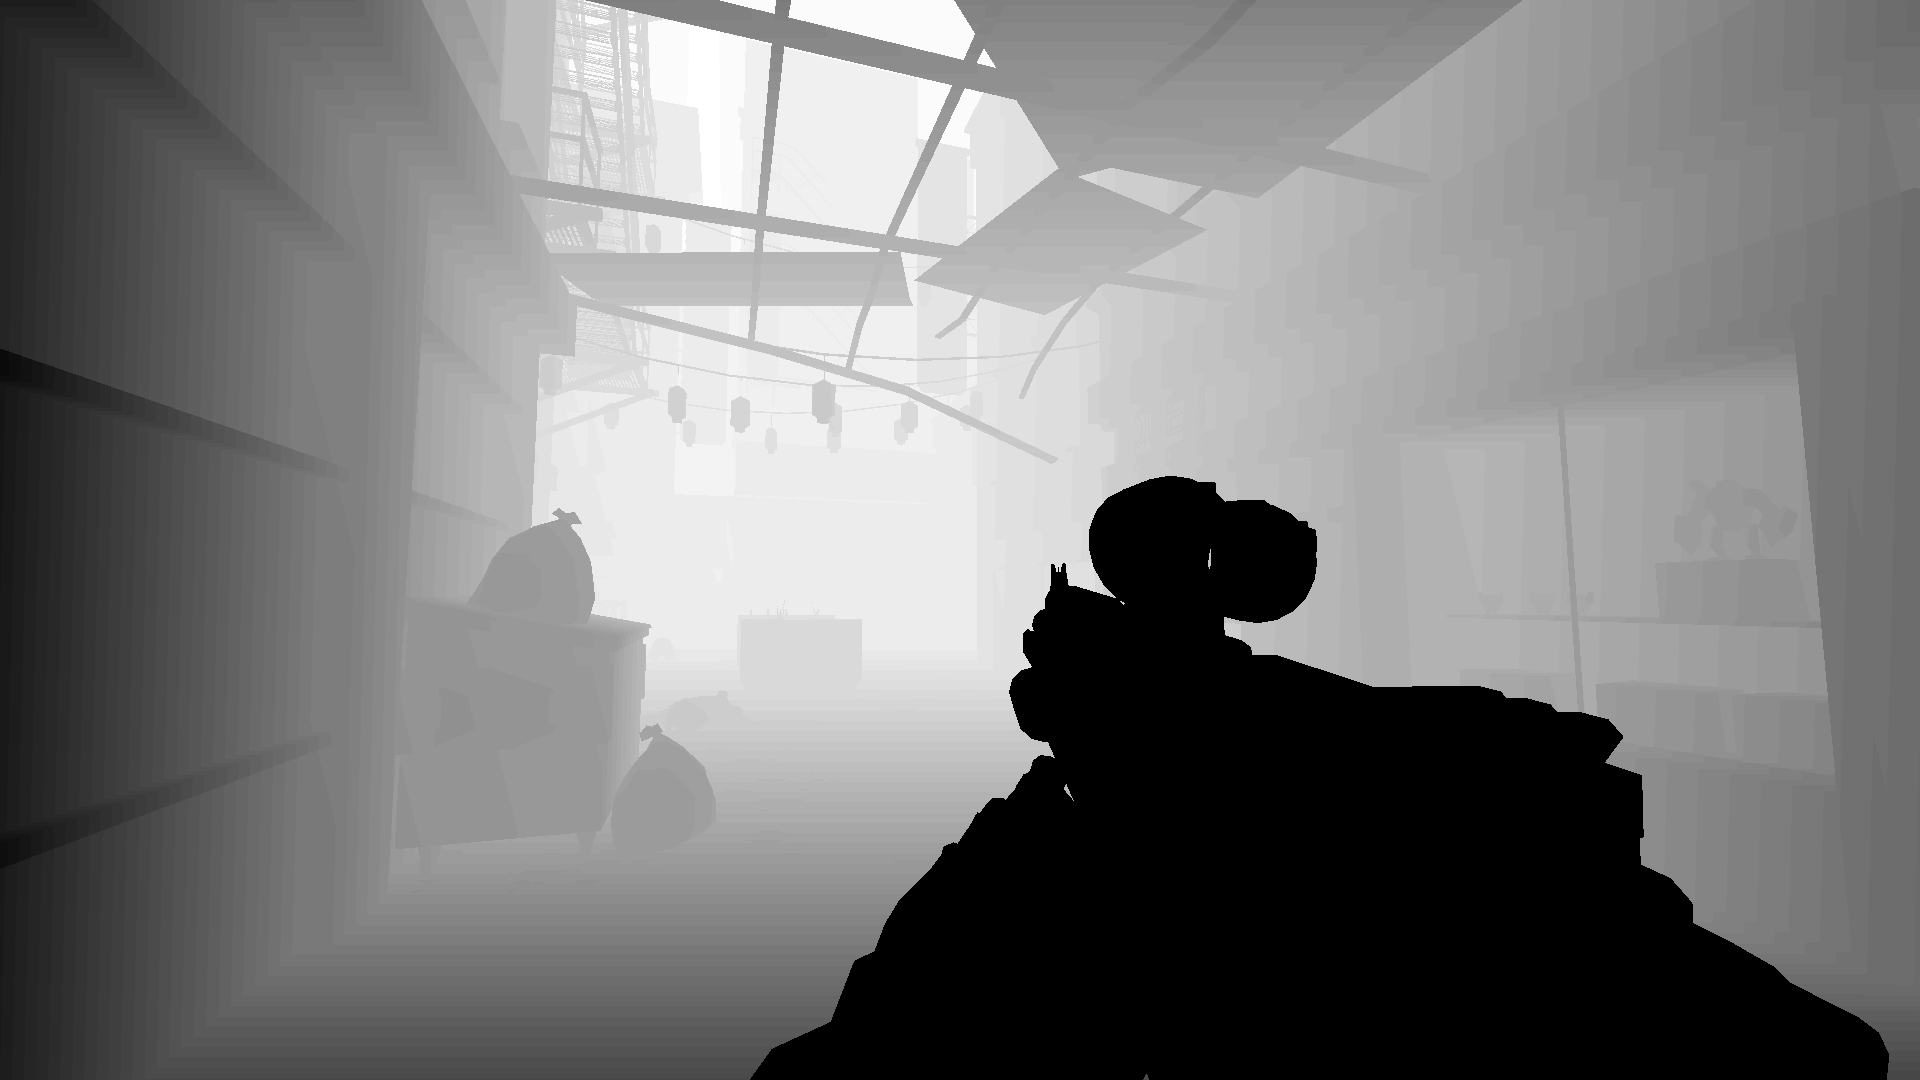
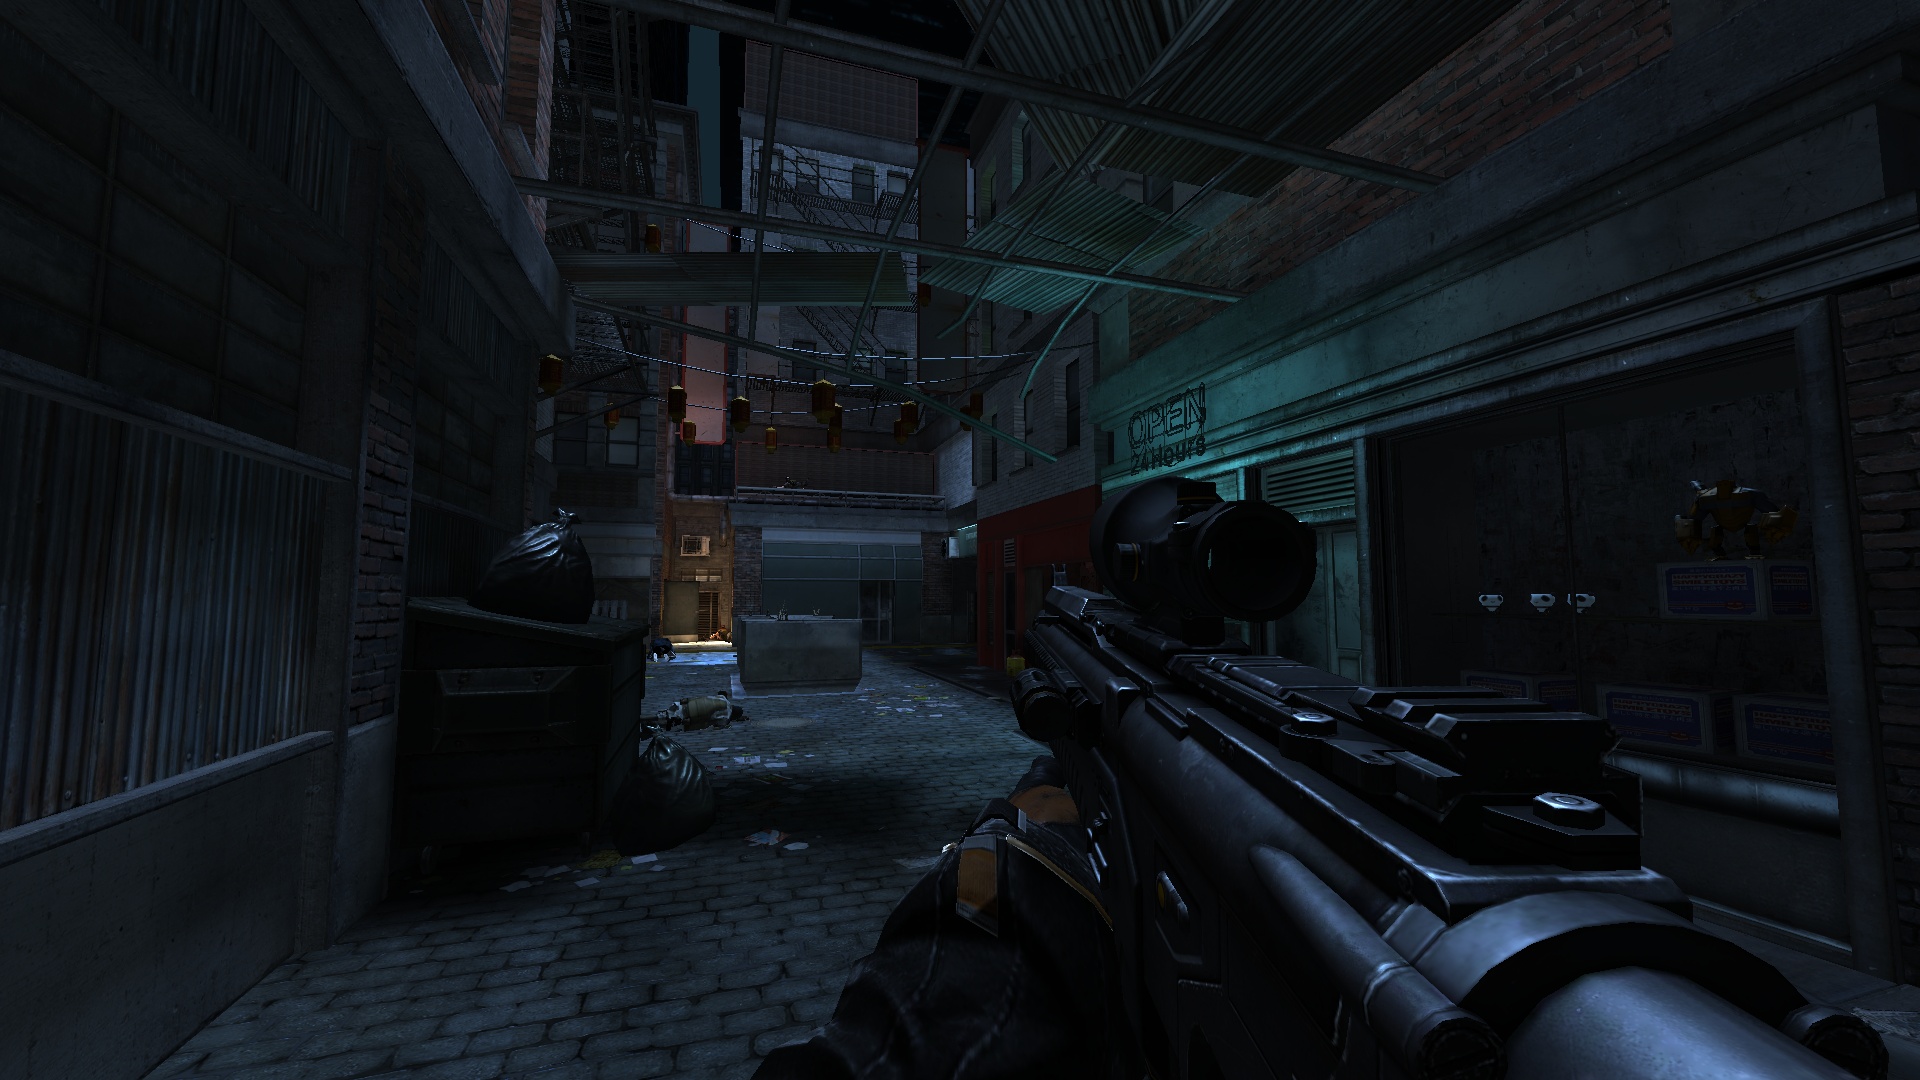
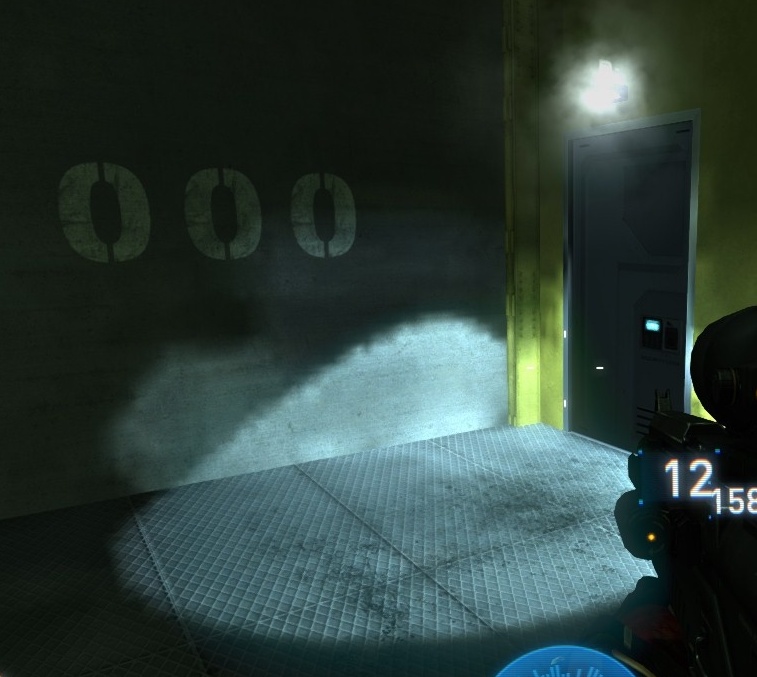
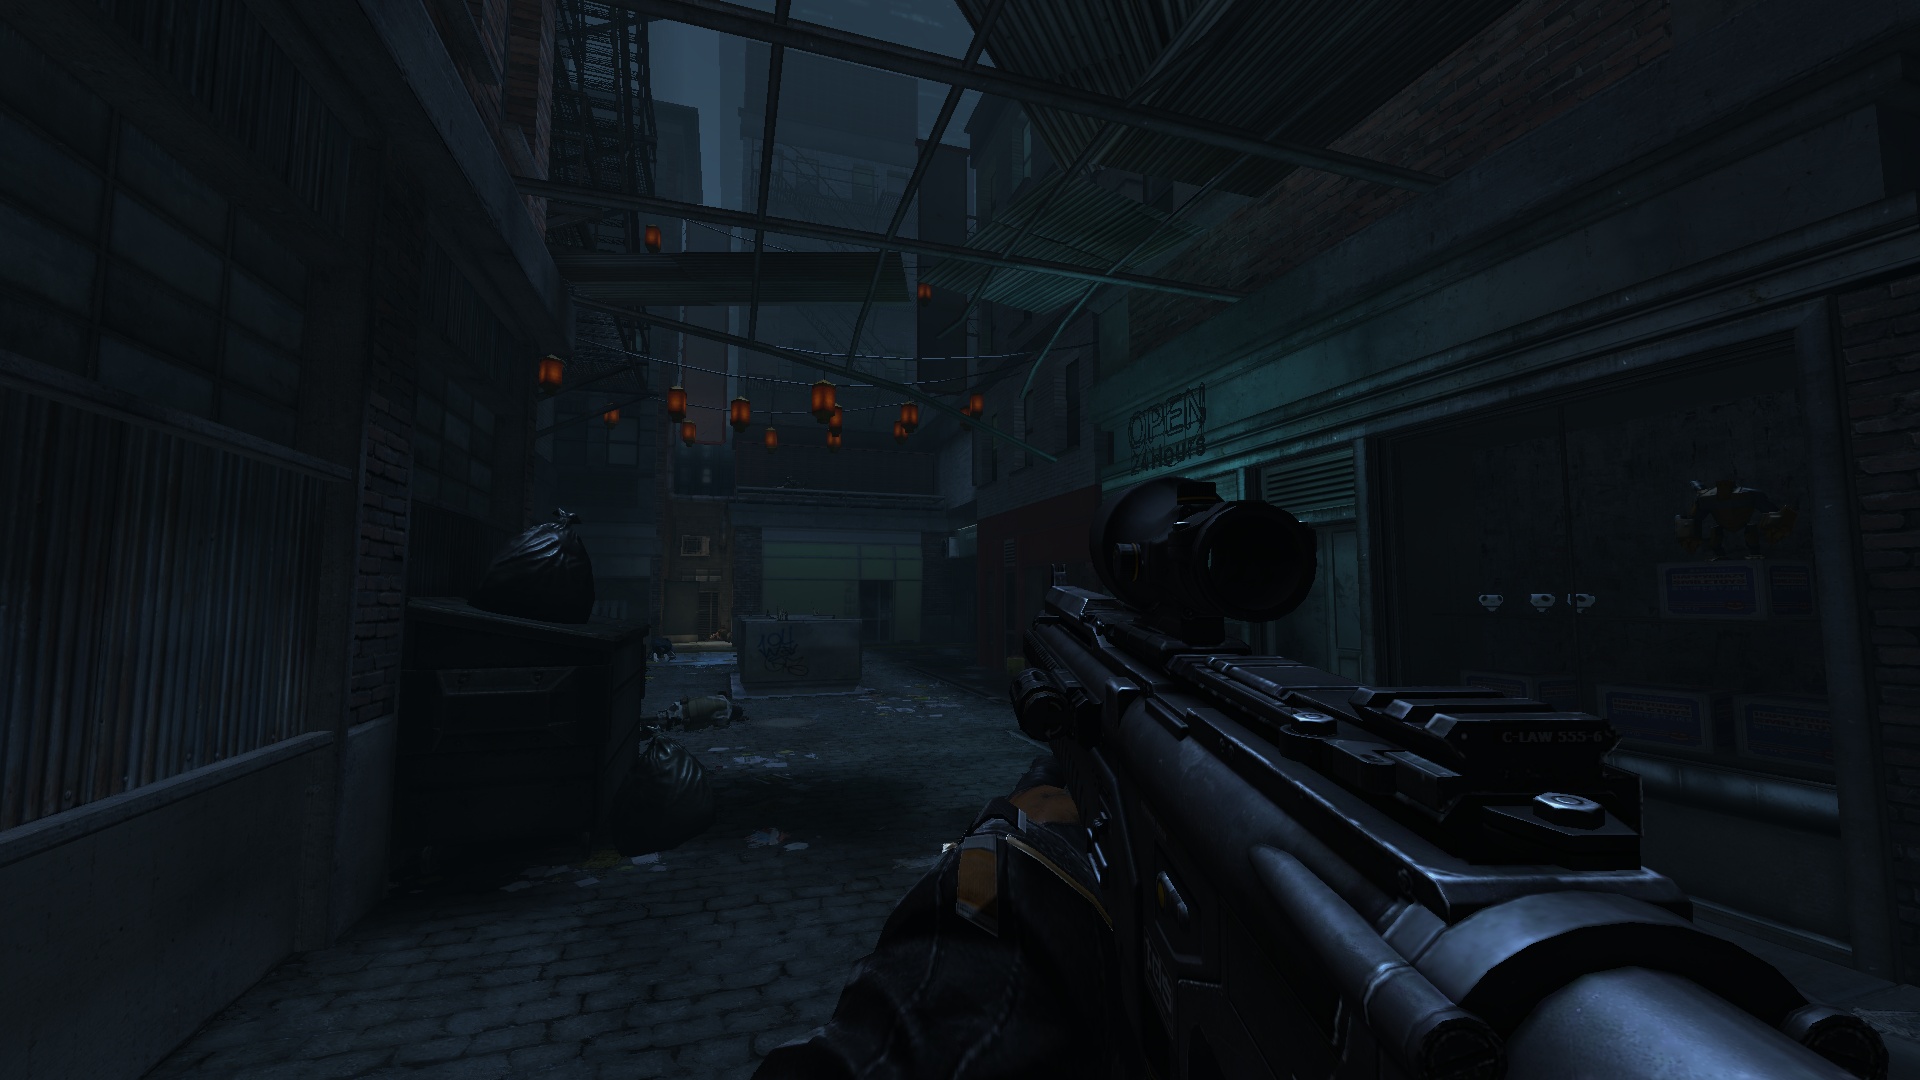
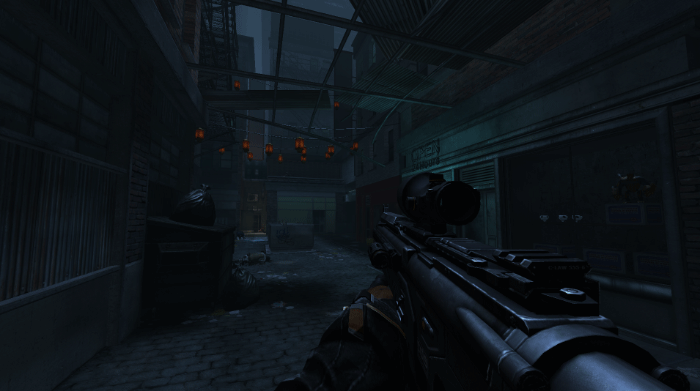
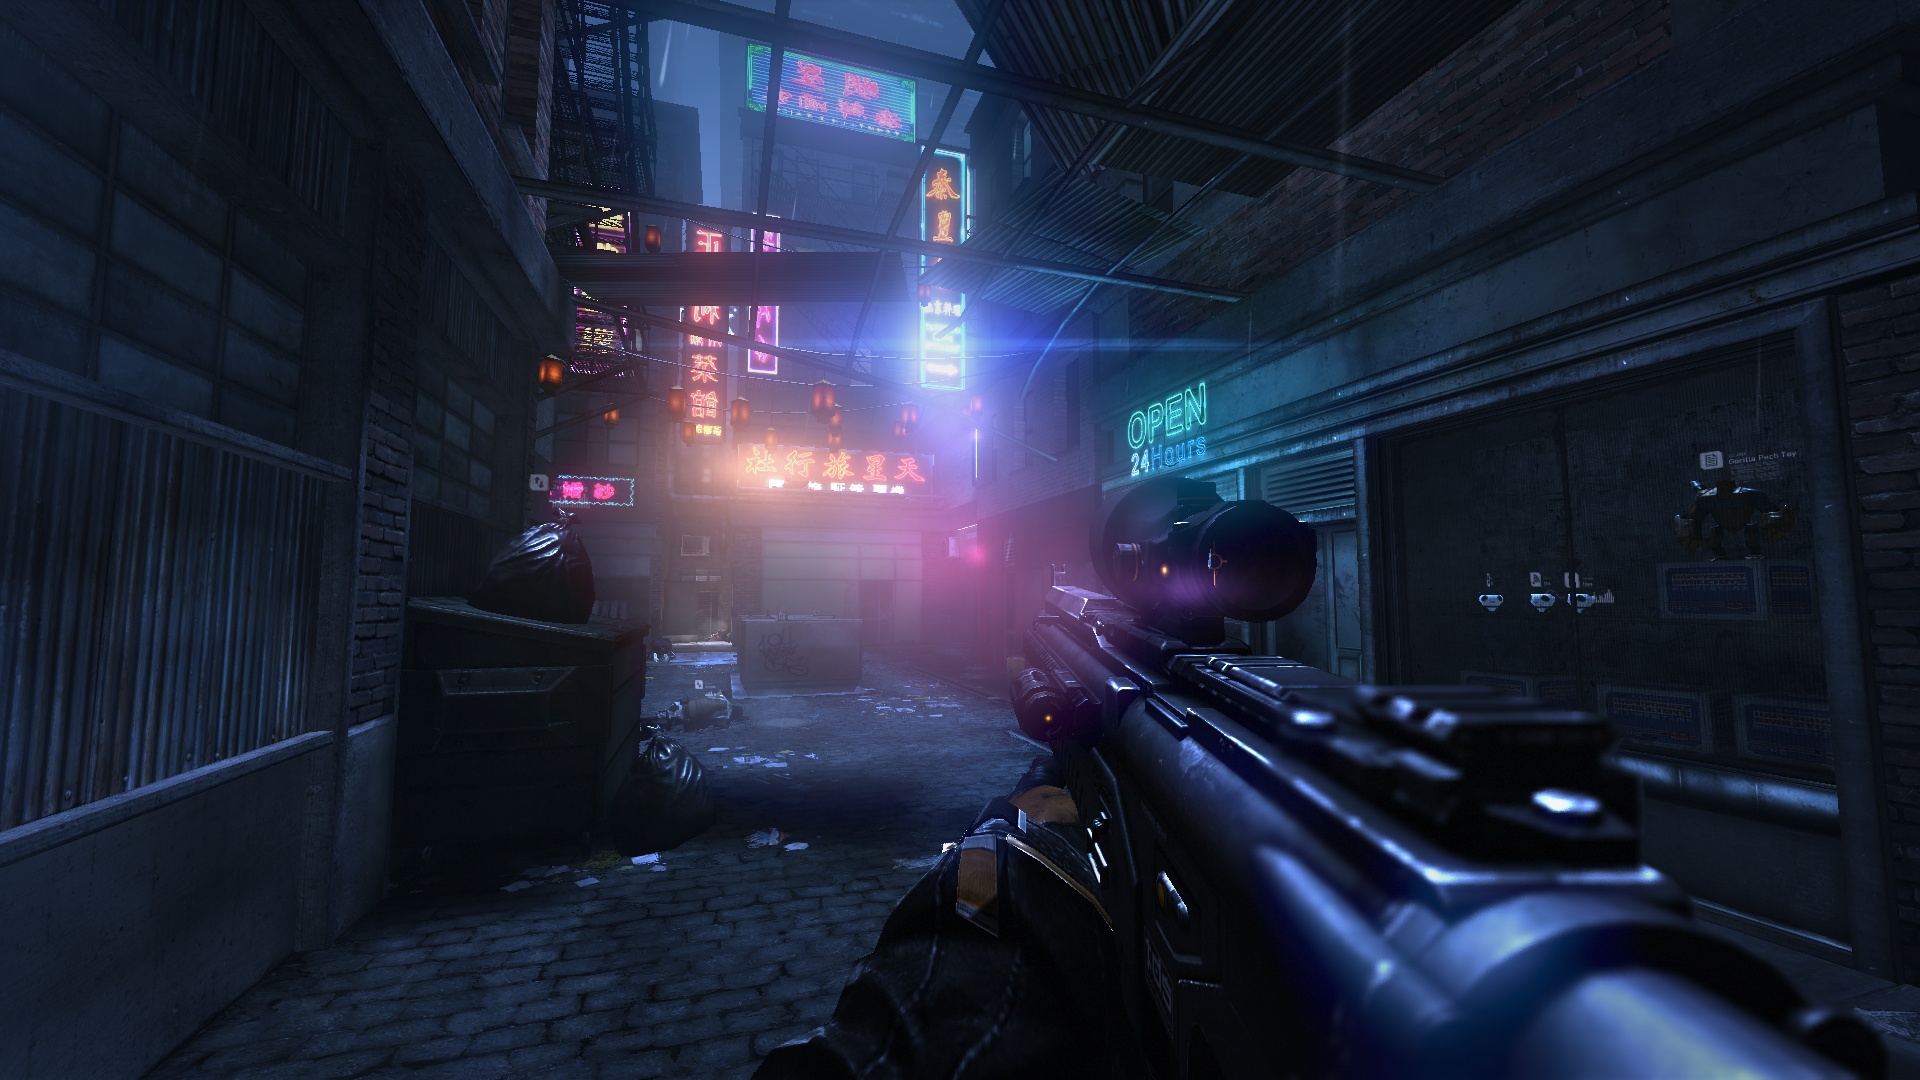
I'm going to use the following frame capture as a reference:
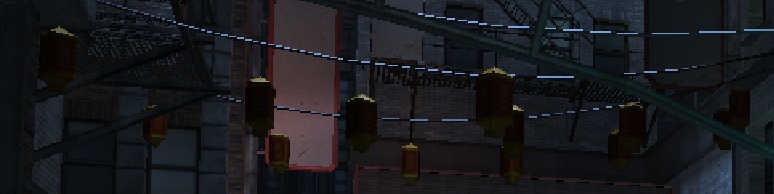
(A small street passage from the first level.)
Something important to note: this capture was made in RenderDoc by running the game through DXVK on my Linux machine. This means that DX9 API calls have been converted to Vulkan which might add a slight layer of abstraction to what the game does.
In some levels of the game there is a rain particle effect. The game therefore starts its frame by rendering a few specialized textures to avoid rain being present inside buildings and have it only visible in open areas.
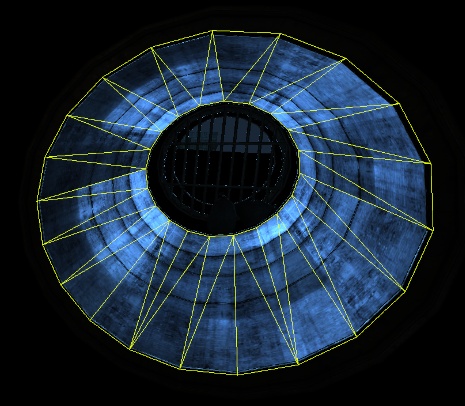
The first step is the rendering of a 512x512 texture mask. It is done by rendering a mesh with an orthographic top-down projection from high above the scene with a custom mesh:
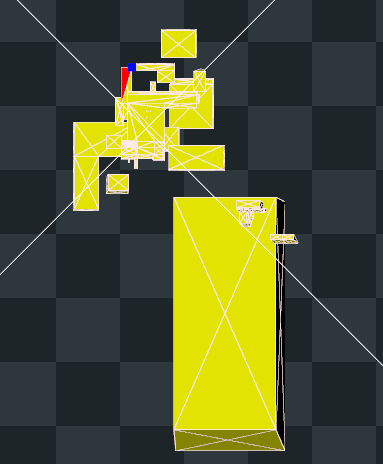
(The mesh rendered into the texture.)
The mesh represents the nearby horizontal surfaces as a single mesh which results into this texture:

To better understand the link between the mesh and the texture, I exported the mesh from RenderDoc and imported it into Blender (via a plugin [14]):
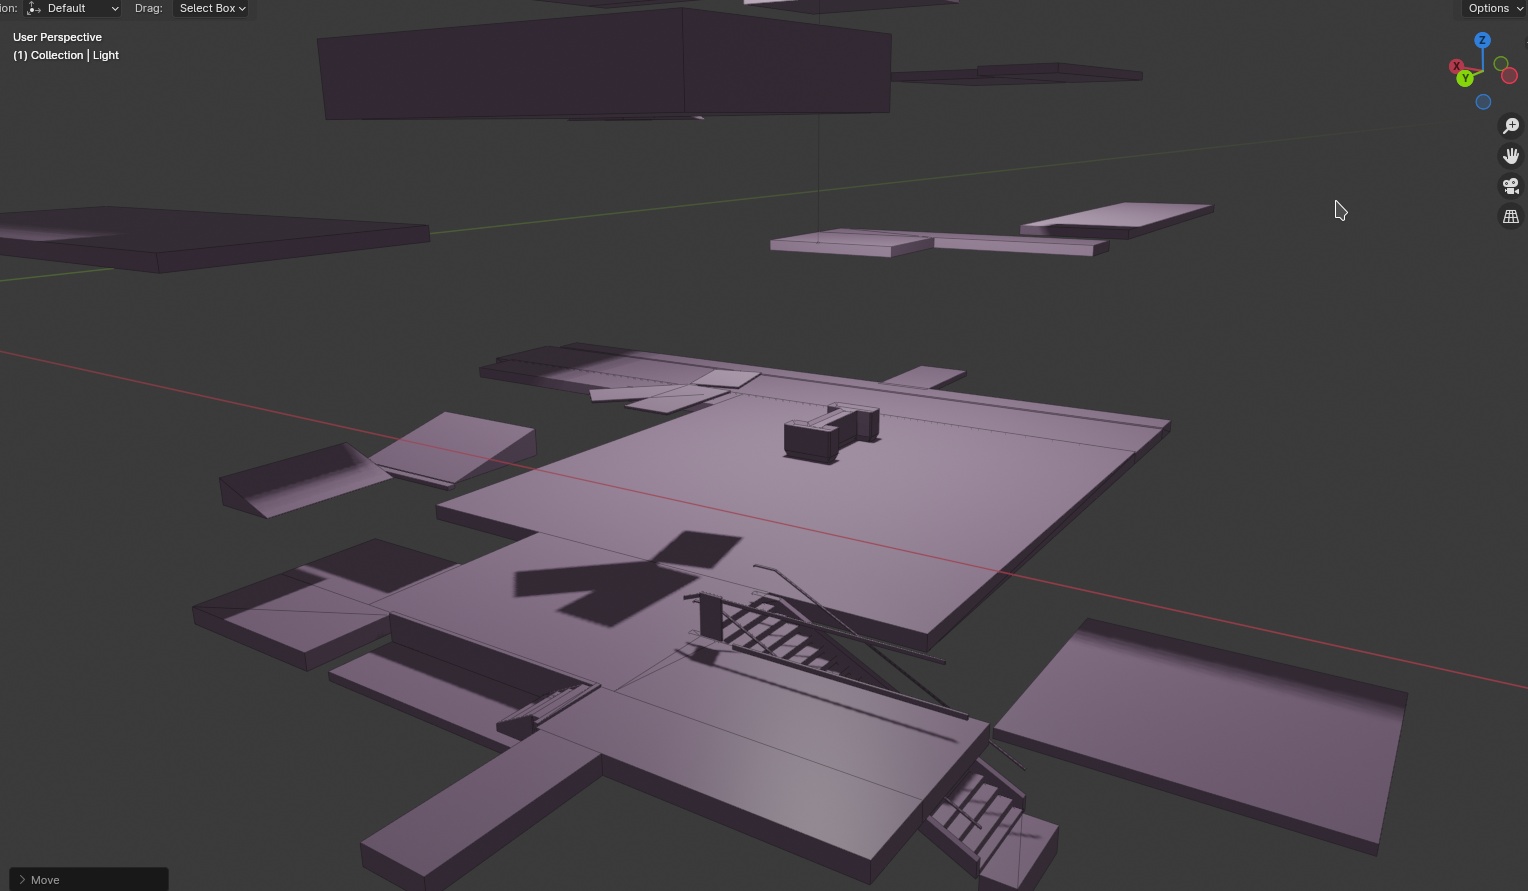
(Here you can see the three metallic panels floating, the "I" center piece and the floor.)
For some reason, the 512x512 texture is then copied into another 1024x1024 texture. That other texture was storing a previous version of the depth buffer but not necessarily from the previous frame. This is likely a re-use of a previous buffer without clearing it first.
Following the rendering of the mask, the game renders a few 64x64 textures in RGBA32F to stores different values. Those values are then fed later on to the particle systems that renders the rain effect (notably the splashing ground particles). I believe these textures mostly serve the purpose of storing positions and timings to animate the rain effect.

(A zoomed in version of the 64x64 texture.)
Next step is the rendering of a depth prepass (sometimes also called a z-prepass). If you don't know what it is, let me quote an excellent blog post:
[...] In its most basic form it is a rendering pass in which we render large, opaque meshes (a partial z-prepass) or all the opaque meshes (a full z-prepass) in the scene using a vertex shader only, with no pixel shaders or rendertargets bound, to populate the depth buffer (aka z-buffer).
A big advantage of a (full) z-prepass is that with the depth buffer containing the depths of the closest to the camera opaque surfaces, there is a guarantee that any subsequent geometry rendering drawcall will have zero overdraw, meaning that the (potentially expensive) pixel shader will be executed on once per pixel. Even in the case of a partial z-prepass we can take advantage of this in many cases, for example rendering the walls of a building only in the z-prepass can prevent the GPU from running the pixel shader for the building’s contents.
Source: [15]
Syndicate renders a depth prepass both in the depth buffer itself and another RGBA8 buffer at the same time:
(The depth buffer during the pre-pass. With an adjusted range for convenience.)

(The RGBA8 buffer rendered at the same time.)
The individual channels look like this:

(Red, Green, and Blue channel respectively.)
I didn't know what this buffer was about at first, but it clearly looked similar to the Depth Buffer. Fortunately Bart Wronski had the answer:


(Posts on Mastodon)
I confirmed it by looking into the shader files of the game. There are a few functions dedicated to packing and unpacking the depth value. I wasn't able to make them work as-is however, so I went looking for a code snippet online and found these:
vec4 PackDepth32( in float depth )
{
    depth *= (256.0*256.0*256.0 - 1.0) / (256.0*256.0*256.0);
    vec4 encode = fract( depth * vec4(1.0, 256.0, 256.0*256.0, 256.0*256.0*256.0) );
    return vec4( encode.xyz - encode.yzw / 256.0, encode.w ) + 1.0/512.0;
}

float UnpackDepth32( in vec4 pack )
{
    float depth = dot( pack, 1.0 / vec4(1.0, 256.0, 256.0*256.0, 256.0*256.0*256.0) );
    return depth * (256.0*256.0*256.0) / (256.0*256.0*256.0 - 1.0);
}
Source: [16]
I made a custom shader in RenderDoc to apply a custom preview on that buffer, called the function UnpackDepth32 in it and it restored the depth value as expected. :)
Something to note as well is that when the depth buffer is cleared before drawing the meshes, the stencil value is set to 0x81 (aka 129/255, so 0.50588). Then each mesh drawn into the depth buffer set the stencil value to 0x7F (127/255, aka 0.49804).
At the end, the stencil buffer will have a hole representing the background where nothing has been drawn:

(The final stencil mask of the depth buffer. A tiny gap remains in the sky.)
The pass afterward is about re-rendering of all the opaque meshes that were in the depth prepass but this time in a RGBA16 buffer to compute motion vectors (and Depth of Field - DOF). Motion vectors are later used as a way to compute motion blur.
The motion vector are stored in view space, with the origin being the middle of the screen. Because there is no movement in the capture, the buffer is mostly gray as vectors are stored with a classic [vector * 0.5 + 0.5] operation.

So to understand a bit better what we are looking at I did another debug shader where I scaled the vectors by a lot (~1000):
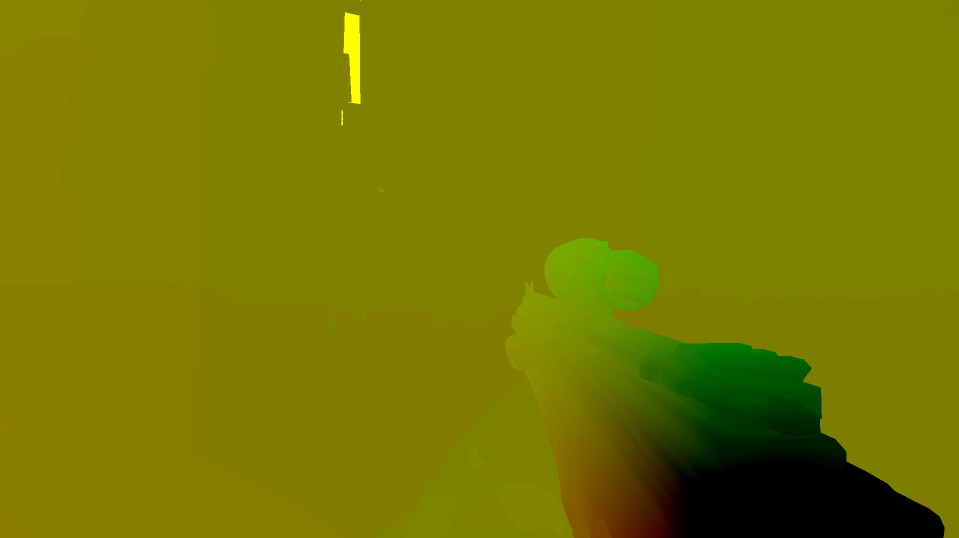
(Only showing the Red and Green channel here.)
The foreground firearm appears the most significant in this case because of the slow first person animation that was happening on it during the capture. If we look at another capture in which I was panning the camera, the gradient is obvious without the need of shader:

(Only showing the Red and Green channel as well.)
On the two previous image I only showed the Red and Green channel. This is because in the blue channel is storing a depth based gradient which is used later on to control the DOF on the firearm shoulder stock:

(That linear gradient for the DOF amount.)
We will see later how the motion vectors and DOF mask are used during the compositing pass.
This pass is optional and only happens when some effects generate distortion on screen. The most common source I noticed were rain/water puddles and particle effects (from explosion or pulsating tech for example).
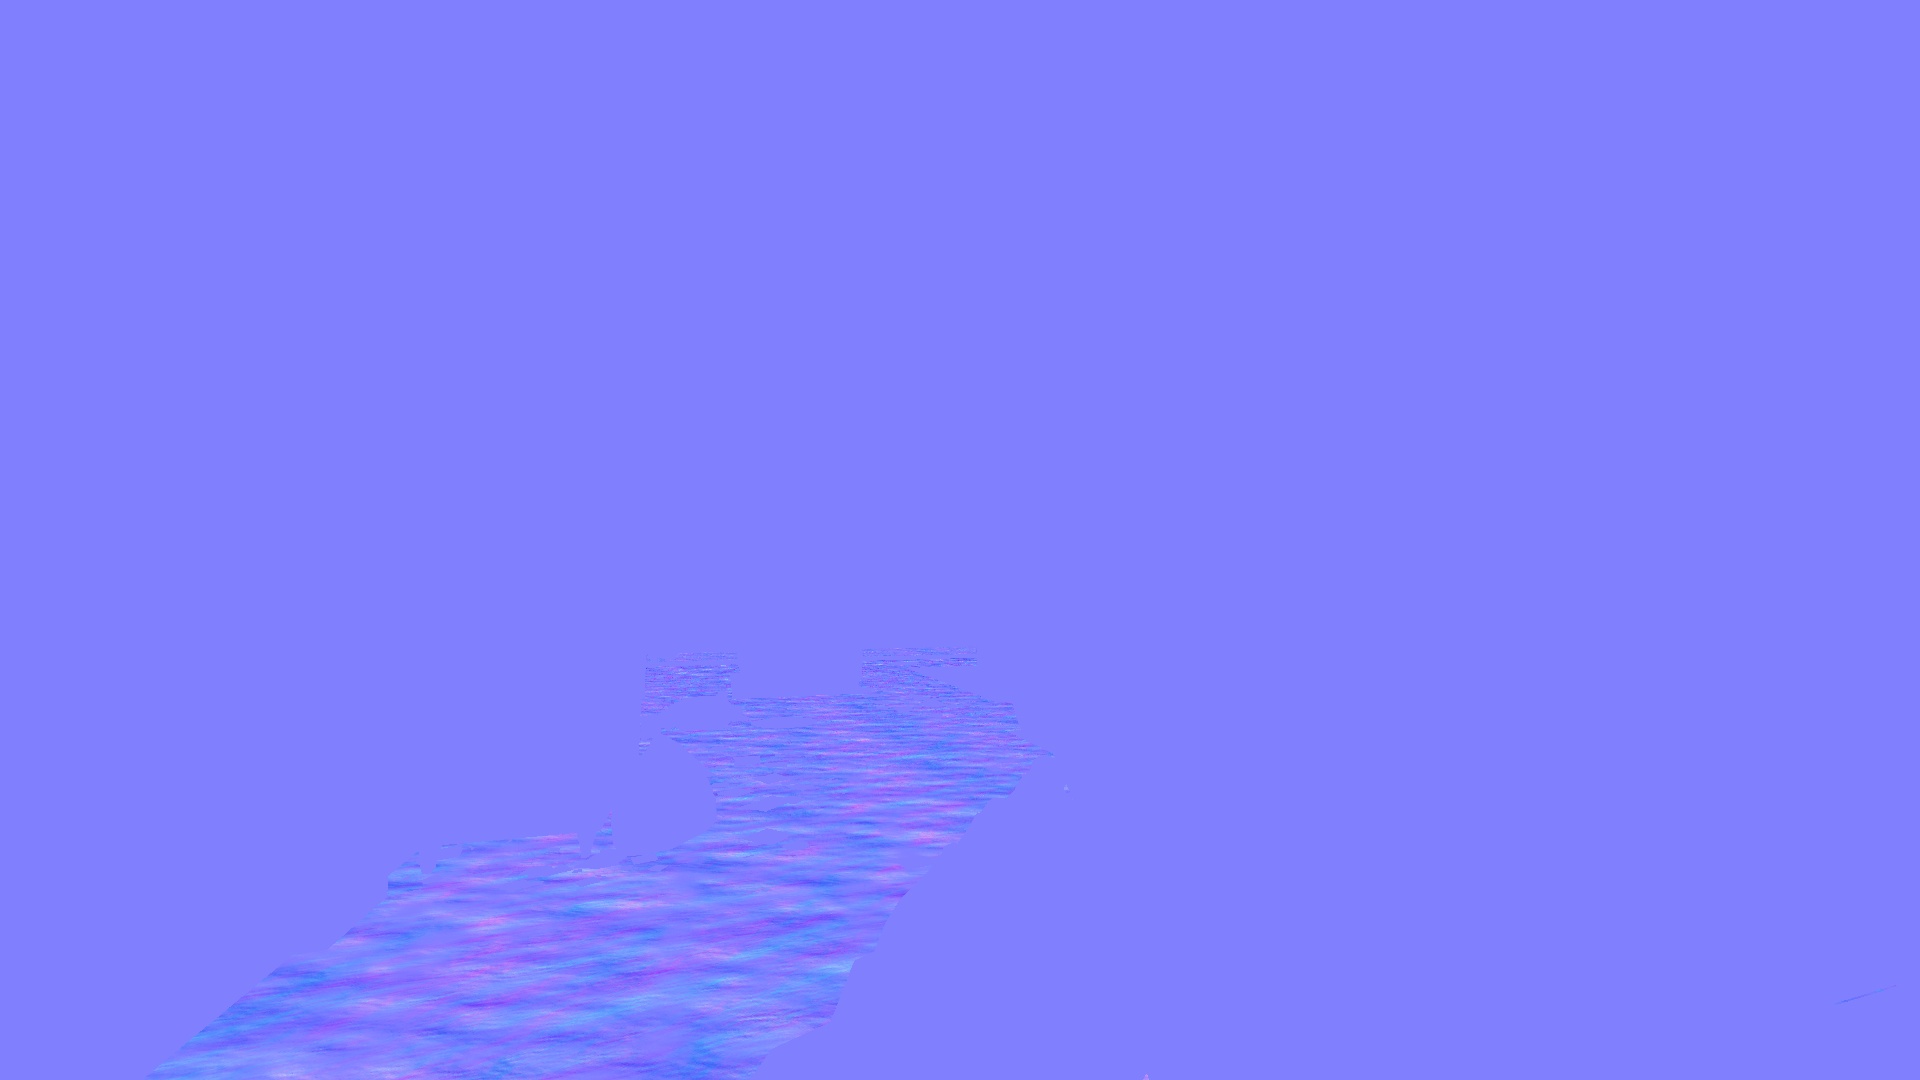
(In this case, the rain puddles produce perturbations.)
This pass first creates a neutral normal map in tangent space and stored between 0 and 1 into a RGBA16 buffer. Then additional drawcalls to accumulate/blend other normal maps into it.
In the current capture, the water puddles on the ground use a noisy normal accumulate a distortion effect to fake refraction later on:
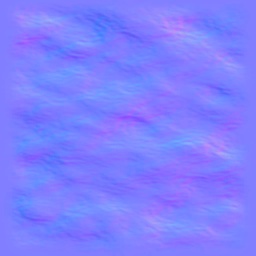
(A simple noisy 256x256 normal map with faded borders.)
At first I was very confused when looking at all the drawcall that were happening in that buffer. Each draw is done while normals are still in [0-1] range, no unpacking is done, while still getting combined by with the previous result. The draw doesn't override the previous pixels.
So I looked at the blending state in RenderDoc, which was:

Source Color        = Destination color
Destination Color   = Source Color
Color operation     = Add
Source Alpha        = Destination Color (same as Destination Alpha)
Destination Alpha   = Source Color (same as Source Alpha)
Alpha operation     = Add
Write mask          = RGBA
Which translates into:
Result.rgb = Destination.rgb * Source.rgb + Source.rgb * Destination.rgb
Result.a = Destination.a * Source.rgb + Source.a * Destination.rgb
Which can be simplified into:
Result.rgb  = 2.0 * ( dst.rgb * src.rgb );
Result.a    = 2.0 * ( dst.a * src.a );
At first glace it's seems like a curious equation, but if we try out some values:
// - Source is 0.5
// - Destination is 0.5
2 * ( 0.5 * 0.5 ) = 0.5;

// - Source is 0.25
// - Destination is 0.5
2 * ( 0.25 * 0.5 ) = 0.25;

// - Source is 0.5
// - Destination is 1.0
2 * ( 1.0 * 0.5 ) = 1.0;

// - Source is 1.0
// - Destination is 1.0
// Result will get clamped to 1.0 since this is an integer buffer.
2 * ( 1.0 * 1.0 ) = 2.0;
That is a really clever blending trick for normal maps ! You can combine them very easily this way and without the need to unpack normals or to use a floating point buffer, you could even ignore the alpha channel.
After that, the game finally starts to render opaque objects with their textures and (almost) final shading since it is a traditional forward renderer:
During this pass the game also often switch to another render target temporarily to render the shadows of characters.
The first thing drawn is a screen space quad to fill the gap with a background color, based on the stencil mask computed during the prepass:
(The sky/background color is drawn first.)
After that the game start to render regular objects.
In some levels, the background is a skybox and not just a single color.
In these cases, the skybox is an inverted cube drawn one face at a time with a different texture. The game doesn't use a cubemap directly:
In the example above from another capture, one of the face from the skybox is drawn just after the background color. Because of the depth prepass, only parts of the cube faces are drawn.
Even if not all the faces are visible the game still produce 6 drawcalls, one for each faces of the cube.
Like many games out there, textures are compressed with DXT/BC compression [13]. Since the game uses a traditional non-pbr diffuse/specular workflow, you can see a classic Diffuse, Specular and Normal texture being used to draw and shade objects.
Let's take a look at a simple example of a metallic surface from a random level:
(A cylinder with a metallic texture to represent a metallic pipe in sewers.)
Here are the textures attached to the draw:
| Name & Preview | Notes |
|---|---|
Diffuse 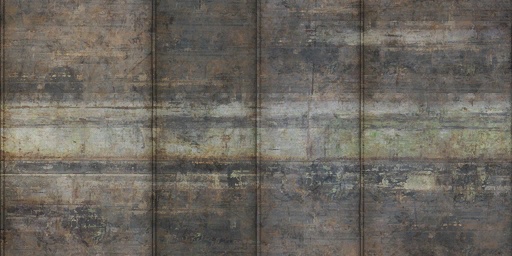 |
Compressed as BC1_UNORM. Usually RGB channels only. Alpha tested materials use the 1 bit alpha of the format to define a black and white mask. |
Specular 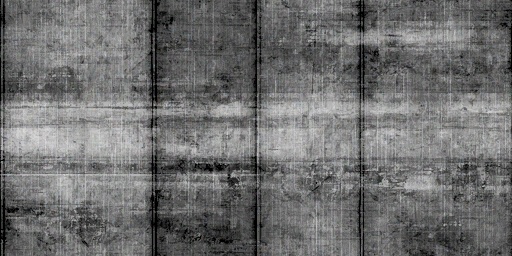 |
Compressed as BC1_UNORM. RGB channels only and grayscale. |
Normal  |
Compressed as BC3_UNORM. The normal is split between the RGB and Alpha channel. The Red channel of the normal is in RGB as grayscale, and its Green channel is in the Alpha. Normal maps are in tangent space. |
Lightmap 1  |
Compressed as BC3_UNORM. Normal in tangent space storing the light vector direction. |
Lightmap 2  |
Compressed as BC1_UNORM. Light color encoded in YCoCg color space. This texture stores the Co component in the Red channel and the Cg component in the Green channel. |
Lightmap 3  |
Compressed as BC1_UNORM. Light color encoded in YCoCg color space. This texture stores the Y component in the Red channel. |
The lightmap textures are decoded and fed to the BRDF function during the rest of the shading pass on objects just as an additional light source. (More on that below.)
I never really looked into how lightmaps are compressed in games before, but it seems at the time the RGBM and YCoCg compression were the most common. [17] [18]
Something to note is that there are multiple sets of lightmaps (one set being like the three textures above) in the scene, and depending which object is drawn it refers to one set or another. Also from what I saw most of the lightmaps are in 1024x1024 resolution.
Even with multiple sets, the resolution can be lacking leading to obvious artifacts in levels:
By curiosity I decided to export a few meshes from the scene to evaluate their polycount and get a general sense of how much details there was in the geometry.
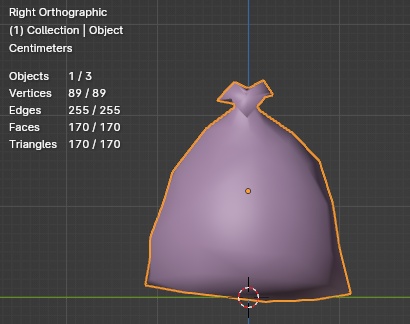
(One of the garbage bag, 170 triangles.)
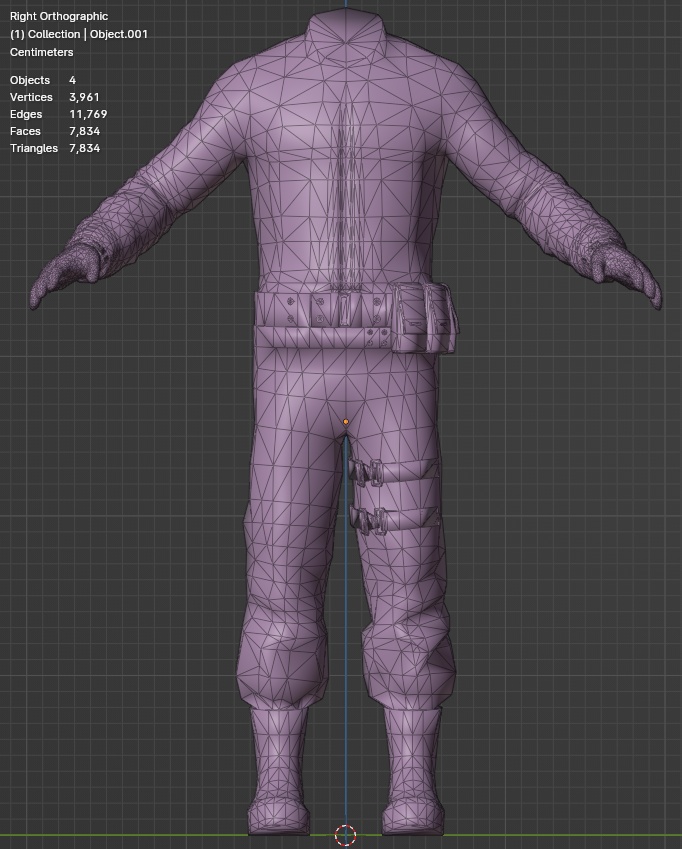
(The player body, 7800 triangles.)
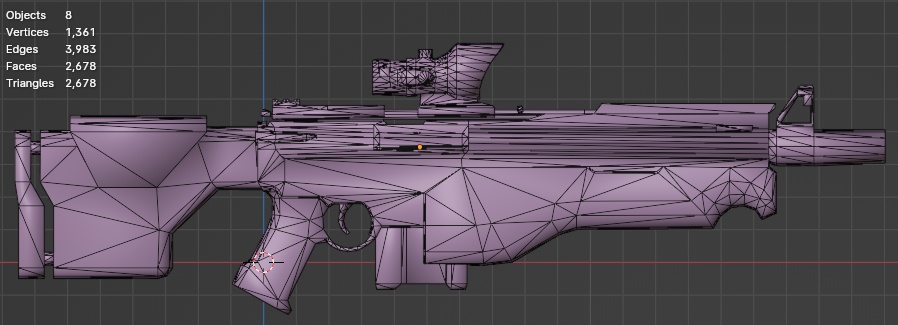
(The weapon in the hand of the player, 2700 triangles.)
Like in previous projects from the developer, the game features what is called fullbody awareness. It means that player own body is fully visible in the game and the camera is not floating above the ground alone.
Some games achieve that by splitting the shoulder and arm as a separate group of meshes and the rest of the body on its own. However here there is a single group of meshes (the body and the hands) drawn together.
This allows animations to follow the player movement, grounding it better in the scene. You can therefore look at your feet while walking:
(Girlfriend asked: "Is he dancing the Madison ?")
Another advantage of this method is that the shadow is very easy to draw as well, no tricks are required to combine meshes and avoid gaps or de-synchronized animations between the body and the shadow.
Speaking of rendering, diving into the game shader files make it easy to learn some of the formulas used by the game. There is even a file called XRShader_BRDF3.fp to groups the different shading variations that the game uses.
At the top of the file there is already a few interesting comments:
- Multiple shading methods
    - lambertian/warped diffuse
    - Torrance-Sparrow/simple specular
    - Hybridnormals
- Multiple predefined Fresnel aproximations
    - Skin
    - Dielectric (glass-like)
    - Conductive (steel-like)
Going further down there are other comments:
// Torrance-Sparrow specular
// using a general geometric attenuation (G)
// and a microfacet distribution (D) (Blinn or Ashikhmin & Shirley)

[...]

// If not anisotropic:
// Blinn distribution

[...]

// If anisotropic:
// Ashikhmin & Shirley anisotropic distribution
The shaders also seem to support up to three lights and an additional environment map. Lightmaps are also sampled in there (that's how I confirmed the YCoCg color space conversion).
Wrinkle maps are also mentioned:
sampler_NormalWrinkle       // Wrinkle normals

sampler_DiffuseWrinkle      // Wrinkle diffuse
sampler_SpecularWrinkle     // Wrinkle specular
What are those ? They are simply related to character rendering which features dynamic blending of wrinkle texture to animate the face skin:

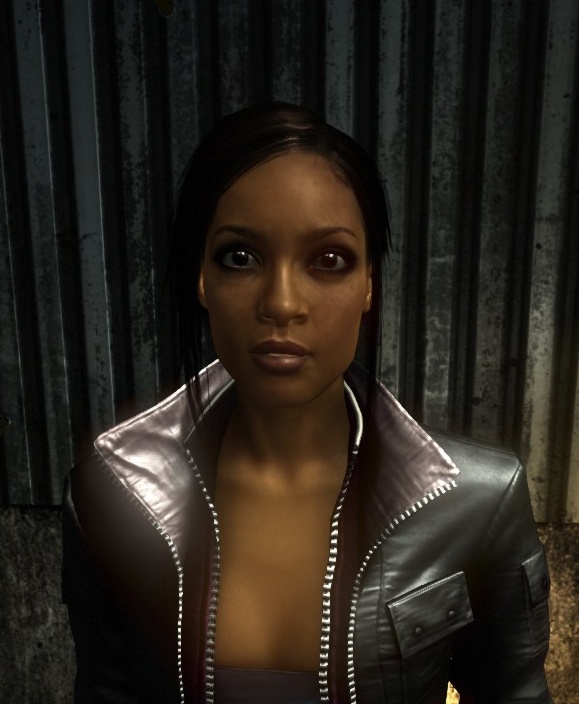

(Close-ups of key characters from the game.)
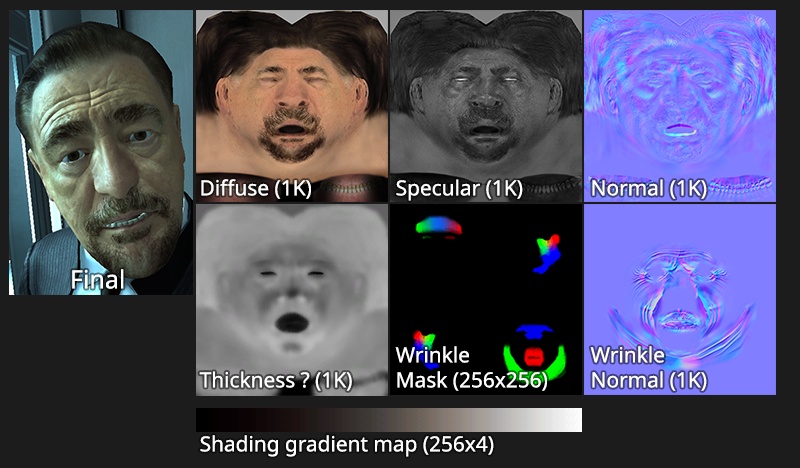
(The input textures when rendering the face of a character.)
Most of the textures above are quite straightforward to understand:
While most of the shadowing is handled by the lightmaps, the game also render shadows on the fly for a few objects, like characters, to have dynamic shadows.
The game only generate a single shadow "map" per object based on the closest light. This seems to be inspired from Dynamic RTT Shadows [19].
The first step is the rendering of the character into a separate texture, which in this case is another depth buffer. It's size can be small, like here with a size of 128x128, but I have seen it go up to 1024x1024 when close to the camera (like the player's own shadow).

(The shadow of the character "napping" on the ground.)
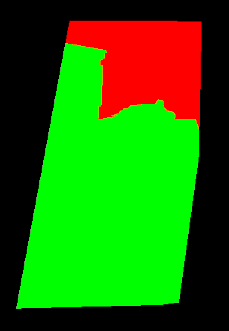
Then the game generate and render a mesh (with only positions as attributes) based on the mesh bounding with faces extruded away. This mesh has inverted normals (pointing toward the inside of the volume) and is rendered into the stencil only to initialize it:
(Stencil buffer with the extruded volume displayed over it.)
The stencil state is set to write to the buffer only if the the depth of the volume is closer than the depth in the depth buffer. With backface culling enabled this make the volume write only to pixel that are close and discard anything that is beyond. It looks like a homemade version of the Depth Bounds extension [20].
Next is the rendering of the shadow texture itself over the main color buffer:
(The character bounding mesh wireframe.)
Switching to debug view mode in RenderDoc allows to check out the depth test, stencil test and how they get combined to only draw the necessary pixels for the shadowing:


(From left to right: depth test, stencil test, combined result.)
You can see how the depth test and the stencil test get combined to only draw pixels around the character (green are drawn pixels, red are discarded).
As for the shadow itself and from what I was able to gather, the shader samples the shadow mask by transforming the mesh coordinates into the mask space. The texture is sampled several times using Percentage-Closer Filtering (PCF) [21] with a 5x5 pixel pattern. Then an attenuation factor fed to the shader is applied based on the distance from the light. The shader also try to clip/discard fragment based on the surface normal to fade edges in some cases.
(Before/After rendering the shadow)
Because shadows are drawn one by one, they can overlap in a noticeable way:
(Player's shadow overlapping another character shadow.)
The interpolation from one light to one another can produce some weird results sometimes. However in-game it is not too much distracting as the focus of the action is not on the ground:
(The player's shadow doing swings while crossing a room.)
All the shadow masks are rendered into the scene before the character themselves. This means that character don't have any kind of self-shadowing. This is not surprising considering the shadow mask is black and white, so it would be difficult to evaluate which part of the character is obscured or not.
This means that once shadow masks are drawn, the next object rendered are mostly enemies, NPCs, animals (like pigeons in this scene) and the player's body with his weapon.
Something to note is that any surfaces that use alpha testing (so discarding fragment based on a binary value) will be rendered during the opaque pass too. This includes some types of decal or fences for example.
(The masked paper decal on the ground.)
In this case, the trash on the ground are even rendered before the ground itself. They also sample the lightmaps, so they have been baked with the rest of the static geometry.
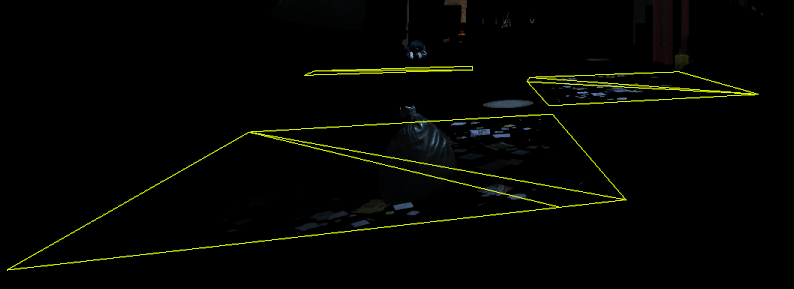
Now that most of the static/opaque geometry has been drawn, the next step is the rendering some specific transparent surfaces to blend them with the rest of the scene.

In this case this means ketchup splatters from the recent paintball session, dirt stains, graffiti and also background elements like far away buildings.
(Example of a 512x512 texture projected after the fight in the scene. Left is RGB, right is Alpha.)
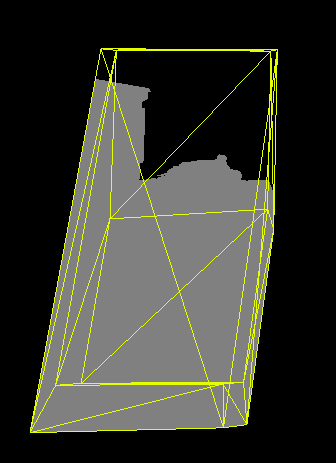
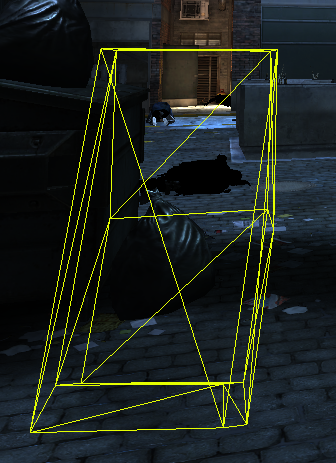
The far away buildings are simple box object rendered as-is, the depth buffer helping discarding most of the non-visible pixels:
(Left the building meshes wireframe, right the building texture.)
By itself this there is nothing special with the building, however they are drawn in additive mode and write to the depth buffer (but they were already present in the depth prepass). I'm not exactly sure why they are blended like this, maybe to make them partially transparent and fade with the background color.
Several other surfaces are drawn over the existing geometry. In this case the lights glow and building windows in the background are drawn over in additive mode too:
(Before with only opaque geometry and after with the glow.)
The subsequent step in the process is the addition of a fog layer over the scene:
There nothing particular to mention about it except one tiny detail: this pass redraw all the opaque objects in the scene. Each drawcall redraws an object, without textures this time, using linear blending.
(The drawcalls adding fog over the scene.)
You can notice that the suspended lights got masked as well. This is likely why some transparent emissive surfaces were rendered first before the fog.
There are also extra elements drawn over the scene to enhance a bit the fog. Single quads as horizontal planes are sitting a bit higher than the player and render a low-frequency noise texture. Those quads are here to add soft clouds:
(Comparing the image before and after adding the clouds.)
The cloud shader also samples the encoded depth buffer to compute a fade based on the distance from the camera, which is the smooth transition visible on the far away buildings.
The previously computed normal texture in which are accumulated normal maps is now used to distort in screen space the main color buffer:
(It is subtle, but the ground near the dumpster has been distorted.
(Close up on before and after the distortion.)
The sampling method is very simple, the red and green channel from the normal channel are used as offset direction after being unpacked. The blue channel is also used to scale down the vector intensity.
The sampling method is very simple and suffer from artifacts. Notably objects in the foreground will bleed into the distortion effect in the background as seen here:
(The water puddle distort the player hands from behind.)
This kind of artifacts can be mitigated while still using a screen space distortion shader. [22] It was probably not worth doing for the game given how little the game use this pass in practice.
We finally reached the last pass that actually modifies the scene. In this pass are drawn transparent objects like particles and lens-flares, etc.
![]()
The previously computed rain textures are also used during this pass to draw the rain particles, for both the drops and the splashes on ground:
(The mesh drawn for the rain particles.)
The rain particle effect is the first effect drawn in this pass:
(The rain splashes drawn on top of the distortion pass.)
In addition to particles, the game also render bright emissive surfaces. In this context those are mostly the neon signs. I presume they drawn here after the fog to avoid dimming them. Given that the game doesn't render in HDR, it's a way to preserve their high brightness compared to the rest of the scene. The game also render regular transparent objects like the windows of the shops.
(Example of before and after a few neons signs and the glass surfaces.)
At the edge of the screen is a quad that displays a smudged texture. It is here to represent a glaring light source from out of frame:

(The smudged texture appears faintly on the left side of the screen.)
This texture appears when near an in-game light source, its side of the screen depends on the angle of vision. Moving away from the light make it disappear progressively. This effect is used as an additional layer of bloom (which we will see later below).
(Example of how the glare appears on the edges of the screen.)
Lens-flares are classic sprite based textures layered and facing the player. Their visibility is determined by a traditional GPU based occlusion query. [23]
![]()
(One of the sprite compositing the lens-flare.)
Finally, the game renders the Augmented Reality text and icons that are scattered through the level. It's the future, so the advanced chip in your head can help you notice fancy toy lying around:
(An example of a floating AR message.)
The texts are drawn in one drawcall, sharing a bitmap based font. Icons on the other hand are drawn one by one. There is a small "easter egg" hidden in the AR message. A tiny texture is scrolling below the title which features the following text:
Starbreeze develops computer games on pre-financed assignments from major game publishers.
The publisher usually owns the rights to the production and carries the financial risk.
If a game does well in the marketplace Starbreeze obtains additional sales-royalties after the pre-finance amount has been covered by the publisher.
Once all of this is done, the mipmaps for the framebuffer are generated in one drawcall.
The game scene has been rendered, so the next step is building the UI. Syndicate doesn't use Scaleform GFx [24], which was a popular choice at the time, and instead rely on a homemade solution.

(The UI buffer.)
The UI rendering works like so:
The game uses a secondary buffer to render the UI elements, that buffers uses the same resolution as the game main resolution. The UI elements are rendered into it one by one.
The location of the elements in the buffer isn't fixed, if an additional element needs to be rendered, it can move other elements. For example:
(In this other example, the UI is glitched and a message is visible on the right.)

(The message is drawn on the top left, while the other UI elements have moved around.)
How the UI is applied on screen happens later down in the rendering pipeline (see below).
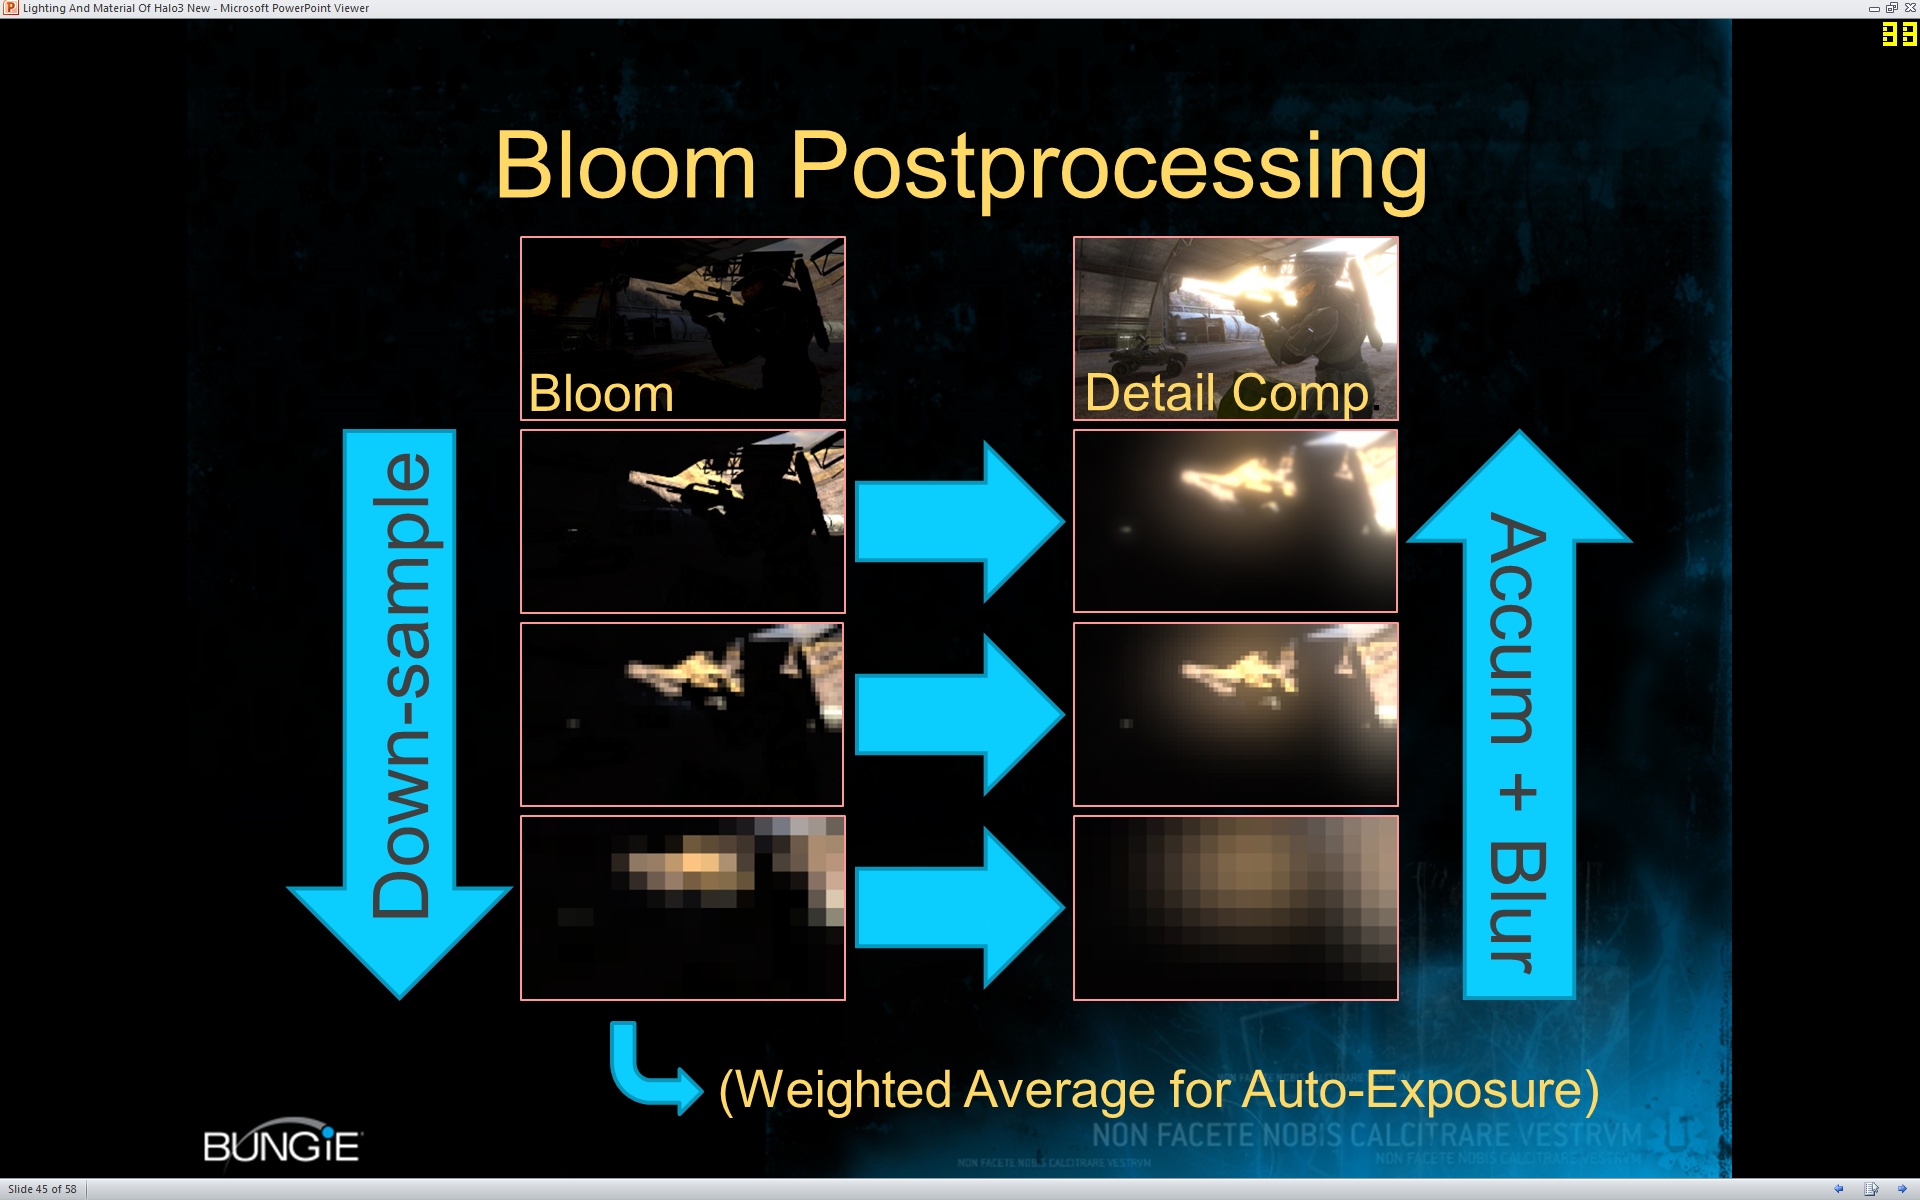
The game is still missing some key elements to achieve its final look. So the next step is to render bloom.
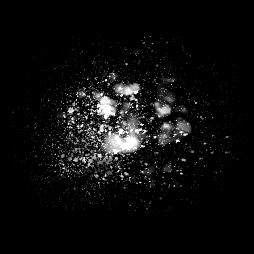
(The result of the blur pass that produces the bloom.)
To generate its bloom the game downscale several times the current framebuffer and then recombine the generated mipmap.
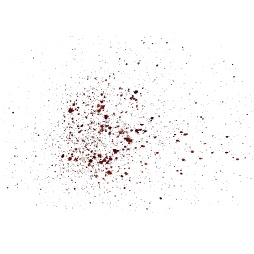
The first operation starts from the current framebuffer content and extract what it considers being brights pixels using a grayscale conversion to evaluate the luminance. This result is then stored at half-resolution. Anything that is below a specific threshold is replaced by black pixels.
The luminance evaluation is done like so:
float Grayscale = dot( SampledPixel, float3(0.212671, 0.715160, 0.072169) );
The constants used above match the Luma values for the BT.709 color space. [25]
In this scene, the threshold value defined is of 0.01328. I tried to see if it could be related in some way to the middle gray point [26] but in the ends it just seems to be arbitrarily defined for the given scene, likely by an artist.
(Result of the first downscale with thresholding.)
The downsample of the first mip is done with a single sample, there is no blurring. Once this is done, the result is directly copied in the the mipmap 1 of the framebuffer (mipmap 0 being the original full resolution level).
Now that the first mipmap has been generated, the rest of the process consist of generating all the other mipmaps (until the last one at size 1x1 pixel). Thresholding is applied on each downscale as well.
There is a difference about how these steps are performed however. A slightly different shaders is used which samples several pixels to blur the result. The sampling is done with a box pattern with specific weights:
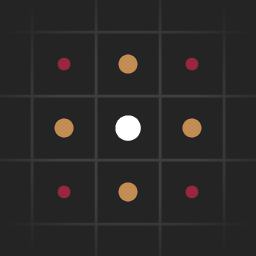
(The sampling pattern for the mipmap downsampling.)
In the image above the squares are pixels while dots are sampling positions. The colors signify the different weight values. They are distributed as follow:
With these weights and the amount of samples used, the final intensity is divided by 16 to get back the resulting value in the 0 to 1 range. When approaching the borders of the buffer the sampling UV coordinates are also manually clamped.
Each time a downscale has been computed, it gets copied into the framebuffer to replace a mipmap level.
(The mipmaps levels generated from the downsampling process.)
Because the game works with non-sRGB buffers and still store non-linear colors, blurring needs to be done in linear space. So there is an explicit Color * Color on every sample done. Once the samples have been merged and the weighting applied, an sqrt() is called to get back to "gamma" space. This is a cheap and approximate sRGB/Linear sRGB conversion.
Once all the mipmaps have been generated they can now be combined into a single texture. this texture is done at 240x135 resolution, which is 1/8 of the original framebuffer size.
A single shader runs to sample the previously generated mipmaps and blend them together like so:
// Values fed to the shader
float EndMip = 8.0;
float PostExposure = 0.57471;
float PreExposure = 1.74; // (1.0 / 0.57471)
float GlareInputClamp = 1.74;
vec3 GlareBias = vec3(-0.03);
vec3 GlareScale = vec3(1.52);
vec3 GlareGamma = vec3(1.06);

// Sample mipmaps from 8 to 4
vec3 Mip5 = texture( ScreenBuffer, UV, max(0.0, EndMip - 4.0) ).rgb * PreExposure;
vec3 Mip6 = texture( ScreenBuffer, UV, max(0.0, EndMip - 3.0) ).rgb * PreExposure;
vec3 Mip7 = texture( ScreenBuffer, UV, max(0.0, EndMip - 2.0) ).rgb * PreExposure;
vec3 Mip8 = texture( ScreenBuffer, UV, max(0.0, EndMip - 1.0) ).rgb * PreExposure;
vec3 Mip9 = texture( ScreenBuffer, UV, EndMip ).rgb * PreExposure;

// Clamping
Mip5 = min( Mip5, vec3(GlareInputClamp) );
Mip6 = min( Mip6, vec3(GlareInputClamp) );
Mip7 = min( Mip7, vec3(GlareInputClamp) );
Mip8 = min( Mip8, vec3(GlareInputClamp) );
Mip9 = min( Mip9, vec3(GlareInputClamp) );

// Combine
Mip5 = Mip5 * Mip5;
Mip6 = Mip6 * Mip6;
Mip7 = Mip7 * Mip7;
Mip8 = Mip8 * Mip8;
Mip9 = Mip9 * Mip9;

vec3 TexGlow = (Mip5 + Mip6 + Mip7 + Mip8 + Mip9) * 0.2; // (1.0 / 5.0 = 0.2)

// Final adjustments
TexGlow = max( vec3(0.0), TexGlow + GlareBias );
TexGlow *= GlareScale.rgb;

TexGlow.r = pow( TexGlow.r, GlareGamma.r );
TexGlow.g = pow( TexGlow.g, GlareGamma.g );
TexGlow.b = pow( TexGlow.b, GlareGamma.b );

// Output
OutputColor.rgb = sqrt(TexGlow) * vec3(PostExposure);
OutputColor.a = 1.0;
The code above is slightly adjusted from the orignal shader to make some variable names easier to follow (and comments are mine). The most interresting bits to note are the pre/post epxosure scaling which converts the color to/from what the developpers call "dfr space". I'm not sure what it refers to unfortunately (maybe "Difference" ?).
Once again, some operations are done in linear space and then get converted back to non-linear with the sqrt() call.
I also imagine that variables like GlareBias, GlareScale and GlareGamma are vec3() because this allows to tweak the bloom color/behavior for each component individually (R, G and B).
Once the bloom final image has been generated, the game re-render the regular mipmaps of the framebuffer to replace the one with the luminance thresholding.
I'm quite impressed by how the game achieve its bloom effect, it seems at the time nobody was doing Bloom like Syndicate did. Or actually like Riddick did. Checking Riddick (remaster) game files showed the same Bloom effect, almost identical. The shader files dates and the game release mean the effect was made or refined in 2008/2009.
As far I could see, nobody was doing the mipmaps downsample combined with a box blur sampling pattern. It was either downsampling then blurring, often with a separable box blur (like in Crysis), or gaussian/box blur without downsampling. And often it was about a limited number of downsamples, not the full chain like here. [27] [28] [29] [30]
The only games/presentations I could find that mentionned this way of doing things were from after the game. [31] [32]
Update 2024-03-29:
It looks like I had actually forgotten this presentation from Bungie back in 2008 [33] which showed the downsample blur and even a recombine method while upsampling which is still in use today:
Once the bloom has been generated and the framebuffer mipmaps recomputed, the rendering process continue with the downsampling and blurring of the motion vector buffer.
First the motion vector buffer is downscaled to the resolution of 480x270 (1/4 of the game resolution) into a BGRA8_UNORM buffer. This is done with a regular bilinear filter. The alpha channel of the buffer also contain a duplicate of the blue channel (the DOF mask).

(The downscaled motion vector, top is RGB, bottom is Alpha.)
Then a gaussian/box blur is performed in two separable pass (horizontally first, vertically second).
(The result of the buffer after the separable blur.)
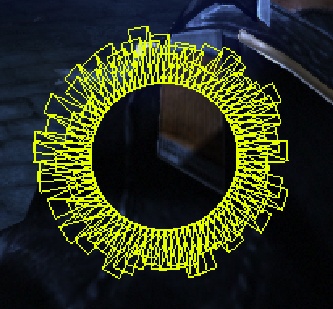
Finally an extra pass shrink the Depth of Field mask using a 9x9 pixel sampling pattern. This is the same pattern as the bloom, with the nuance that now the samples have all the same weight and are not combined by an addition but by a min/max comparison.

(The sampling pattern for the shrink/expand pass.)
(The buffer after the grow/shrink pass.)
As you can see in the comparison below, the grow/shrink pass result is different depending on the channel: the mask grows in the blue channel, while the alpha channel shrank.
(Comparison of before the blur and after the blur and grow/shrink pass.)
The grow/shrink pass works like this:
vec2 UV;
vec2 MinUV = UV - PixelSize; // PixelSize == 1.0 / BufferSize
vec2 MaxUV = UV + PixelSize;

// Bottom row of pixels
vec4 Tex00 = texture( Buffer, MinUV );
vec4 Tex10 = texture( Buffer, vec2(UV.x, MinUV.y) );
vec4 Tex20 = texture( Buffer, vec2(MaxUV.x, MinUV.y) );

// Middle row of pixels
vec4 Tex01 = texture( Buffer, vec2(MinUV.x, UV.y) );
vec4 Tex11 = texture( Buffer, UV );
vec4 Tex21 = texture( Buffer, vec2(MaxUV.x, UV.y) );

// Top row of pixels
vec4 Tex02 = texture( Buffer, vec2(MinUV.x, MaxUV.y) );
vec4 Tex12 = texture( Buffer, vec2(UV.x, MaxUV.y) );
vec4 Tex22 = texture( Buffer, MaxUV );

// Put samples into groups
// B = blue channel = DOF mask
// A = alpha channel = Same content as B
vec4 Tex00_10_baba = vec4( Tex00.ba, Tex10.ba );
vec4 Tex20_01_baba = vec4( Tex20.ba, Tex01.ba );
vec4 Tex21_02_baba = vec4( Tex21.ba, Tex02.ba );
vec4 Tex12_22_baba = vec4( Tex12.ba, Tex22.ba );

// Min/Max comparisons
vec2 B03 = min( Tex00_10_baba.xz, Tex20_01_baba.xz );
vec2 B58 = min( Tex21_02_baba.xz, Tex12_22_baba.xz );
vec2 B08 = min( B03, B58 );
float Bmin = min( Tex11.b, min(B08.x, B08.y) );

vec2 A03 = max( Tex00_10_baba.yw, Tex20_01_baba.yw );
vec2 A58 = max( Tex21_02_baba.yw, Tex12_22_baba.yw );
vec2 A08 = max( A03, A58 );
float Amax = max( Tex11.a, max(A08.x, A08.y) );

FragColor = vec4( tex11.r, tex11.g, Bmin, Amax );
I'm not sure what is the meaning of the 03/58/08 numbers, but the code above shows the sampling pattern I mentionned followed by the minimum and maximum comparison before assigning the results to the blue and alpha channel.
We are getting close to the end. Now the game performs two dinstinct operations:
Like I just mentionned, the game perform 16 draws which look like this:
(Frame by frame video showing the 16 drawcalls after each other.)
(Same video but seeing the draws individually instead.)
I was wondering at first what what happening here, what were those "slices" for ? The curious thing to note here is that these draws use the previously rendered scene color as input. I wondered at first if it was based on depth, but by the look of it, it seems related to luminance since each slice appears to be about pixels being brighter and brighter.
It turns out I didn't know RenderDoc well enough, and after some time loking around I checked the exact command sent to the GPU and saw this:
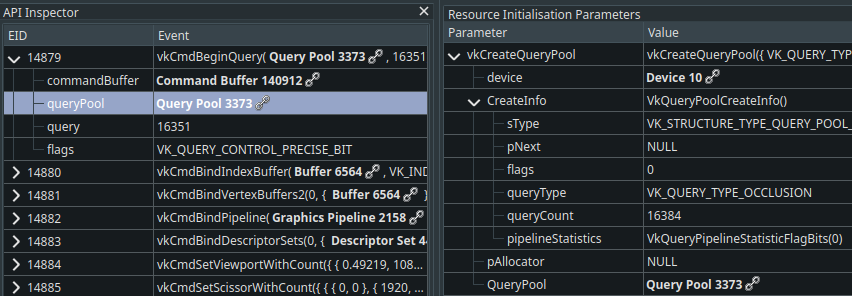
So each slice is actually a different oclcusion query. But what are occlusion queries ?
This feature makes it possible for an application to ask the 3D API (OpenGL or Direct3D) whether or not any pixels would be drawn if a particular object were rendered. [34]
Specifically, these queries detect whether any fragments continue being processed after reaching the depth test stage in the Per-Sample Processing part of the rendering pipeline. These operations proceed in the order defined on that page, so if a fragment passes the depth test, then it must also have passed all of the operations before it. So fragments which pass the depth test must also have passed the stencil test, scissor test, etc. [35]
So this is odd, occlusion queries on luminance based pixels ? What kind of visibility test is going here ? I didn't had the answer to these questions at first, I had to do some back and forth until it clicked: it is for counting pixels.
The occlusion queries are used to count pixels based on their luminance in order to know how many pixels are bright or dark. This is used to build an histogram of the current frame. It makes sense to see it happen at the same time as the LUT generation, since the histogram information will also be used to adjust the final image afterward.
Looking online we can find similar techniques:
Several image processing algorithms have been ported on the GPU because of its fast increase of performance. Some of these algorithms need to compute a histogram, but the computation of the histogram is not well supported on the GPU because of its architecture.
To cope with this problem, we present a new method for the efficient computation of histograms on the GPU. Therefore, we use a fragment shader, occlusion queries and the depth-buffer. The gray level values of the image of which the histogram will be calculated are taken as depth values.
The depth-buffer in combination with occlusion queries can efficiently be used to count the number of gray values that fall into each histogram bin. We will show in our experiments that our method is up to ten times faster than an existing technique for the GPU-based computation of histograms. For a small number of bins in the histogram or for large images, our method is even faster than a CPU implementation.
Source: [36]. Valve also mention it in their presentation about the Orange Box. [37]
Looking into the game files, I go the final confirmation that it is indeed what is happening here with the file named XREngine_Histogram.fp.
This shader file contains a dot product against three constants to generate a luminance value and this result is compared against a minimum and a maximum values provided to the shader, allowing to specify the range to compare against. If the luminance is outside the range, the output alpha is 0, if inside it outputs 1. The RGB is simply the luminance value.
Just after the occlusion queries a LUT texture is generated. It is the classic 3D cube sliced and stored as a 2D texture to be sampled later to apply color adjustments. [38]

(The final lut texture generated.)
The LUT is 256x16 pixels in size, which represents a 3D cube of 16x16x16 pixels. Like many game at the time, and especially in this one, color grading is done over non-HDR colors so a small LUT is enough to deal wtih 8bit colors.
We are now in the most important step, which is the merge of the previously generated effects into one final image. It blends together the scene color with the bloom and applies the DOF, motion blur as well as a few other visuals like color grading or grain.
This pass has the following inputs that we saw earlier:
There are also two extra textures, both in RGBA8 format:

(A white noise texture of 128x128 pixels)

(The gradient/vignette noise texture of 256x128 pixels.)
Now let's look at how some of the effect are actually applied/done.
Motion blur and DOF and rendered as the same time because they actually generate the same kind of blur visually. They use slightly different sampling patterns but get combined to give a nice gaussian blur (so no bokeh here).
The sampling direction is first computed from the full resolution motion vector buffer, then the DOF blur mask is used to add an offset to the sampling direction.
The scene color buffer is sampled several times (~5 to 7 samples per pixels it seems), each of these samples use a different mipmaps level which is computed from the DOF mask and the downscaled motion vector buffer. Using mipmaps is a good way to approximate a wide kernel for a gaussian blur. [39]
The white noise texture is also sampled to jitter the sampling position and reduce the amount of samples needed to reach a visually smooth blur.
I presume the motion blur is based on the same principle as seen in Crysis [40]:

(Slides from Crysis GDC presentation.)
We can now see why a downscaled version of the motion vector buffer was generated.
Another effect that happens in some very specific scenes is some kind of diffusion/ghosting. I'm not 100% sure how it is done, but it seems to be based on a feedback loop built by re-using the previously computed downscale version of the motion vector buffer and mixed into the current frame buffer. It is then fed to the final shader pass like above in place of the usual downscaled version.
(Left is final result, right is the downscaled motion vector buffer - adjusted.)
(This effect is used in a strong way later in the game to simulate an "injured" state.)
The bloom/blurry buffer generated before is blended over the scene color with a simple screen blend mode. Here it was it looks like with some pseudo code (comments are mine):
vec4 Bloom = h4tex2D( SamplerBloom, UV );
// Strangely performa a sature a non HDR buffer ?
Bloom = saturate( Bloom );

// Apply an intensity value provided to the shader:
TexGlow.rgb *= PreExposure.y;

// Cheap color space conversion
TexGlow.rgb = TexGlow.rgb * TexGlow.rgb;

// Screen blend (with another non-needed saturate ?)
Final.rgb = Final.rgb * saturate( 1.0 - TexGlow.rgb ) + TexGlow.rgb;

// Back to previous color space
Final.rgb = max( Final.rgb, vec3(0.0000001) );
Final.rgb = Final.rgb * vec3(
    rsqrt( Final.r ),
    rsqrt( Final.g ),
    rsqrt( Final.b )
);
Because of the way bloom is generated (with repeated thresolding for the mipmap blend) and the blend mode used (screen blend) this can lead to obvious transitions when the intensity is pushed a bit too far:
Let's go quickly over other effects that happen during this pass:
Color grading: we already saw how the LUT was generated in a previous part, the way it is applied is the same way as described in the GPU Gem article. [38]
Sharpen: Called "unsharpen" in the shader, it is basically sampling the scene color texture at a different mipmap level (level 2 instead of 0) and blending it back into the final color result to enhance the contrast.
Local contrast: This operation applies some kind of curve on the image to enhance the image contrast. This is done by first computing a factor based on a low mipmap (level 5 in this case) and then multiplying that result over the image but preserving black colors. I presume this is where the histogram computation results are used. (I wasn't able to make the curve work in a standalone shader to confirm unfortunately.)
Grain: a subtle grain/noise is added using the white noise texture tiled across the screen.
Vignette: A vignette is composited over the final image using the vignette texture.
A few parts of the shader also mention a "virus" effect, but I don't think I saw it actually happen in the game. Or maybe it was only part of the Co-op mode which I didn't experience.
I just wanted to add a quick note to specify in which order things are done.
And after all of that we have our final color to be displayed on screen.
Syndicate uses FXAA as its anti-aliasing method like many games at the time. There is not much to add, the FXAA Nvidia headers can be found in the shader files.

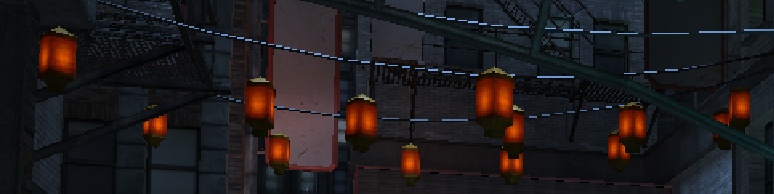
(Before FXAA.)

(After FXAA.)
Previously the game Riddick also supported MSAA, but in Syndicate it is not the case, at least via the main menu settings.
Finally the UI is drawn over the scene color after all its post treatments.
First the game draws drop-shadows to improve the contrast of the UI when displayed over the scene color. This drop-shadow is simply drawing the small resolution version of the UI texture with a black color.
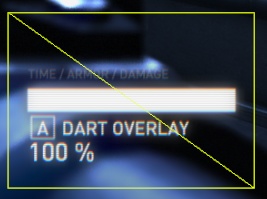
(The drop shadow for the dart vision feature.)
The central widget showing many tiny bars is rendered with many quads directly:
(The central widget wireframe overlay.)
Then the game render on top the actual UI element in the original color. This time it combines in the same draw the downscaled version and the full resolution version. The downscaled version is used to create the soft bloom around the UI elements.
(The UI overlay with its bloom drawn over.)
Finally the crosshair is rendered with 4 successive drawcalls of one enormouse quad.
(The crosshair quads.)
I'm not sure why those quads are so big why it wasn't done in a single drawcall.
Some stuff I will mention quickly:
(The settings main menu.)
(The effect when entering the dark vision mode.)
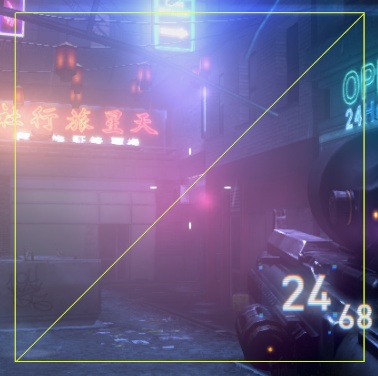
(Dart vision mode in action.)
(Example of a virtual space from a tutorial level.)
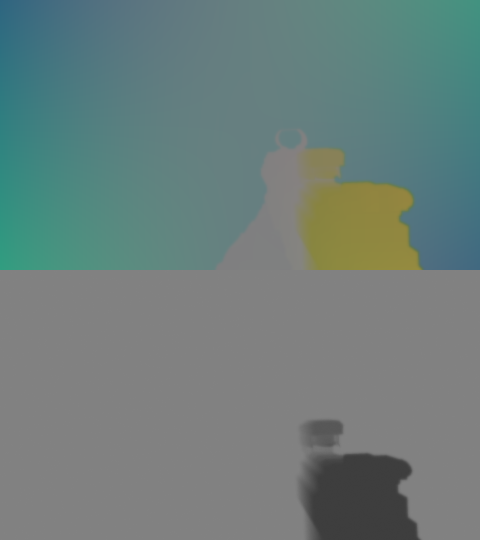
So finally we can ask the real question. Let's take a look at an example.
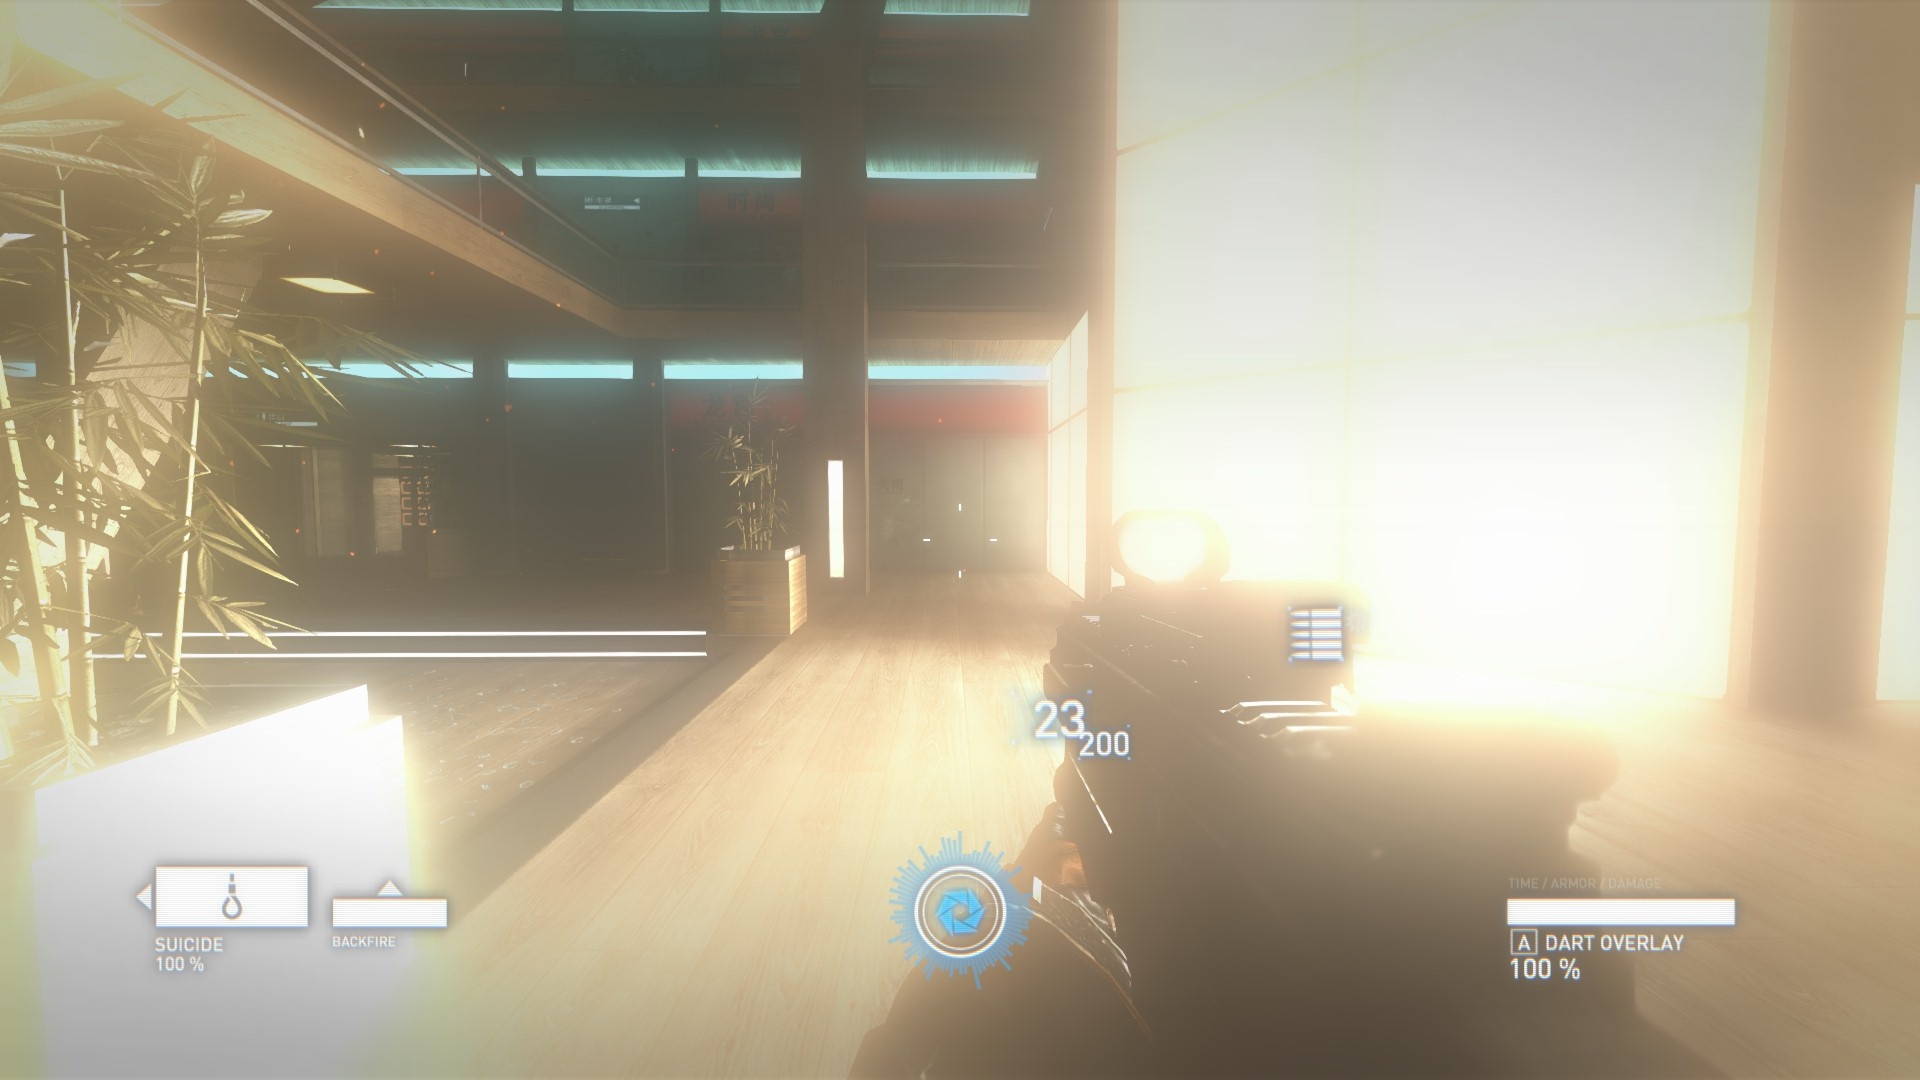
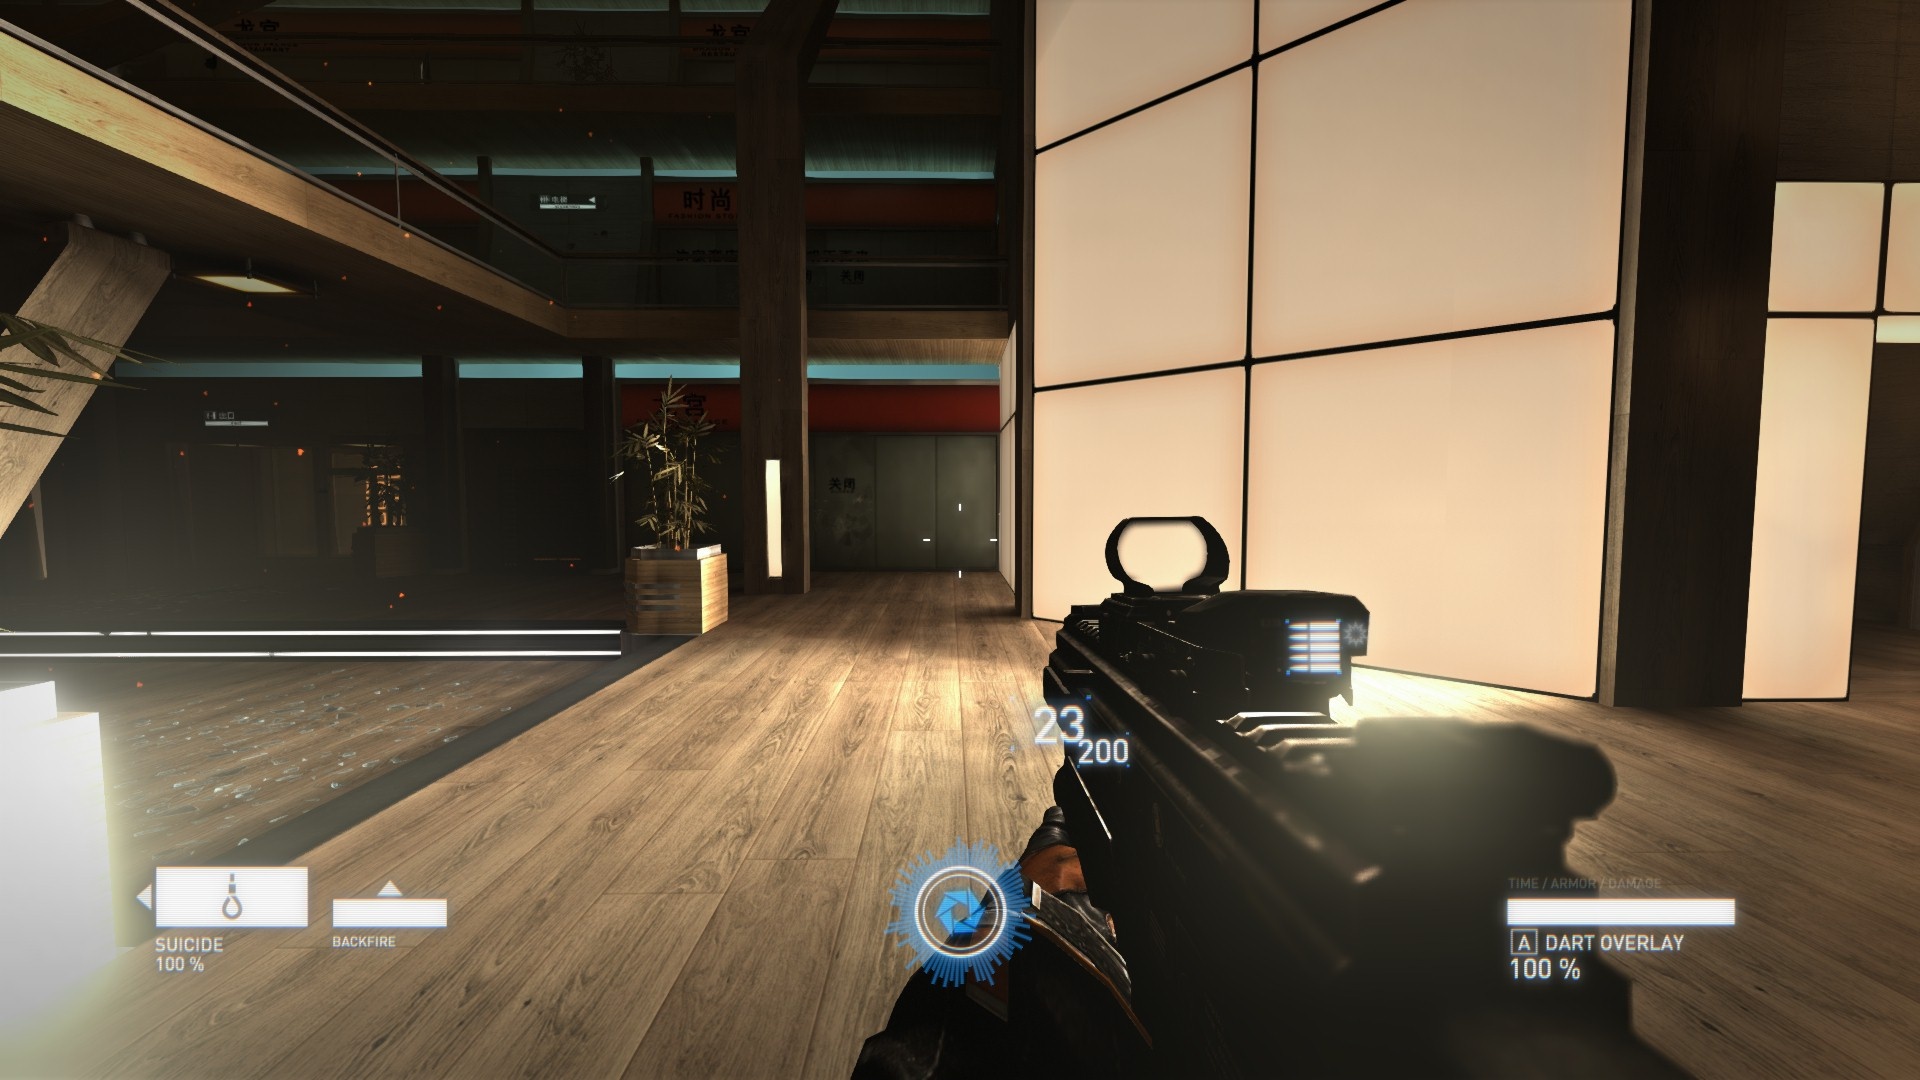
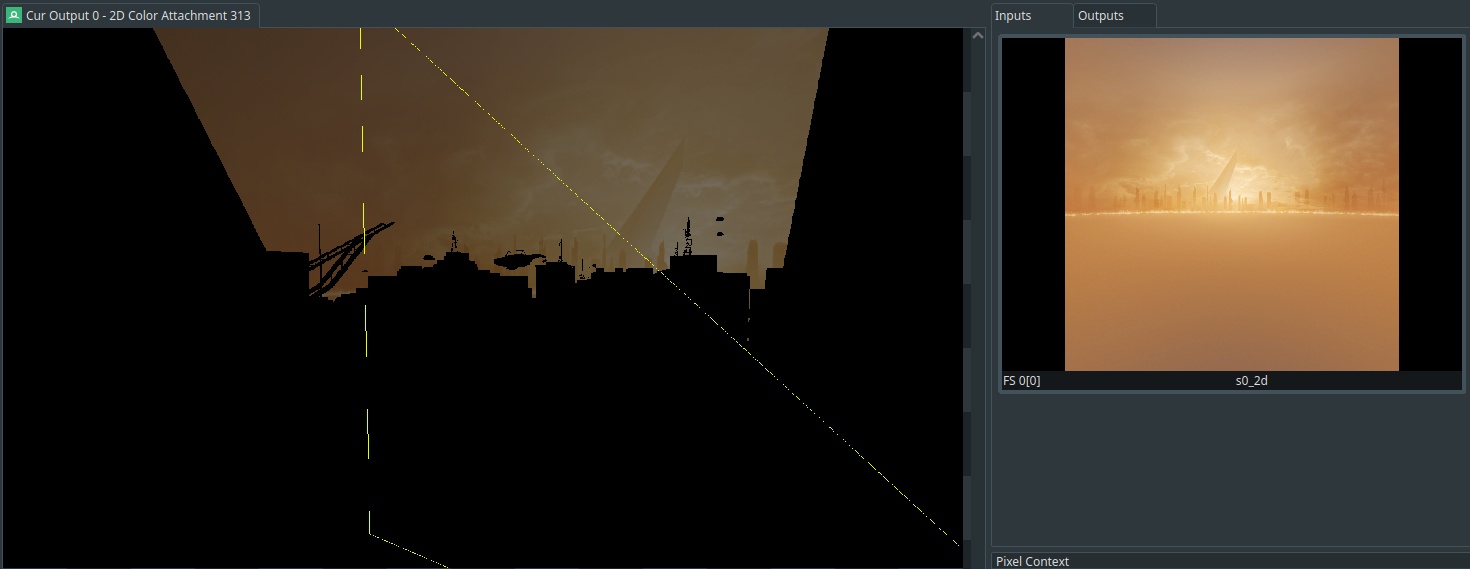
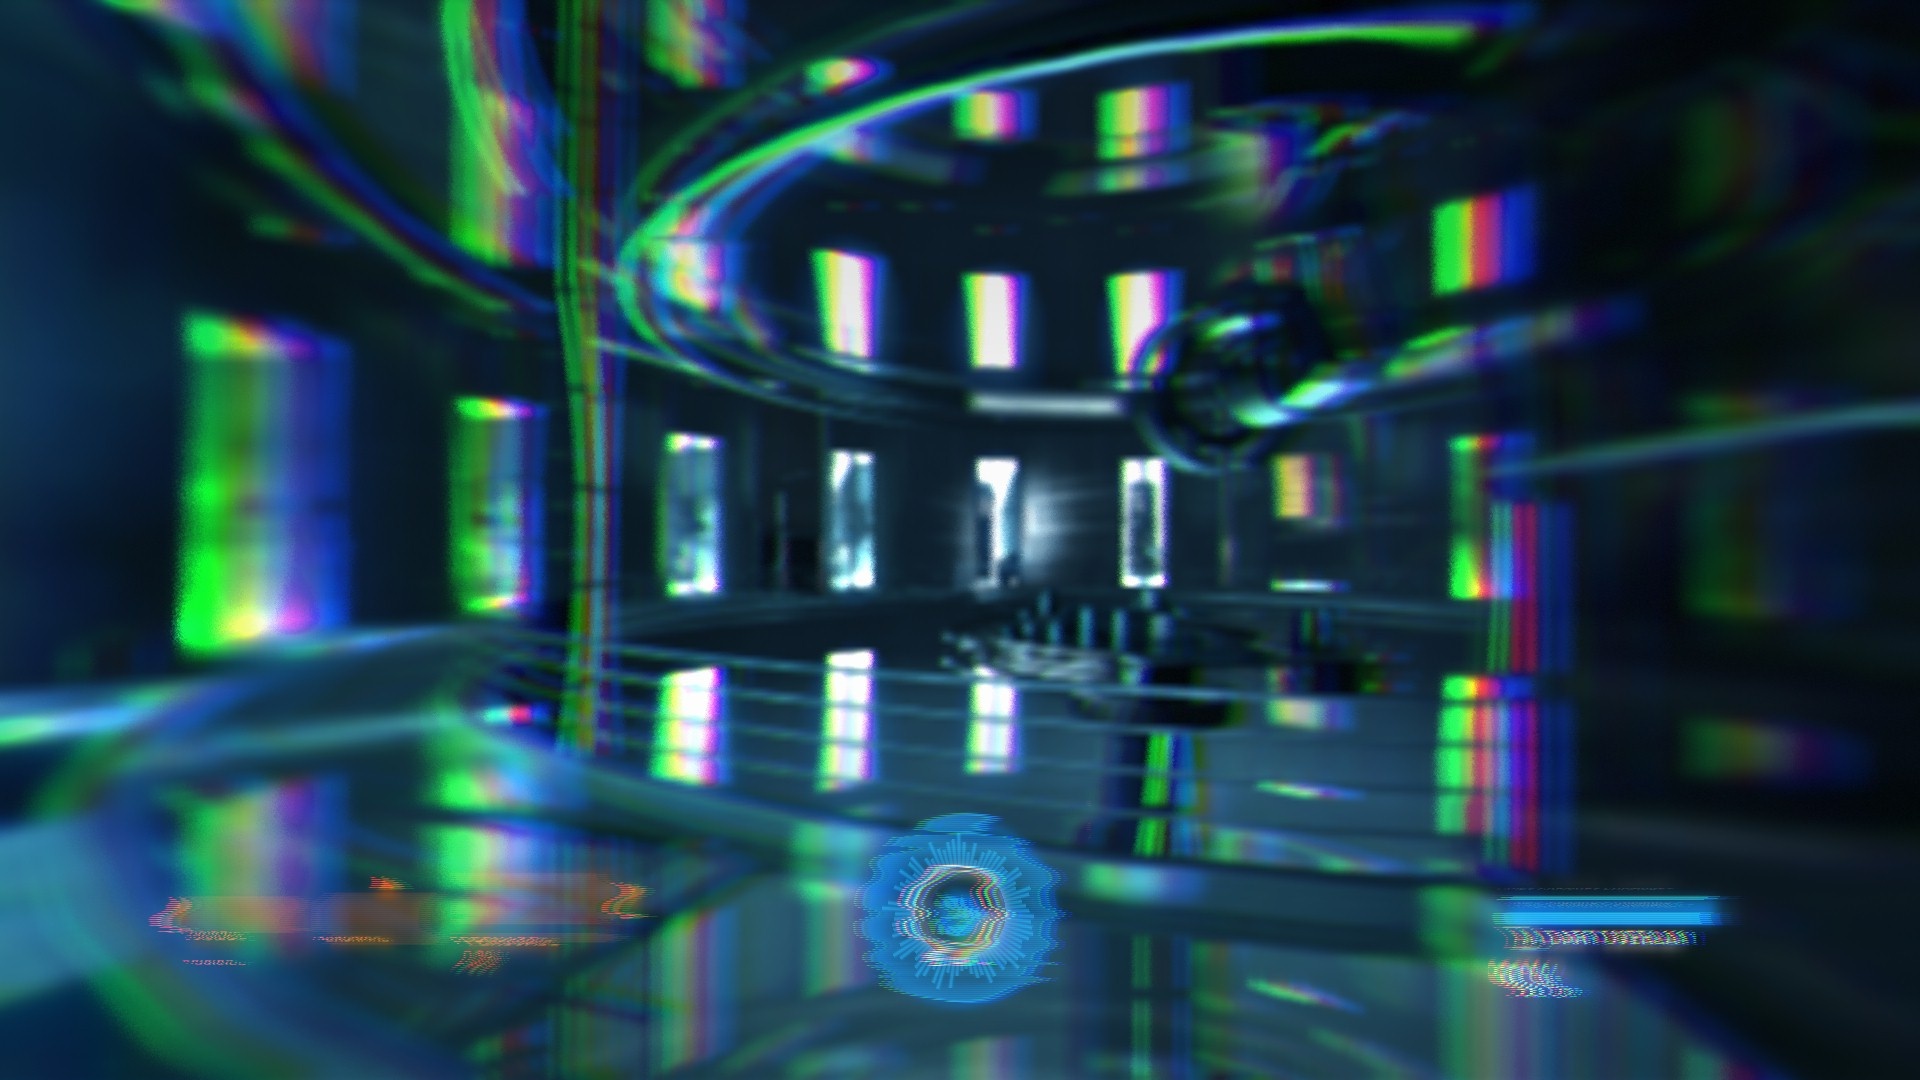
(Same scene but with two slighty different positions lead to different bloom intensities.)
If we look directly at the bloom buffer that was generated for each of these captures, it starts to become obvious why one looks over the top and the other feels normal:

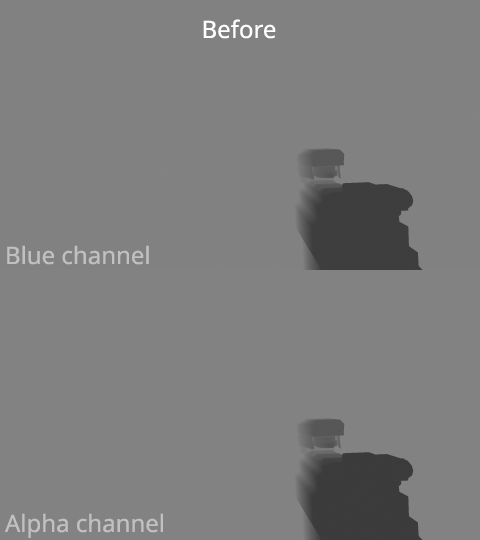
The thresholding seems off, so I went looking for the shader uniform values to confirm it:
// First capture (before)
f[0] 0.00104, 0.00185, 1.00, 0.00
f[1] 0.00026, 0.00046, 0.99974, 0.99954
f[2] 1.00, 0.00, 0.00, 0.00

// Second capture (after)
f[0] 0.00104, 0.00185, 1.00, 0.00
f[1] 0.00026, 0.00046, 0.99974, 0.99954
f[2] 1.00, 0.79621, 0.00, 0.00
We can see that what changed is the threshold value, going from 0.0 (no thresholding) to ~0.8 (high thresholding).
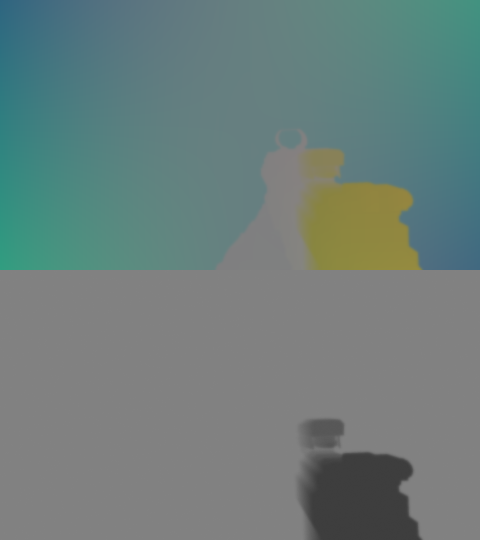
(Another example of moving from one area to another.)
Now why did the threshold change like that ? My guess is that the game interpolates volumes/areas that contains the post-process settings and give its look to the game. I presume there is a global volume and smallers one, so some areas end-up with default values (likely 0) which leads to weird and excessive bloom values.
It was mentionned in few places that the over the top bloom effect was a request from executives and not direclty an artist intent. However I'm not so sure, as overall in the game I feel the bloom is yes, a bit strong, but not to the point of being blinding like in the image above. So I would think the problem here comes from small mistakes in the level design instead.
I really like Syndicate. It is for sure far from perfect but it features many and really nice effects. Diving into the game was quite pleasant, even if it took some time to figure all of this (basically one month to dive into this rabbit hole), and I'm glad I was able to use all the knowledge I have accumulated over the years to decipher its inner details.
As someone who is working on their own game engine, being able to see the design and implementation choices made in the game is quite stimulating. While nowadays everybody is looking in deferred renderers and other advanced rendering methods (like mesh shaders), seeing a more traditional approach helps a lot to figure things out and learn.
I'm also impressed by some of the tricks used by the game (like its bloom), the developers behind it really had clever ideas at the time.
There, one obsession I can now strike off from my list. :)
Here is the list of documents that helped writing this article: