Face Skin in Substance Painter
Step by step process to create realistic skin details.
Step by step process to create realistic skin details.
July 03, 2016
I wanted to share my method for painting somewhat realistic skin in Substance Painter. It’s far from perfect but it gives good result when rendered in Real-time with the Unreal Engine 4. Following is the step by step process (more or less). 🙂
Note that this tutorial was based on Substance Painter 2.1.

First step before starting to paint is to setup your additional maps (baked textures) in Substance Painter. I mostly use the default baking settings as they often work very well. The only thing I really bother to tweak is some AO settings. As for the resolution, in my case my texture set will be at 2048×2048 pixels, so my additional map will be either at this resolution or just below (1024×1024). I use for the anti-aliasing 2×2 subsampling for the AO and 4×4 for the other maps. That require therefore to bake in two times. Don’t forget to save your project once you are done and then let start with the next step.
Baking textures with a character that has closed lips for example can be tricky to get right. So instead of trying to figure out the best settings or use a cage, I prefer to paint over the errors. I usually avoid this workflow because it means you have to redo those steps if you rebake or change the UVs. However that’s not true with Substance Painter since we are in non-destructive workflow where UVs can be changed at anytime (because brush strokes are projected in 3D space).
The first step therefore is to add an ambient-occlusion and normal channel to your texture set if that’s not already the case. Then change the blending mode those two channels via the "mixing" parameters. This will tell Substance Painter to only use the channels and ignore the additional maps.

Now that the channels are ready, we can add a fill layer in the layer stack. Inside this fill layer you can load you baked texture in the proper channels. I called this layer "Base Textures" for obvious reasons. You also need to set the tilling value to 1 if it’s not the default one for you (since we are using mesh based texture, not tilling materials).

From there I add two new fill layers above the existing one. In my case I wanted to fix the incorrect baking between the lips and inside the nose holes. I only enabled the normal and AO channel on these new layers. Don’t forget to change the blending mode of these layer to "replace" for the Normal and AO channels. You can cycle through the channels via the drop-down menu at the top of the layer stack :

As you can see I have also added a black mask and painted in white inside it to erase only the part I needed from the layer below. The reason I use two fill layer is because I don’t use exactly the same mask between the AO and the Normal channel. However if your baking artifacts are very similar, you should be able to setup all of that in one layer. As for the color, I use an average AO color to mask out the baking error :

I little "lazy" trick I often use is to paint in a mask without being very clean. I don’t try to get the perfect gradient/smoothing here because it would take too much time and tweaking. Instead I often add a new filter effect and load a Blur in it. Then I add a level effect just after. With this setup I use the blur to smooth my painting and the level to tighten it back and avoid too much bleeding. The big advantage is that you can go back and tweak those effects back and forth without having to paint again. It’s pretty quick to do, so you can move forward on another task. You can also repaint something and still benefit from the Blur/Level combo on top.
Now that the base textures are ready, let’s start the skin painting. In order to avoid painting everything on the character, I start off by using the already existing Smart Material named "Skin Human Simple" which gives a good start with a natural color and a decent roughness. I disable/remove the "Veins" layer however as it doesn’t fit very well for a face.

Now let’s start painting !
Below are the list of the layer that you need to create with some detail. Each is detailed with only the channels enabled on the layer.
Fill Layer :_ Warm Colors_
– BaseColor = RGB – 0.910, 0.058, 0.058
The mask was Painted with the "Paint spray" brush preset.

Fill Layer :_ Cold Colors_
– BaseColor = RGB – 0.138, 0.236, 0.838
The mask was Painted with the "Paint spray" brush preset. There is also on top a fill effect with the "Grunge Concrete" in UV projection mode and a tilling set to 1.0. I set the blending mode of the effect to multiply with an opacity of 50.

Fill Layer :_ Thin Colors_
– BaseColor = RGB – 0.895, 0.336, 0.103
The mask was Painted with the "Paint spray" brush preset.

Fill Layer : Fibers
– BaseColor = RGB – 0.744, 0.530, 0.497
– Roughness = 0.3
This one use procedural noises to create the mask. I started by creating two fill effects. The first fill having a "Messy Fibers 2" with a tilling of 32. Then on top (in multiply blending mode) I added a "BnW Spots 1" with a tilling of 12. On top of those effects I added a level to contrast and bring back some white values as on the screenshot. I also added a paint effect to mask out the borders of the UVs. Especially for the neck, to avoid a seam.

Fill Layer : Wash
– BaseColor = RGB – 0.797, 0.414, 0.279
This one has a bit more complicated mask to setup. See the animated gif for more step by step. The first fill effect contains the Ambient Occlusion texture (baked). Then I use a level effect to contrast it a bit. On top I add a fill effect with the "BnW Spots 2" noise in multiply mode with an opacity of 75/80. Then I add an other fill effect this time with the "Dirt 1" noise in Add/Sub mode with an opacity of 25/30. Another level effect this time to invert the grayscale values. Then a paint effect to retouch a bit the brightness of the jaw area (in Linear Dodge mode).


Fill Layer : Light
– BaseColor = RGB – 1.0, 1.0, 1.0 (Opacity 50)
On this mask painted with the default smooth brush, I used a level to reduce the overall brightness.

Fill Layer : Dark
– BaseColor = RGB – 0.242, 0.089, 0.045 (Opacity 70)
– Roughness = 0.3
For the mask of this layer, I use different brush preset to simulate more natural patterns. I focused mostly around the cheekbones and mouth area while using more spaced out details on the top of the face. I used a mix of the "Dirt" (1, 2 and 3) brushes and the "Sandpaper" one.

Fill Layer : Dark 2
– BaseColor = RGB – 0.066, 0.037, 0.016 (Opacity 40)
– Height = 0.01
For this mask I painted almost only on the cheekbones area. I used the "Spots spray" brush with a big size and also a bit of "Crystal" and "Dirt" brush. Then on top of the painting I used a fill effect with the "BnW Spots 2" noise in Multiply mode with a tilling of 11 to darken a bit the painting.


Fill Layer : Nose Corners
– BaseColor = RGB – 1.0, 0.0, 0.0 (Opacity 20 – Mode Overlay)
Very simple mask here, I just painted the corner of the nose with the "Sandpaper" brush or one alike.

Fill Layer : Nose Color
– BaseColor = RGB – 1.0, 0.046, 0.046 (Opacity 70)
Again, a very simple mask here. I painted a smooth area around the corners of the nose with the default brush.

Fill Layer : Spots
– BaseColor = RGB – 1.0, 0.0, 0.0 (Opacity 80)
– Height = -0.02
I used again the "Spots spray" brush here but with more spacing to really give a sensation of random spot. I also used the default brush to darken a bit some areas and avoid uniformity.

Now that the base painting is done, we can move forward to specific details and refining it. The first step is to move all the previously created layers (but not the one with the baked textures) inside one big group. Then set the opacity of this group around 70 for the BaseColor. This should help to homogenize the overall colors.
Once done, let’s create another group on top with all its blending modes set to "Pass Through". Inside the group, add a sharpen effect (by drag and dropping it from the Shelf) with an intensity of 0.15. Enable it only for the Roughness and the BaseColor channels. Duplicate this layer and remove the sharpen effect and add level effect instead. Change the middle point of the BaseColor to 1.053. This should darken a bit the BaseColor. Now add an HSL effect (enabled only for the BaseColors) with values of 0.52 for the Hue, 0.51 for the Saturation and 0.49 for the Luminosity.

Finally add a new fill layer (called "Dots") on top of these effects with only the BaseColor enabled and set it to a pure white color, an opacity of 8 and with a blending mode set to Linear Dodge.
The mask will be very special for this layer :
– Start to add a fill effect with a "Fractal Sum Base" noise. Set the Min and Max parameter of this noise to "9" and the tilling of the effect to 16. I also switched the effect to the tri-planar projection mode and set the hardness to 0.95.
– Add a second fill effect, this time with the "Grunge Map 21 Bitmap" with an Opacity of 20 and its blending to "overlay". Also enable the Tri-Planar mode and set the tilling to 4. You can get this grunge here : https://share.allegorithmic.com/libraries/562
– Add a level and use it to contrast the dots, giving wider dark areas.
– Add a blur effect on top with an Intensity of 0.11.
– Add a paint effect and use a black and smooth brush to erase some areas. In my case I masked out the lips, the bottom of the eyes and the eyebrows area.


The white spots are very subtle currently, but they will appear a bit more later when we will start adding a second sharpen effect in addition to other details.
Now that we painted the colors, we need to add the other kind of details that a real material need, especially skin.
Create a new folder above the group containing all the previously created fill layers. This new group will contains the new skin normal map. Set the normal channel blending mode of this group to "Normal combine". Add two new fill layers into this group (with only the normal channel enabled). The bottom layer will be used as a neutral normal map color. Be sure to set it’s blending mode to "normal". For the group above, load into the normal channel the texture "skin_nose_tip" (available in the default Shelf of Substance Painter). Set it’s tilling to 64 and the projection to "tri-planar". Also set the opacity of the normal channel to 50.
Add a black mask on this group and paint in white on it like in the image below. The goal is to use this normal map only on important areas of the face.


Now that the normal is set, let’s add the roughness details.
Create a new fill layer (I called it "roughness cavity") and enable only the roughness and height channel. Set the roughness to 0.7 and the height to -0.01. Now create a black mask and setup it as follow :
– Add a fill effect with the "Fractal Sum Base" noise, set it’s min/Max setting to 9. Set its tilling to 20 and it’s projection mode on "tri-planar". I also changed the hardness to 0.94.
– Add second fill effect on top, in Multiply mode with an opacity of 70. I loaded the "Perlin Noise zoom" in it and set it’s tilling to 80 and it’s projection on "tri-planar".
– I finally added a paint effect to mask out in black the border of the UVs (mostly the neck connection in my case).
You should get something like this :

We can now attack the specific details. This time it’s the lips.
In order to make the control over the lips easier, I started by creating a new group and used a global mask on the group itself. As you can see below. I also used a blur filter on this mask to smooth it a bit more than what I already painted.

Fill Layer : Base
– BaseColor = RGB – 0.541, 0.144, 0.108
– Roughness = 0.35
I added two fill effect on this layer :
– Fill effect 1 : "Grunge concrete" (Balance 0.72, Tilling at 22) with only BaseColor enabled (set to Multiply mode with an opacity of 30)
– Fill effect 2 : "Directional Noise" with only the Height enabled (with an Opacity of 12)

Fill Layer : Lips Height
– BaseColor and Height = Directional Noise
Tilling set at 8 and Rotation of 90 (to fit my UVs). Set the BaseColor to Overlay blend mode with an Opacity of 15. Then set the height Opacity to 5. Then I added two filter, first a blur with an intensity of 0.22, then a warp filter. With an intensity of 32 (divided by 1000). I also set the warp blur to 1.87.

Layer : HSL (drag and drop it from the filter section of the shelf)
– Hue : 0.5
– Saturation : 0.51
– Luminosity : 0.53
I use this HSL layer to compensate from the loss of luminosity that happened with the previous layer.

Fill layer : Colors
– BaseColor : Noise "Clouds 1", Blending mode Add/Sub, Opacity 5.
I set the tilling to 8 and 1 to stretch the noise. I also added a warp filter to alter a bit the noise globally (with an intensity of 2.7, divided by 1000).

Fill layer : Top Colors
– BaseColor : 0.783, 0.348, 0.308. Blending mode "normal", Opacity at 20.
Another fill layer, this time to brighten the borders of the lips.

Fill layer : Cracks
– Height : -0.06.
Last layer for the lips, this time to sculpt some surface cracks/details.
Here I just enabled the height channel and added a black mask to the layer. Then I added a fill effect in the mask and loaded the "Gaussian spots 2" noise. I set the tilling of the effect to 16.

Let’s go for the details of the eyes. Again, create a new group. Take the time to set the blending of all the channels of this group to "Pass Through" since we will be doing color modification over what is already existing.
Fill layer : Lacrimal
– Base Color : 0.531, 0.112, 0.074
– Roughness : 0.25

Fill layer : Border color
– Base Color : 1.0, 0.0, 0.0. Blend mode "Normal", Opacity at 25.
– Roughness : 0.3

Fill layer : Crease
– Height : -0.11
On this layer, I used the mask to paint wrinkles below the eyes. I also a the "Cotton" brush preset along those lines to add more details. Then I applied a blur filter to mix all those details together (Intensity of 0.2).

Fill layer : Shadows
– BaseColor : 0.144, 0.003, 0.026. Blending mode "normal", Opacity at 50.
– Roughness : 0.3
Simple mask hear, I used the default soft brush to paint a shadow on the side of the nose and the inner corner of the eyes area. Once again, I used the blur filter on that mask to soften it up a bit.

The hardest part for the eyebrows is to find and tweak a good brush to give the right feeling to the hairs. I just created a fill layer with an uniform color and then added a black mask. For the mask I used a mix of some brush presets in it, such as "Fibers 3" or "Sandpaper". Then I added two filters on top to give more details. I started with a blur filter to smooth a bit the painting and avoid some aliasing, then I added a warp filter on top to add some variations. It gives me something that look like this :

Next step to get more variations and details is to add spots on the cheeks. Same process, I create a fill layer (BaseColor 0.341, 0.031, 0.031 with an opacity of 50). Then I add a black mask and use the "Sandpaper" brush to pose the base of the area. Over the painting, I apply the "Gaussian spots 1" noise in Multiply mode, then use a level to boost up the contrast. Finally I add a second noise, this time the "Grunge Dirt Dried" but still in multiply. Don’t hesitate to tweak the contrast and tilling of these noises to get the feeling that you want.


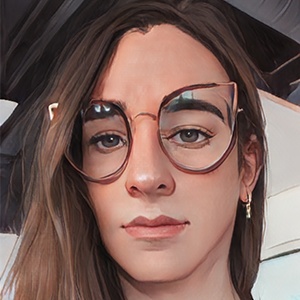
Now we just need to add a sharpen filter on top to boost a bit the details of the BaseColor and Roughness channels. Here is my final result in Substance Painter itself and then UE4 :


