Cleaning, Beams and Post-Process
Exil Dev-Blog 6
February 27, 2013
A new month means an new dev-blog. So what is new since January ? 🙂
(A lot of chat and not many images this time, sorry.)
A spend a bit of time cleaning and rewriting some code of the core gameplay. Mainly rewriting properly the climbing detection functions. There is still some errors that I have to fix but now my code is more modular than before, so it’s easier to manage and fix any possible problems. Visually nothing change, the gameplay is still the same for the player.
The most recent change in my code, and also the most recent addition to the gameplay of EXIl, is the input controls. Previously, I was not updating the inputs regarding the character direction, which was quite confusing when you get inverted inputs in certain case (like Lena facing the player, you put the stick to the left and Lena goes to the right). So I took the time to convert these inputs regarding the camera location and the character facing direction.
The first step was to determine where the camera is, I expected this part to be complicated, but in fact I solved the problem with two dot products. The first dot product compare the vector from the character to the camera and the vector used by the character direction. This way I’m able to know if the camera is in front on in the back of Lena. Same process for knowing if I’m at left or at right. I merge then both data to know where I am.

I had some trouble in the past to really understand what a dot product does (also known as "scalar product"), but it magically becomes more clear during the past days. So I took this opportunity to also update the head AIM of Lena. Lean now turns her head (and a bit of her torso) to look where the player camera is looking at. It’s really a nice touch to make Lena more alive and synced with the player.
Last thing : I have also linked the Field of View with the camera. Now when you look up or down, I move the camera and change the FOV value (a simple Vertigo effect) to increase the depth and the verticality feeling. Currently the change is obvious since the speed of the change is not related to how fast the camera moves. It’s just a little tweak to do. Of course, I have created a setting in the configuration files to disable this effect if the player don’t want it. I believe some people may feel sick with it.
That’s by the way an example of how many effect you can enable/disable. I plan to let a lot of options freely toggeable, because I want the player to not be forced the receive certain effects that can make them sick (like the camera rolling when your health is low).
The most recent work I have done/that I’m doing is the beam walking system. While most of the climbing system is almost done (still some corner rotations to add), I found that a strong movement was missing : the ability to walk on beams. Beams are a nice way to make linear paths and still be enjoyable to use. Mostly because you feel powerful to be able to stay balanced and you move fast.
Multiple games offer the ability to walk on beams, however I limited myself to Prince of Persia, Tomb Raider and Assassin’s creed. Assassin’s Creed stands out compared to the two other because in this series the player moves freely on the beam, while In Pop/Tomb Raider the movement is much more slower and you have to be careful to keep yourself balanced (to avoid falling). Same idea, different gameplay mechanic. It was a logical choice for AC because the developer wanted to keep the feeling of the fast flow that you have when you move in the levels, while Pop/Tomb Raider are much more slower (they favors the exploration).

I must admit I prefer the AC design, mostly because in the other games you are being slowed. Keeping you character balanced feels annoying : why can’t you be well balanced on a beam when the player is already capable of strong and impressive acrobatic movements in the rest of the game ? The prince of Persia can run on walls, climb ledges and is never tired. Same thing for Lara Croft, she is strong and enduring (she run the whole games). Then a beam appear and you lost your abilities. These characters are not afraid of the verticality and don’t feel the dizziness, so it doesn’t feel right for me. Meanwhile, walking on beams in AC doesn’t mean taking risks. When you stop the character stays crouched on the beam.

I’m still working on the system, currently you can only move along one axis. I’m coding the jump from one beam to an other one. Then I will program the rotations, to go along multiple beams interconnected. That’s why I decided to update the inputs based on the camera, this will make the movements easier on the beams. Of course, the beam detection is procedural to make the level design easy to update.
To allow the player to jump from one beam to one another, I decided to use the Root Motion technique. This means that the movement of the player is driven by its animation and not by the code. This allow me to decide the timing and be precise without worrying about vectors and speeds in the code (because I really suck at maths). The only thing I need to manage is the animation itself. Since the jumps are always done with a precise distance, using animations is not a problem.
That’s the theory, in practice I meet some problems. First, the physics : my custom states for climbing ledges and walking on walls/beams use the physics PHYS_Flying, which means that the player fly and is not affected by the gravity. It’s the first time I work with Root Motion, so I guess there is some parts that I still don’t understand (and also the documentation is outdated on this subject, so it doesn’t help a lot). The problem is that in PHYS_Flying physics, the player doesn’t move at all. You have to switch the physics to an other state which can create some strange behaviors like the player jumping but falling at the same time.
An other problem I meet was that even if I was exporting my root motion animation, the UDK was not using it. I discovered it was caused by a wrong bone. In Maya, my scenes are heavily organized under groups to keep everything clear. The problem is that the root bone must not be under a group, otherwise the UDK will import it as bone. This means that my root bone was not the first but the second bone on my chain because of the group. So I had to change this in Maya and re-export my character, which broke all my animations. This is why Lena is naked and missing some animations in a few videos.
Of course it’s only the beginning and the beam system will improves with the time.
While coding is always the worst part for me (I do it because I must, I prefer doing artistic things), playing with lighting and post-process is the part I prefer in UDK. I really like the lighting system of the UDK (yes, even lightmass). Since I was adding to Lena visual effects (like her health tattoo) I also took the time to change a bit the global post-process on the game. I created custom materials to increase the bad feeling that you have when you are hurt.
I use a mix of a stronger vignette on the screen and a global desaturation. Currently the effect is very strong (maybe too much) because when Lena has only 1 HP left, the player barely see the level. I will have to tweak some values. Still, it’s clearly an effect that I like and it gives a nice touch. I have added a little rolling effect on the camera to increase the feeling of discomfort and also a heart beat sound to give a better feedback to the player (to be obvious that Lena is in a risky situation).
So here are the effects I manage :
–Vignette (normal and increased when you health is low)
–Sharpen (give back some details on the overall screen)
–Chromatic aberration (currently very simple since I just offset a duplicated framebuffer)
–Difference (A sort of negative of the screen, but only affecting the dark parts of the screen)
–The health effect (a simple power over the screen combined with color desaturation)
–HDR Colors (Not really HDR, it’s just an effect to increase the brightness of the light areas of the screen without ugly bleedings)
On the top of that I tweaked the bloom settings. I decided the change the bloom to make it less strong but more large. With light red or white it gives a nice and warm feeling on the scene.


The difference effect is only used during the "pause menu" which is currently only a message. Once I will have time (mostly after I finish some game mechanics) I will program the ingame menu.
While I was working on the post-process materials, I discovered some funny effects (mostly while working on the sharpen), little example :


Another thing I have worked on was the tone-mapping. The UDK can manage HDR rendering but doesn’t have a dynamic tone mapping. So while you can get great lighting exposure, you can’t adapt it to the amount of brightness that you get on the screen. I looked and tested a lot of techniques, but there is no way to get the average luminosity of the screen. Let me explain.
The purpose of getting the luminosity of the screen is to know if what the player see is currently flashy of dark, this way you can over-expose or under-expose the screen during a few seconds and then go back to normal to simulate the eye adaption with the ambient lighting. Sounds cool hey ? This is basically the purpose of the Half-Life 2 : lost coats demo. This demo was demonstrating this tone-mapping effect (combined with HDR color depth).
As I said just before, UDK can’t give you the overall luminosity of the screen. There is two "main" way to get this luminosity value : getting the color of a few pixels of the screen and doing an average value or reducing the screen into a small texture (aka a render to texture of 1×1 pixel). The second method works fine, until you want to get the value, there is not way at all to convert/send the pixel value to your code. Since I use the UDK tone mapper (static, this is why I want to manage dynamically myself), I need to get this value back to my code.
So I decided to switch to the second method. With the help of DLLBind, I was able to call the API of Windows and get some pixels. This method works perfectly fine in windowed mode :
![]()
Why is this method not working in fullscreen ? Well, my knowledge of the Win32 API is equal to none, but I believe it’s because in fullscreen, the desktop is somewhat not updated, which means any windows behind the Direct3D render don’t get updated. Therefore, as the Win32 API is unable to read the Direct3D render, I get black pixel colors. So what workaround can I use ? Well it looks like with the help of DLLBind I could hook the framebuffer. My idea is to intercept the Direct3D call, make a copy of the framebuffer, compute it to get the luminosity value and send it back to the UDK and my code. My knowledge of C++ is limited and my knowledge of Direct3D is equal to my knowledge of the Win32 API : none. It’s gonna be a fun challenge, ho yeaaaah !
So once I discovered this second limitation, I stopped working on it. I preferred to go back on some other tasks before spending time on any C++ codes. However, I made a video of the current effect, working in windowed mode :
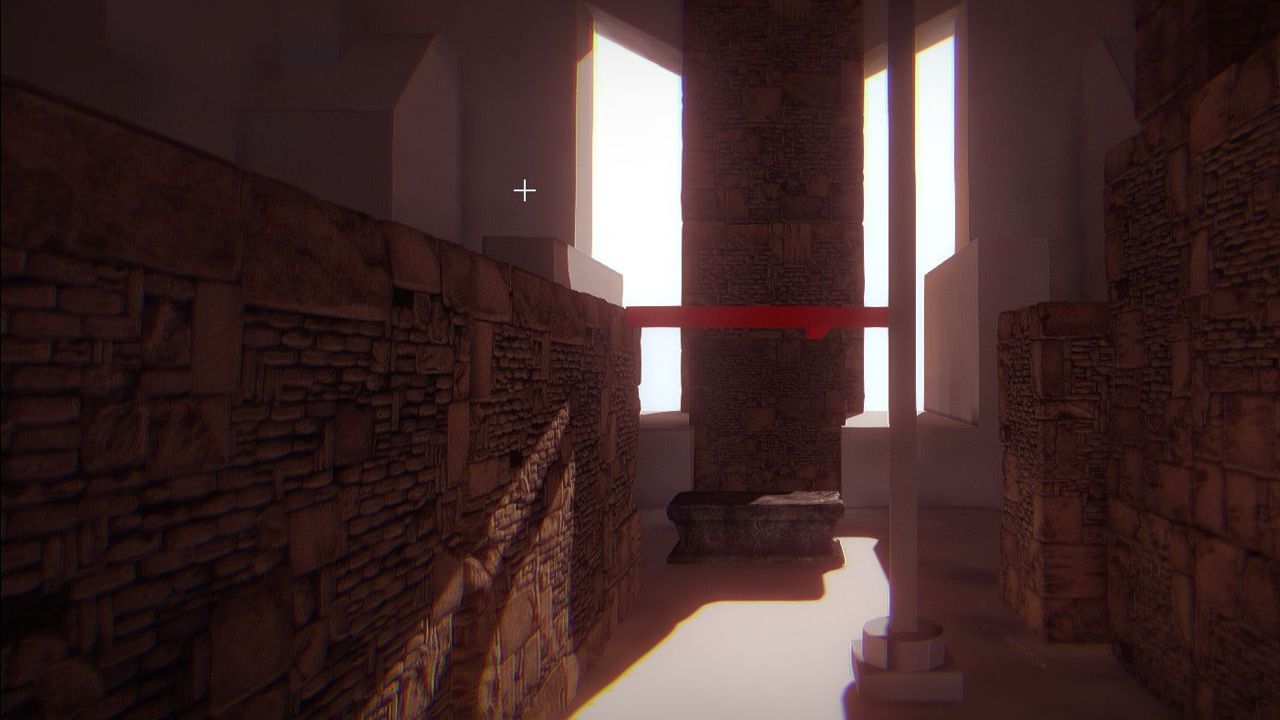
On the screenshots above, you can certainly see a new asset that I have made : it’s a brick wall. I will not explain how I made it because I already planned an other blog post which will present in details my workflow. Be patient. 🙂
What I can say currently is that bricks wall is made of 3000 triangles, with power of two units to allow the player to wallrun/climb on it correctly.


Last part of this blog-post, I would like to present a little test that I have done. While I’m hardly working the the core gameplay, I’m also thinking about the beginning of the game and its cinematic. I would like to present a character similar to a ghost, but not the classical way. Often in games when you want to show a ghost, you simply make is translucent. This is a bit boring, so a tried something new.
The idea was to only show the illuminated par of the ghost, leaving the part in the shadow translucent. I used the a custom lighting in an UDK material to compute the lighting and use it as an opacity mask, here is the result :


I use a custom light (with a specific channel) to only illuminate the ghost and combine the light vector with a little Fresnel to keep a smooth lihgting. Of course, Lena is not the ghost, it was just a test on a model with a normal map on it.