

Setting Up Perforce with Docker for Unreal Engine 4
Running a Perforce server on your NAS to version your UE4 projects easily.
Running a Perforce server on your NAS to version your UE4 projects easily.
September 16, 2018
This guide explains how to setup a Perforce server on a Synology NAS via Docker to be used with Unreal Engine 4. That’s something I wanted to do for a while and I finally took the time for it. I’m therefor writing this guide as a reminder for me but it will probably be useful for others as well.
Disclaimer:
This guide is an old and quite outdated article. I don't use Perforce anymore. I cannot provide any kind of support related to it.
I’m my knowledge of network software, IT and anything related is very minimal. Expect dumb and not secure things.
Docker is a tool that allows to virtualize systems. It creates a container which is an independent virtual machine. The main advantage is that it is quite easy to start, restart, configure and even reconfigure. I choose this format because it avoids to manually install a virtual machine to run the Perforce server. This allows to reduce the setup to minimal steps and automate most of the process. Also in case somethings goes wrong in the machine (let say a hack or virus) you can simply shutdown the process and restart it (from scratch). The maintenance requirements are therefore very limited.
The image in this case is a Linux based virtual machine, running Centos 7 at the time I wrote these lines.
Installing Docker on Windows is required for the next step. You can download Docker with the following links :
In order to install docker properly, you need to enable the VT-x/AMD-v feature in the BIOS of your computer. Modern CPUs include hardware virtualization features that help accelerate virtual machines and Docker relies on them. Refer to the manual of your Motherboard to enable the feature if it’s not already enabled.
Once ready, run the default Docker script in bash (via a command line window) :
E:\Software\Git\bin\bash.exe --login -i "E:\Software\DockerToolbox\start.sh"
The script can be found where your installed Docker and bash is available with Git for Windows. Running this command will install the bases of Docker in the system.
Keep the command line window open, we will need it later.
The modified files can be found on my GitHub repository.
The Perforce server we want to install requires some specific parameters to make it compatible with the Unreal Engine. As explained by the Unreal Engine documentation :
>
To avoid potential integration issues with our tools (such as UnrealGameSync), we recommend running a case-insensitive Perforce server.
Also if you are working on Windows and versionning files on a Linux server, the case-insensitive mode is likely mandatory.
By default Perforce will install with a case setting based on the operating system. Since Linux supports case sensitive path and filenames, this will be the default setting. To run Perforce while ignoring the case we have to do it by explicitly stating that behavior.
First we need to look for a parent image to edit. I have based my modificaitons on this package which seems to be the most popular : ambakshi/docker-perforce.
Download the "setup-perforce.sh" file into an empty folder and open it in a text editor such as Notepad++. Look for the following line :
/opt/perforce/sbin/configure-helix-p4d.sh $NAME -n -p $P4PORT -r $P4ROOT -u $P4USER -P "${P4PASSWD}"
Replace it with :
/opt/perforce/sbin/configure-helix-p4d.sh $NAME -n -p $P4PORT -r $P4ROOT -u $P4USER -P "${P4PASSWD}" --case 1
Then save the file.
We just added the command "–case 1" which is used to specify the case mode when configuring a new server. As the help of the configure-helix-p4d.sh script explains :
>
# –case – Case-sensitivity (0=sensitive[default],1=insensitive)
Next modifications are tweaks I wanted to apply on the server. They are not mandatory. The reason we modifiy the following block is because this setup is only performed when the server runs for the first time, so there won’t be any duplicate later. So try to find :
if [ "$FRESHINSTALL" = "1" ]; then
    ## Load up the default tables
    echo >&2 "First time installation, setting up defaults for p4 user, group and protect tables"
    p4 user -i < /root/p4-users.txt
    p4 group -i < /root/p4-groups.txt
    p4 protect -i < /root/p4-protect.txt
fi
And replace it with :
if [ "$FRESHINSTALL" = "1" ]; then
    ## Load up the default tables
    echo >&2 "First time installation, setting up defaults for p4 user, group and protect tables"
    p4 user -i < /root/p4-users.txt
    p4 group -i < /root/p4-groups.txt
    p4 protect -i < /root/p4-protect.txt

    # disable automatic user account creation
    p4 configure set lbr.proxy.case=1

    # disable unauthorized viewing of Perforce user list
    p4 configure set run.users.authorize=1

    # disable unauthorized viewing of Perforce config settings
    p4 configure set dm.keys.hide=2

    # Update the Typemap
    # Based on : https://docs.unrealengine.com/en-us/Engine/Basics/SourceControl/Perforce
    (p4 typemap -o; echo " binary+w //depot/....exe") | p4 typemap -i
    (p4 typemap -o; echo " binary+w //depot/....dll") | p4 typemap -i
    (p4 typemap -o; echo " binary+w //depot/....lib") | p4 typemap -i
    (p4 typemap -o; echo " binary+w //depot/....app") | p4 typemap -i
    (p4 typemap -o; echo " binary+w //depot/....dylib") | p4 typemap -i
    (p4 typemap -o; echo " binary+w //depot/....stub") | p4 typemap -i
    (p4 typemap -o; echo " binary+w //depot/....ipa") | p4 typemap -i
    (p4 typemap -o; echo " binary //depot/....bmp") | p4 typemap -i
    (p4 typemap -o; echo " text //depot/....ini") | p4 typemap -i
    (p4 typemap -o; echo " text //depot/....config") | p4 typemap -i
    (p4 typemap -o; echo " text //depot/....cpp") | p4 typemap -i
    (p4 typemap -o; echo " text //depot/....h") | p4 typemap -i
    (p4 typemap -o; echo " text //depot/....c") | p4 typemap -i
    (p4 typemap -o; echo " text //depot/....cs") | p4 typemap -i
    (p4 typemap -o; echo " text //depot/....m") | p4 typemap -i
    (p4 typemap -o; echo " text //depot/....mm") | p4 typemap -i
    (p4 typemap -o; echo " text //depot/....py") | p4 typemap -i
    (p4 typemap -o; echo " binary+l //depot/....uasset") | p4 typemap -i
    (p4 typemap -o; echo " binary+l //depot/....umap") | p4 typemap -i
    (p4 typemap -o; echo " binary+l //depot/....upk") | p4 typemap -i
    (p4 typemap -o; echo " binary+l //depot/....udk") | p4 typemap -i
fi
Lots of modifications happening here.
I added 3 "p4 configure" commands which modify a few default behavior of the Perforce server. The comments in the code are pretty self-explanatory so I won’t go into details for these. They can be found in the official Perforce documentation if necessary.
The lines following are specific to the Unreal Engine however. The "p4 typemap" command allow to define how perforce should see a certain type of files. Perforce default behavior is to automatically determine if a file is binary or text based on its content. This could be problematic if a binary file has a text header for example, it would be stored as text and become corrupted. The typemap list allow to explicitely override this behavior and define how the server should store these file formats.
The way the command is written here allows to modify the typemap file without having to open a text editor. So it’s a fully automated process.
Next step is to create a new empty file named "Dockerfile" (without a file extnesion). Add the following lines :
FROM ambakshi/perforce-server

COPY setup-perforce.sh setup-perforce.sh
COPY setup-perforce.sh /usr/local/bin/setup-perforce.sh
Then save the file.
These few lines will tell the Docker buidler to retrieve the ambakshi/perforce-server package and then to overwrite one of the files with our version instead.
Switch to the command line window we kept open. Change the currently active directory with the command :
cd The/Path/Where/Your/Files/Have/Been/Saved
Then build the docker image with :
docker build . -t=froyok-perforce --no-cache
It should print something like this :
$ docker build . -t=froyok-perforce --no-cache
Sending build context to Docker daemon  531.8MB
Step 1/3 : FROM ambakshi/perforce-server
 ---> 45136443a538
Step 2/3 : COPY setup-perforce.sh setup-perforce.sh
 ---> 3856dbf8a2a1
Step 3/3 : COPY setup-perforce.sh /usr/local/bin/setup-perforce.sh
 ---> d1bb0e01655e
Successfully built d1bb0e01655e
Successfully tagged froyok-perforce:latest
SECURITY WARNING: You are building a Docker image from Windows against a non-Windows Docker host. All files and directories added to build context will have '-rwxr-xr-x' permissions. It is recommended to double check and reset permissions for sensitive files and directories.
The security warning here is expected. Windows doesn’t have a notion of "executable" files line UNIX system do, therefore when creating an image from Windows they are marked as such by default. I didn’t see any issue on my side so I let this behavior as-is.
Now that the image has been built, we can export it as a standalone file so that we can load it on the Nas. Simply run :
docker save froyok-perforce > froyok-perforce.tar
This will create a new file named "froyok-perforce.tar" next to the Dockerfile. Simply copy it anywhere you want on your Nas system.
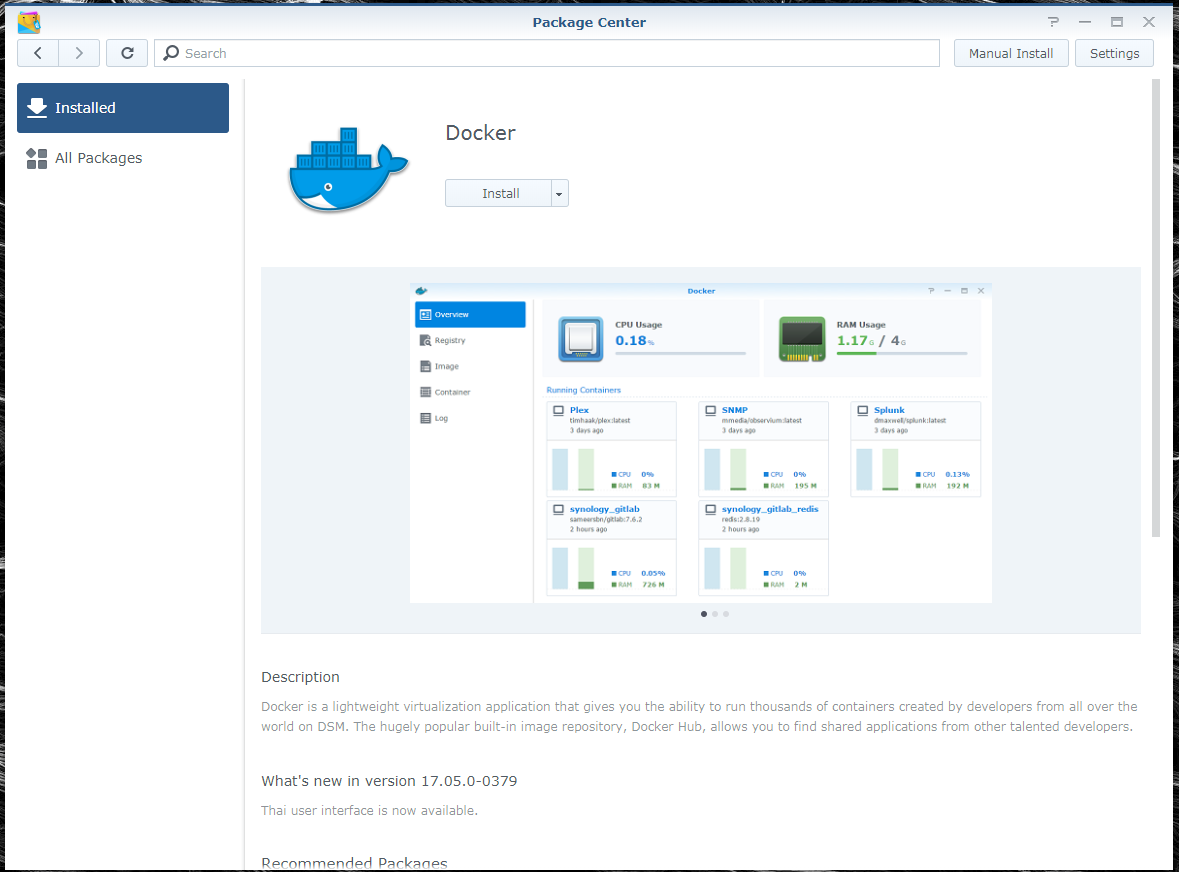
Heads up to your Package Center on your NAS and install Docker :
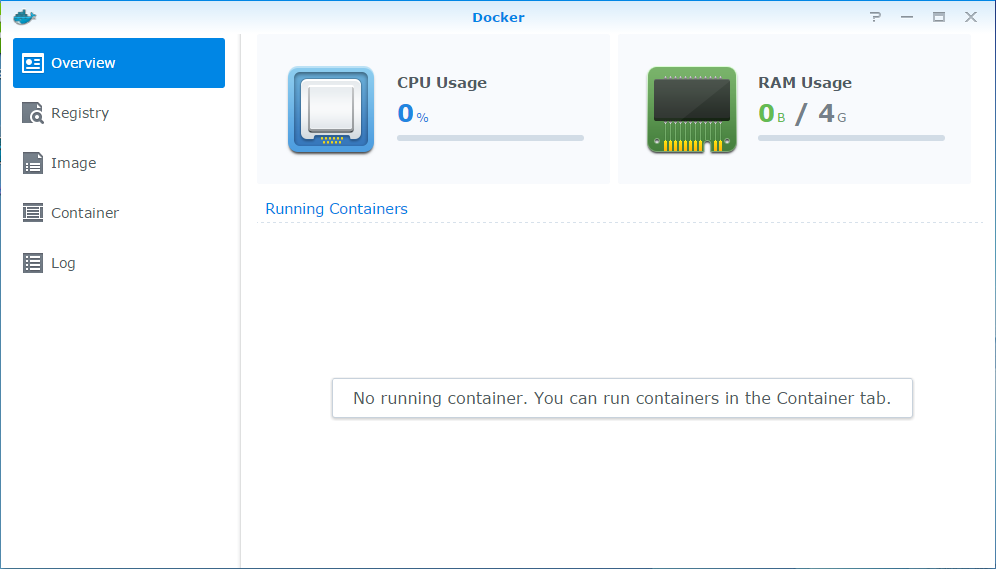
Then open the application :
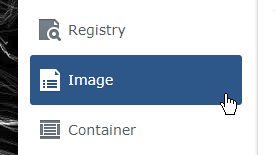
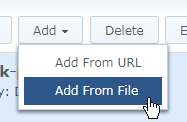
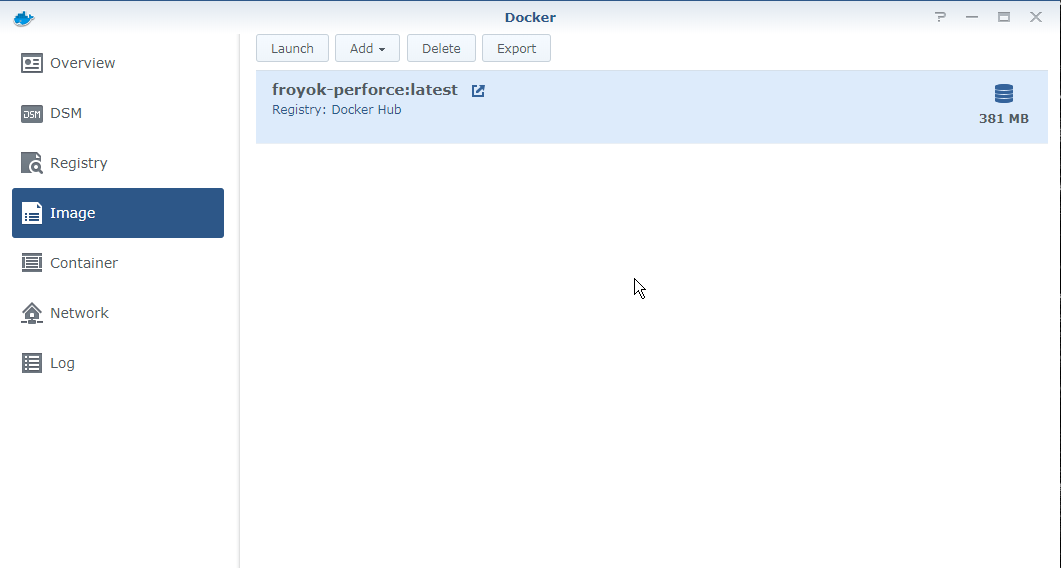
Switch to the "Image" tab, click on the "Add" button, and choose "Add from file" :
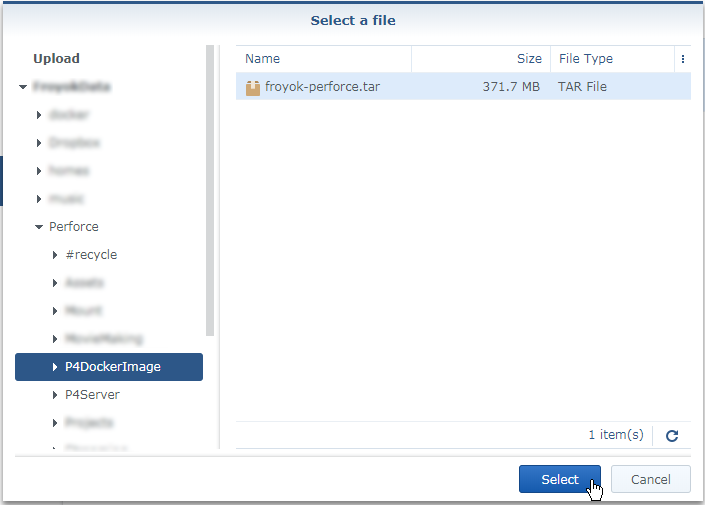
In the new dialog navigate to where the previsouly copied tar file is located and select it. Then click on the "select" button.
You should end-up with this :
Next step is to create the server. We will start by running the image setup, then go on and configure the server itself.
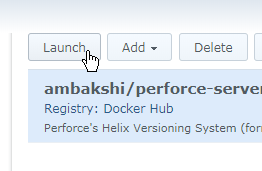
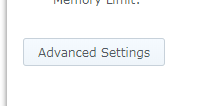
In the "Image" tab of the Docker interface, select the image we just added and click on the "launch" button. It will start the wizard for creating a new container. Click now on the "advanced setting" button in the new window.
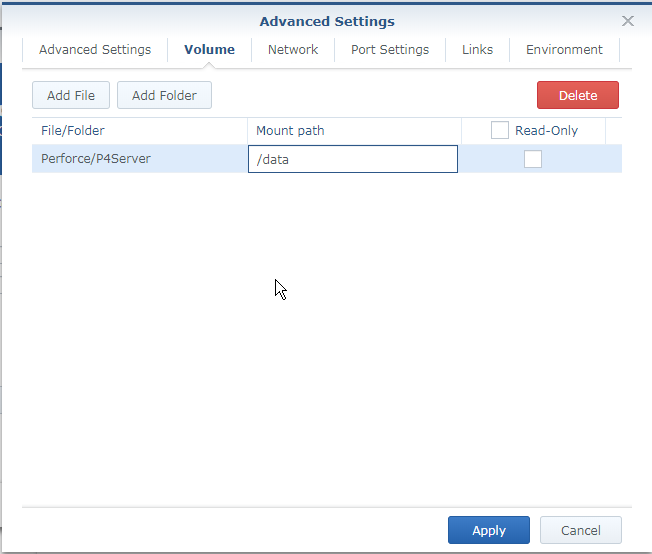
Click on the "Volume" tab and add a path where you Perforce server data will be saved. In my case I have a volume on my Nas called "Perforce" and a subfolder named "P4Server". The perforce image will internally store data into the "data" folder, so this is where we want to mount the Nas path into.
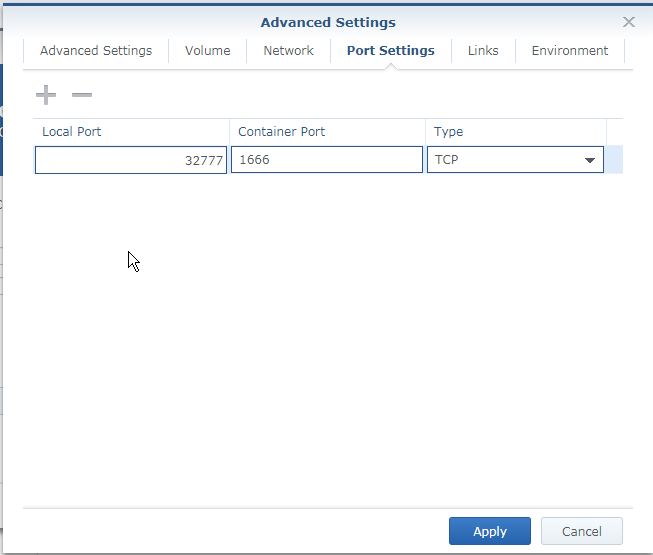
Next, click on the "Port Settings" tab and change the default "auto" field to a fixed port. In my case I choose 32777. If this setting stay on auto it will change each time the contained is restarted. If you don’t know which port to use, let it set to Auto, start the contained and look at which port has been chosen by the system. You can then manually change this setting later.
Click on "Apply", then "Next". Keep the "run this container after the wizard is finished" enabled and choose "Apply" again. The container will be created and automatically started. Switch to the "Container" tab now and double click on the "froyok-perforce1" container (if you didn’t change the name). It should open the details :
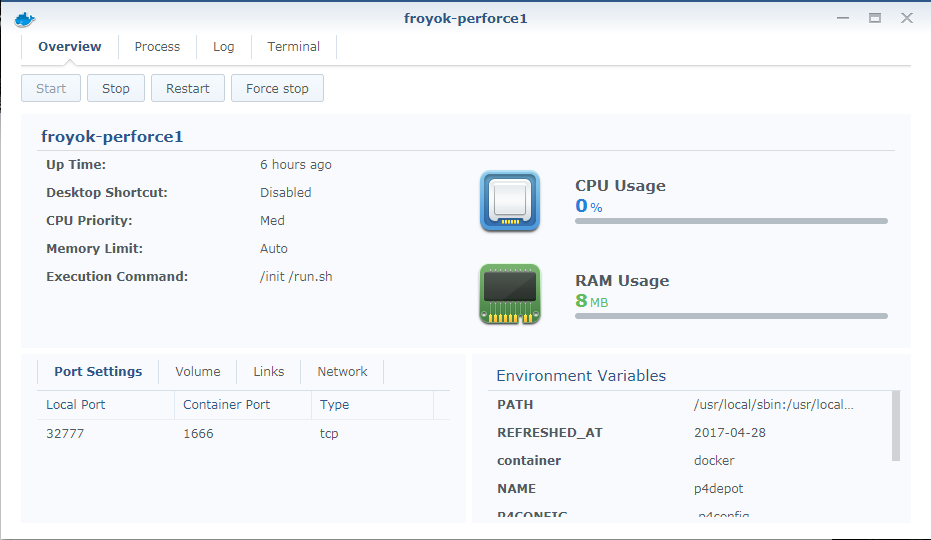
If you take a look at the log, you will see a few warnings, such as the password being let to the default value. This is what we are gonna change in the next step.
***** WARNING: USING DEFAULT PASSWORD ******
+ echo 'Please change as soon as possible:'
Please change as soon as possible:
+ echo '   P4PASSWD=pass12349ers!'
   P4PASSWD=pass12349ers!
+ echo -e '\n***** WARNING: USING DEFAULT PASSWORD ******\n'
***** WARNING: USING DEFAULT PASSWORD ******
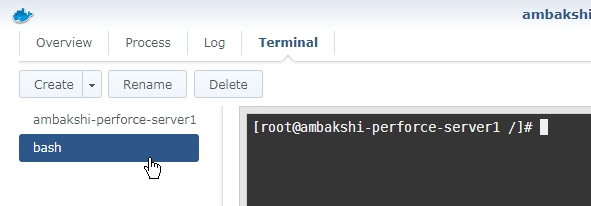
Now that the server is running, we can quickly check its information. Switch to the Terminal tab and click on the "Create" button which should launch a "bash" terminal.
Type the following command :
p4 info
This could should print in the Terminal something like this :
[root@froyok-perforce1 /]# p4 info
User name: p4admin
Client name: froyok-perforce1
Client host: froyok-perforce1
Client unknown.
Current directory: /
Peer address: 127.0.0.1:43127
Client address: 127.0.0.1
Server address: localhost:1666
Server root: /data/p4depot
Server date: 2018/06/30 17:40:50 +0000 UTC
Server uptime: 05:20:16
Server version: P4D/LINUX26X86_64/2018.1/1660568 (2018/05/09)
ServerID: p4depot
Server services: standard
Server license: none
Case Handling: insensitive
[root@froyok-perforce1 /]#
As you can read on the last line the case is set as "insensitive", which is what we wanted.
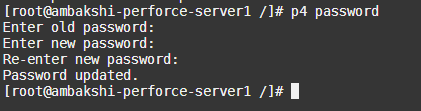
The next step is to change the password for the root account of the Perforce server (p4admin). Type the command "p4 password" in the terminal. Since we are logged as root in the console it will ask to change the password for the root account which is the one for the Perforce server. Change the password by typing the old one (can be found in the current log of the bash script, see the file setup-perforce.sh).
>
Note : because the server data is saved in "/data" which we mounted to a path outside the container, any modification of the server will remains after a restart of the container. These data are then reloaded when the container restarts.
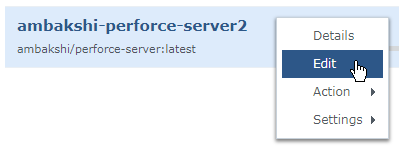
Once this is done, close the window and stop the container in the "Container" tab. Then right-click on it and choose "Edit" :
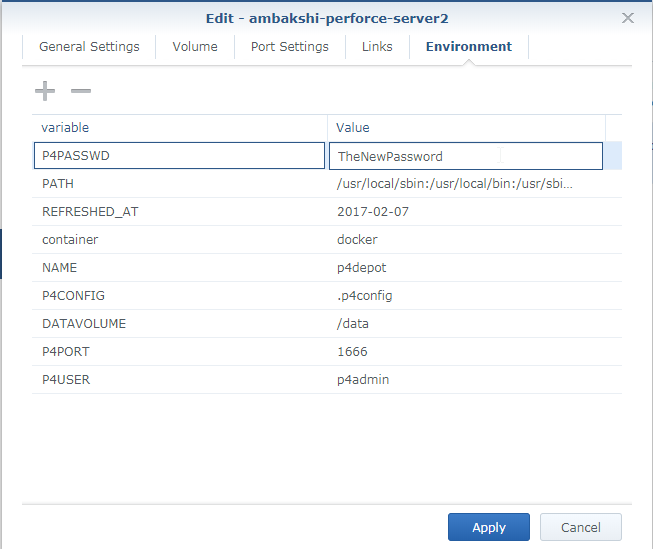
Switch to the "Environment" tab and click on the plus (+) button to add a new environment variable for this container. Add "P4PASSWD" and set its value to the new password that you changed at the previous step. The idea here is that when the container starts, it will look at the environment variable we just set for the virtual machine to login and launch the server with the new password.
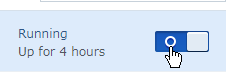
Apply the change and restart the container. If everything goes well, it should be running without stopping. If you take a look at the log, it shouldn’t mention the warning anymore.
Let’s add our first user, because we don’t want people to login as the Perforce admin (p4admin).
As in the previous steps, open the details of the currently running container and switch to the Terminal tab to create a bash terminal.
The first change I made was to disable the automatic creation of new users. Perforce’s default behavior is to automatically create users when they first log into Perforce, if they don’t currently exist. Therefor use the following command in the bash terminal to disable this behavior :
p4 configure set dm.user.noautocreate=2
Then I created my new user "froyok" with :
p4 user -f froyok
I changed its password :
p4 password froyok
(This will prompt you to enter the account password twice in the Temrinal)
And finally added the user to the default group which has access to the depot, so he will be able to commit files and changes :
(p4 group -o p4users; echo " froyok") | p4 group -i
(Notice the space before the username)
Finally you can type "p4 users" (plural) in the terminal to check if your user has been properly added :

You can download the perforce client software here (I used version 2017.1).
Once installed, launch it. It should prompt the "Open Connection" window :
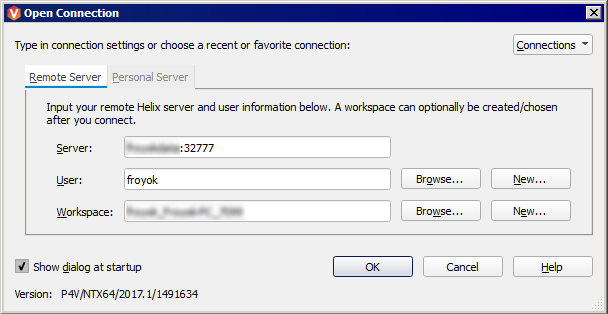
As you can see :
>
Note : If you wish to connect to this server outside of your local network, you will have to use port forwarding on your router. This won’t be covered by this article as there are many examples available elsewhere.