
OMBRE Dev-Blog Year 3
Struggles, Steam Audio, basic particles and a bit of user experience
Struggles, Steam Audio, basic particles and a bit of user experience
November 30, 2025
It's November, which means it is time for another year long recap of the development of my own game engine. I'm a bit late compared to the anniversary date (November 5), but this year has been hectic for me.


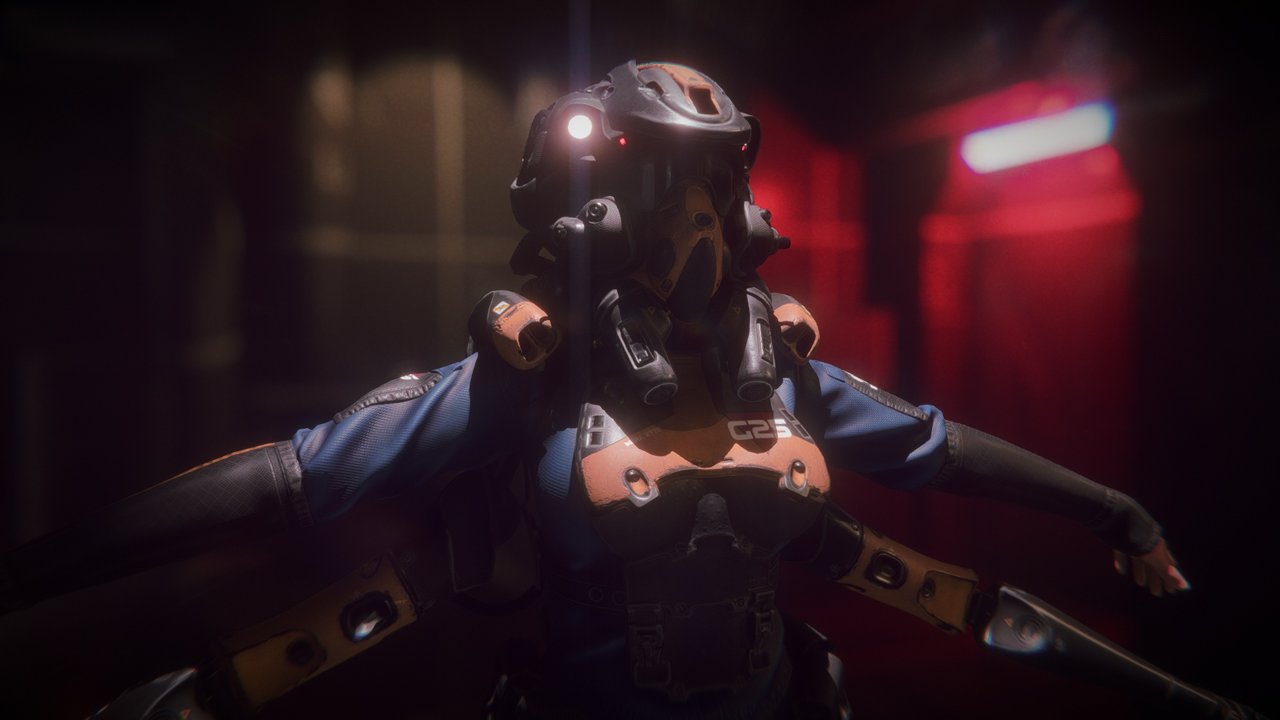
(The Ombre engine in 2025.)
If you are interested, you can check the previous years before jumping into this one:
If you want to follow the day to day progress of my work, you can also check out:
- My threads on Mastodon: thread 1, thread 2, thread 3
- My thread on Bluesky: thread 1 & thread 2
- My dev-blog on the Graphic Programming discord server
- The wip channel on my own discord server
This year can be summarized in a single word: struggles.

I'm not happy, clearly.
I had a lot of setbacks and generally feel like I didn't make much progress this past year. This is exacerbated by the long pause I did after July.
While I really like Love framework, I'm starting to hit some of its limitations pretty hard and I had to abandon some ideas. Workarounds are becoming a bit tedious. I considered several time dropping it and moving toward an even more custom solution, like building my engine with SDL now that SDL_GPU is available. However I know this will be another huge challenge to overcome if I do that and while the engine architecture is still being worked on I don't think it's the right time.
Steam Audio integration also took its toll. It's a great solution with some nice flexibility in how to manage some things, but it requires to do quite some work to make it performant (notably by using separate threads, which raised the complexity of the engine). Combine this with a codebase that has been growing and required even more refactors and you end-up in a situation where things are much more difficult to manage and progress is inherently slow.
As a consequence, several times this year my motivation stopped. I experienced several creative burnouts, followed with some issues in my personal life.
The end goal has become blurrier and my vision for the engine feels less precise than before. Likely because my future tasks aren't as well defined as those I did in the past. I probably need to sit down and have a think or two about this.
I don't want to abandon the project, it's my most ambitious one, but I also feel like I need a break from it. The creative itch is still here, but recovering is proving to be more difficult than usual.
Not everything is gloomy however, I'm still happy about some of the progress I made.

(My happy face, sometimes.)
Notably the video showcase I made for the Graphics Programming community event:
I have been longing for a video showcase of the engine, and while I'm already dissatisfied with the result, at least it forced me to "ship" something out. It is good enough in my eyes, even if I feel it could always be "better".
So what are the topics I "achieved" this year ?
As always, there still are a lot of things to do.
If you are curious you can take a look at the roadmap I regularly update over here.
The listing below roughly covers development events from November 2024 to November 2025 July 2025.

(Better take notes !)
(November 3-4)
Moving on from the cubemap blending, I'm looking at how things are set up and added back some transparent materials in my test scene. That made me notice a new bug:
![]()
(The broken light through a glass.)
After digging around for a few minutes I figured out the problem: since I reworked my shadow volumes to the bitmask buffer, I didn't take into account that transparent surfaces should ignore that mask (since it is only based on opaque geometry).
To fix this I added a uniform in the shaders to specify the current rendering state (something like "IsTransparent"), which I use to ignore the bitmask (and the SSAO as well on cubemaps reflections).
It's not ideal, but okay for now since I didn't want to introduce a real "state" variable into my global structure that I feed to every shader (which would have required updating it before rendering transparent objects). I added it on the todo list for the future.
Specular reflections from cubemaps seem also very faint and I'm not sure if this is expected, they are still there at least.
(November 6)
Following some other rework I noticed that missing materials would raise an error and crash the engine instead of using the fallback material.
This was following some recent modification to lazy load resources on demand (instead of loading all the materials all the time on startup). That was easy to fix fortunately:

I also checked a bit further specular reflections related to cubemaps and it seems to be the expected result:

(Faint reflection of a bright emissive wall behind the camera.)

(The same behavior can be observed in Substance Painter.)
In the example above a bright studio light intensity is clipping in the background but not in the reflection, which means its intensity is lower. I presume this is because of the fresnel attenuation.
I also noticed when I fixed cubemaps I went a bit too far and removed the SSAO for all the cases, not just on transparent objects. Oops...
(November 8)
While looking into what I could work on next, I was wondering about portals and decided to run the game Portal and do a RenderDoc capture to see how they managed it (even if I had already some notions).
Of course if you are curious and want to know more about this subject, I recommend this really great video directly from Valve developers:
Anyway, from what I saw in Portal 1, the rendering process is roughly as follows:

(The back of the portal is rendered, initializing the stencil buffer at the same time.)

(The scene is rendered, masked by the stencil.)

(The particle effect of the portal is drawn afterward.)

(This shows that the far away Portal is drawn last, inside other portals.)
So this is a simple recursive loop in terms of logic, which seems easier to manage. I wonder how it works with more complex situations however (like with refraction or transparent surfaces).
(November 10)
In a follow up to my explorations in Portal, I wondered about doing a RenderDoc capture of the game Prey as well (the one from 2006). I figured out a way to make it run on Zink (OpenGL over Vulkan), which allowed me to do a capture:

It looks like in Prey they use the stencil but draw the inside of the Portal first, then draw the rest of the normal scene. Since the portal mesh draws into the depth buffer, that handles automatically the masking of the rest of the scene "for free".
For anyone curious, I had to enable a few environment variables to make sure the Zink driver would load on my Linux:
LIBGL_KOPPER_DRI2=1 __GLX_VENDOR_LIBRARY_NAME=mesa MESA_LOADER_DRIVER_OVERRIDE=zink GALLIUM_DRIVER=zink ENABLE_VULKAN_RENDERDOC_CAPTURE=1 %command%
(For Steam command line.)
(November 11-12)
Okay so the next topic I decided to look into is reworking my Depth of Field post-process. I have been very unhappy about it a while now, notably the halo effect around in-focus objects in front of out-of-focus areas.
The first step was simply starting all over. This time I decided to simply use GPU Zen 1 method from start to finish:

I got something running pretty quickly, as the code (and the article accompanying it) are pretty straightforward.
However, I wasn't happy with the bokeh pattern, it had some obvious flaws:

Fortunately hooking back in my own kernel pattern for the bokeh shape wasn't too hard. However the focus transition looked quite harsh:
So that's when I started to tweak away from the GPU Zen implementation and started to plug back in some of my own tricks (from stuff I read elsewhere):
While not as perfect as I could like it to be, it at least got rid of the weird white halo artifacts I had been having for a long time.
Tweaking stuff even further made me get better transitions:
I don't remember what I tweaked here but it made the DOF... fluffy ?

Of course since I'm using my own bokeh shape, it means the heart pattern is still available !

(November 14)
Today I was looking into ways to make my DOF resolution independent, which means in practice that I need to adjust the bokeh size (and therefore the amount of samples) depending of the current resolution.
While experimenting with different amounts of samples, I noticed that the rendering pass was having some inconsistent render times:
So, huh ?
Why is 7x7 so much slower than the rest ? I switched to Zink, wondering if this could be some kind of OpenGL bug, and got 0.14ms for 7x7 samples. So clearly an issue somewhere with the OpenGL driver on my Linux.
Changing the bokeh size didn't change a thing, even with a scale of zero (so all samples overlapping), the rendering time didn't change.
Somebody on Discord suggested changing the compiler used by the OGL driver, so I switched from LLVM to ACO and the problem was gone (using AMD_DEBUG=useaco) !
So I guess it's a shader compilation issue, which ended-up with a non-performant pattern for the GPU ? I'm not motivated enough to look at the disassembly of the compiled shader.
In order to be able to test the DOF at different resolutions and checking if it is stable, I started to edit the engine to be able to have an internal resolution different from the current window/screen size.
I even added a little slider in the UI to adjust it on the fly:

From there it was easy to test things out empirically and adjust the samples count and the bokeh radius. I could have maybe figured out a formula for this, but I ended going with basic linear interpolation and changing the sample count depending on common resolutions. It's a bit dumb but it works.
When going below 720p things start to get visually different, but I decided to leave it as-is. The bloom and my screen space fog are a bit unstable since they are slightly dependent on the screen resolution too, but that's something I will bother looking into another time.
Not everything is perfect however: I stumbled upon some explosive bloom because of NaNs/Infinite value in some pixels after the DOF is rendered.

(Bloom makes any kind of artifacts look really cool.)
(November 15)
NaNs got fixed, which means it's time to render out new beauty shots:


(November 17)
I put a poll on social media platforms to help me decide which feature I should work on next. People could choose between refractions, portals or integrating Steam Audio. I waited 24h to get the results.
Refraction won, and because this seemed simple enough, I decided to respect the democratic choice and go with that ! :D
I started checking out how some popular games were rendering refraction to get an idea of how I should proceed.
(December 03)
I published an article to summarize everything I learned while I was investigating how some games would handle refraction:
The article is available here: Refracting Pixels

(A screenshot to illustrate the article.)
I also started to write some simple shaders and added a render path in the engine for supporting refraction in a less hacky way:
(December 5-12)
I'm changing my PBR shaders, the goal is to merge transparency and refraction.
What I want to do is to have different code paths in my shaders to choose which features I want, but without having to use if/def to enable/disable specific features. So I had to re-organize a bit some code.
While doing this, I was wondering however how exactly Filament was handling refracting and fog. Because of refraction I copy the scene color, so I need to ensure I don't apply fog twice and only apply it on the "transparent surface". So I need some kind of "layer" system to properly handle this.

(This is what my refactoring led to, that made the code much easier to read.)
After a few days I finally got something operational:

But I noticed a limitation: when refraction is too strong and near the screen borders the scene color texture clamping is visible.
My trick, which I saw in some other games, is to use mirror repeat when sampling the scene color buffer:
Now of course this is far from perfect, but it's less annoying than seeing stretched pixels.
The refraction formula is also working pretty well, I got a very nice glass ball with it:

To make iterations easier I also took the time to work a bit on the UI to expose the material settings when selecting an object:

(December 13-14)
Trying to merge the refraction properly into the rest of the PBR shading wasn't as easy as I thought. I'm still struggling with how I should make it work with the fog property.

(The window and the ball shouldn't be this bright when refraction is enabled.)
Here I only output the refraction layer, so I should only see the scene color and nothing else, and yet...

Basically Fog is applied afterward over everything blended together and not just on the Diffuse + Specular layer isolated from the refraction. I'm not sure why, I would have expected the refraction to already have fog applied to it (since it's based on a copy of the scene color that happens just before rendering the object displaying the refraction) but doing so result in the refraction being too bright.
I'm not able to make sense of it, so I ended-up putting a comment in the code and moving on.
Adding the support of absorption, aka tinting, wasn't very hard since I got refraction already functioning:

Also I'm thinking I could have an automatic switch between screen space and cubemap based refraction depending if the roughness is different from 0, this way I could get rough refraction more easily and it would be cheap for small objects instead of using a fullscreen blur.
I would have to find and hook the nearest cubemap for this, so that would mean extracting that info when I iterate over the nearby cubemap for the specular reflections. I don't think it is worth it yet given the state of my code, so not until I switch to tiled/clustered rendering.
(December 15)
Another strange bug I noticed is that an IOR value greater that 1.0 would lead to some strange warping:

Playing with some Shadertoy online, I could get similar results, so I wasn't sure what was going on... until I noticed that my Air/Material IOR equation was inverted. Oops.
Complaining about it made me learn something new at least:

(From Mastodon)
Once I fixed that, I finally got a convincing result when playing with the right values:


From there I decided to finally close that topic and bump the engine version.

(Me after finally closing a chapter.)
(December 16)
After seeing some messages passing by about non-uniform scaling (dark stories about the Adjugate of transformation matrices), I decided to integrate some of that code in my own shaders to fix that common problem in my engine as well (based on IQ shadertoy):


(Left is before, right is after: notice how the shading changed.)
The difference is night and day !
(December 18)
I was going to look into Steam Audio, but got distracted by some old CryEngine slides from Crytek (about the game Crysis 3). Notably the fact that they had a bright ambient light in their scenes and faked ambient occlusion by manually placing lights with negative contribution:

On paper, this is pretty similar to what I'm already doing with my fill lights in Ombre. So why not extending the principle to make ambient occlusion lights ?
So I decided to create a new kind of point lights which are drawn in screen space with a simple post-process pass that reads the depth buffer and gets multiplied into the SSAO result.

(It didn't immediately work of course...)


(Before and after adding an AO light.)
Right now I went with point/sphere areas, but I'm thinking I could expand it to other kind of shapes (like boxes).
(December 20-26)
The past few days I have actually been looking into another topic instead of jumping to Steam Audio. Working on the AO lights made me wonder if maybe a cheap but well localized Global Illumination solution could be possible for my project.

(Meme courtesy of the folks from the Graphic Programming discord server.)
The reason why I'm interested in some kind of dynamic GI is to be able to switch off lights and combine it with dynamic shadows from objects (for example doors). Hand placed fill lights work very well but they can be tedious to use when you need to animate stuff.
I'm looking into Light Propagation Volumes and Voxel Cone tracing so far, both techniques have interesting properties. Voxel Cone tracing (VCT) seems to be the most appealing to me.
I checked out SEGI, which is a Unity based implementation of the original VCT technique with some additional tweaks. I had to install Unity 2017 (on my poor old laptop since I wasn't at home) to make it run however.

(SEGI Unity project running on a GTX 1060.)
In the demo you can throw some objects around, because they have pure colors they act a bit like emissive surfaces. I found it to look a bit odd sometimes, but I guess it's a matter of tweaking stuff.
I found that 3.9ms on laptop with a GTX 1060 isn't too bad to be honest, and the scalability settings are interesting since SEGI uses cascades of voxels instead of a just a single fixed grid. I can see the cascade transitions however with an open ended level like in the demo.
The issue I see with VCT is how could I make it work with Portals ? Maybe I could renders the portals first, then inject the result into the voxel scene as an emissive surface ?
I also found another example of someone that implemented VCT. I'm really impressed by how good the metallic surfaces look like in it.
(December 31)
I found another example of Voxel Cone Tracing in an engine on Github which features a lot of interesting technical details.
The project on Github: IDKEngine
There are binaries available, so it's nice to be able to try out a live demo.
(January 2-6)
I continued to play a bit with the IDK Engine, tweaking settings to see how VCT would react and if it was suitable for Ombre. I find it very cool and promising, despite its flaws.
Unfortunately it's a bit complicated to make it work in Ombre, because I'm missing some graphic API functionalities in Love. I'm missing the support of imageStore in fragment shaders, which is key to have a way to quickly fill and update the voxel representation of the scene around the camera.
Another way is to render the scene several times, as slices, by adjusting the near/far clip planes. That's a lot more expensive since you need to render the scene quite a lot of times.
But while digging around I found an interesting paper: Optimizing Surface Voxelization for Triangular Meshes with Equidistant Scanlines and Gap Detection
This paper presents an efficient algorithm for voxelizing the surface of triangular meshes in a single compute pass. The algorithm uses parallel equidistant lines to traverse the interior of triangles, minimizing costly memory operations and avoiding visiting the same voxels multiple times.
Also it's a very fresh one, it was published in September 2024 !
(January 8-9)
Digging further into the research paper I previously mentioned, I saw a few traps in it. So I went with building a simplified (and linear) CPU based version first to figure out the algorithm.
To this occasion I decided to rewrite the way I do my debug drawing. Until now I would do an immediate draw of box, lines, sphere, etc. This is not ideal because it would hijack the regular render pipeline and create a lot of performance issues (because of the shader state change).
So I'm going with lists that are filled during the current frame, then drawn at a later point, then cleared once drawn. This way it's even easier to tie them up to only the editor rendering part.
I also simplified the functions to create those debug objects:
DRAW.AddLine(
    0, 0, 0,  // Start
    0, 2, 0,  // End
    0.025,    // Width
    1, 0, 1   // Color
)
Which gives:

So it's pretty easy afterward to build more complex shapes:

Note however that each line and sphere (at the corners) here are a separate drawcall, I didn't try to batch/instantiate them. I kept it simple since I will use it only for debug purpose.
Also somebody asked if I was considering using distance fields instead of voxels, but I don't see how to build the SDFs data without having to voxelize the scene first. So that's why I'm going with VCT still for now.
Plus, wouldn't it be cool to be able to say "Unreal dropped this, I picked it up !". :D
Back when UE4 was freshly announced they were still using VCT (before it got removed):
(You can learn about all their trick in their old SIGGRAPH presentation by the way.)
I never had the chance to try it out, when I joined their private beta it was already gone.
(January 11)
I hate that freaking research paper.

The more I dive into it, the more I see stuff that isn't properly explained. I have to take a lot of guessing, which I don't like very much.
I'm almost tempted to just write my own implementation based on the rough idea behind the paper instead. But fuck it, I think I'm just gonna go and render slices instead for now and will revisit it later. I don't want to get stuck on the voxelization step for weeks.
(January 14)
Grumbling and stuck in one of those "I don't know how to move forward" phase. Basically I can't decide stuff because the possible trade-offs I'm seeing aren't satisfying, so instead I'm doing nothing.
(January 17-18)
Almost no progress. I'm working a bit on some code to figure out which meshes in the scenes are inside a specific volume. This is what will decide what should be voxelized around the camera.
However adapting my frustum culling code to do this is resulting in some bugs.
The volume is 10x10x10 around the camera, and the yellow highlight is for meshes that are marked as "inside" the volume.
After a few iterations I figured it out fortunately.
On another note, kind of as a distraction, I uploaded on Github a small project based on Love2D that shows my current implementation for rendering Bloom: https://github.com/Froyok/Bloom
(January 19-20)
So I'm going with rendering the scene as slices for now. That means a lot of drawcalls.

("Rookie numbers !")
But of course, they render nothing, it would not be fun otherwise. After checking a bit I figured they were drawing behind the camera, so it was an issue related to my view/projection matrix.
Once I got it drawing, I made up a basic debug shader to draw all the slices by reading the volume texture I'm drawing into:

As you can see, they aren't quite aligned. I'm not sure yet why. I started manually shifting it for now to see how it updates. The first results are pretty cool:
I tried increasing the resolution as well, but it looks like I couldn't do a 1024x1024x1024 pixels volume texture. So I settled on using 768 instead (which seems to be eating 3950 MB of vram !).

(Voxels make you appreciate curves.)
I also tried making the update across several frames instead of a single one:
Clearly this won't work well for dynamic stuff, but for building the static geometry that looks reasonable. For dynamic stuff I'm thinking of using approximate shapes like cube, sphere, capsule, etc. which I would inject directly into the 3D texture via compute. So I could even do it in one drawcall (at the cost of having two copies of the volume texture, one for the static scene, and one with everything together).
(January 21-22)
I mostly tweaked the Bloom demo I posted on github after some folks pointed out some bugs (and then integrated the fixes in Ombre).
(January 23)
Today's internal thought process:
_ "Hmm, I still wonder why my LookAt with the voxel rendering is behaving weirdly..."
_ "Ho, in GLM the cross product of the up vector is Side x Up while mine is Up x Side."
_ "Okay let's fix this, it probably doesn't matter."
Result:

(Everything is now upside down...)
It's even funnier when you check out the comment above that single like of code:

So yup, adding a new comment to say why I'm once again flipping a value here when building my matrix via my LookAt.
(January 26)
After cleaning up a bit my code I finally hooked back the LookAt function and decided to check out the voxelization results. It looks like I also fixed my weird Orthographic projection bug being shifted with that recent change. I have no idea why I never noticed that issue with the regular camera (perspective projection).
After that I started to render the other axes for the voxelization, however debug visualization for it isn't super easy as-is:

(January 31)
I'm struggling making progress forward once again. I need better visualization for my voxel stuff, but raymarching/rendering cubes to view the volume texture seems a bit annoying to setup and I don't want to spend time on that.
So I'm thinking of pausing the GI stuff, because otherwise I feel I'm gonna stay stuck for too long.

(Another time, maybe ?)
(February 1)
I noticed a regression today. The voxel stuff somehow made my lights not cast shadows anymore unless the camera is inside their bounds.
At first I thought the shadow volume mesh was broken, but digging a bit more I noticed the culling was off.
This is very likely related to the LookAt and projection matrix rework.
(February 3)
Frustum culling is still broken currently.
I'm trying to draw debug lines to view the frustum bounds but they look off:

At first I didn't know if my frustum planes were broken or if my debug drawing itself was incorrect. You can't trust anybody in this world, not even yourself.
After some more iterations, I got the debug drawing working and...

Everything looked normal ! So what is going on ?
I went digging even more, deeper into my system, and found the culprit : it is inside the function that compute the light bounds on screen. For spheres I use this snippet, which is based on the projection matrix.
So that's likely what broke following my recent modifications.
(February 4)
Freaking fixed !
It took way too long to figure out I just needed to flip two components. I deserve 8/10 hours long nap.
Later on I noticed a sneaky bug in my icon shader (to view object in the scene with the editor):
    vec4 Output = mix(
        IconColor,
        Composite,
        float(IsSelected)
    );

    if( FragColor.a < 0.0001 )
    {
        discard;
    }

    FragColor = Output;
FragColor is assigned after being checked out in the if() block. No idea how this worked on Mesa/AMD (the discard worked as expected) but it didn't on Nvidia.
(February 6-9)
I'm finally looking at Steam Audio. The C API interface is a bit more involved than what I got used to with Jolt, so I need to fiddle a bit more. Notably I need to manage audio buffers myself, also the API uses double pointer which is something I never saw before.
I quickly got a very basic demo working:
(Unmute if you want to hear)
The first quack is the original sound, while the second is after processing by Steam Audio.
(February 13)
I'm trying to learn a bit more about how audio is supposed to work in general, to understand better how I should use Steam Audio.
I'm having trouble finding dedicated resources about managing audio in a game engine, how you are supposed to stream the data especially when you have varying framerate and all.
(February 24)
Quite some time passed and I have been mostly learning about audio stuff. Learning some vocabulary but also looking around at how other seems to be working with audio in general. I looked at at a simple music player made in SDL for example. This is barebone but helped me get some logic.
It looks like everybody out there choose a fixed buffer size to process during each "frame". Then some folks just eyeball the size depending on the audible results (crackling = too short, delay = too long).
So far I haven't seen any mentions about tying this to the framerate, likely because most implementations seem to push that processing into a separate thread (and then the actual play by the hardware is likely async too ?).
So I think the way I need to approach the implementation is to keep things simple as:
Basically I will handle the mixing myself for everything coming from Steam Audio. I think I prefer this approach instead of converting every sounds back into an object that Love can process, because of the fact I need to stream the result in chunks (small buffers) and that Steam Audio process sounds in non-interleaved way.
This also means I need to handle the sound state -playing, paused, stopped- myself, same for reading the sample chunks.
Sounds like a plan !
(March 3)
I'm getting somewhere!
(Unmute if you want to hear)
The audio is streaming, but it can be very glitchy. I didn't have the issue with another sound so I wasn't sure at first what was going on.
After tweaking a bit, I noticed that the sound was kinda loud, so I adjusted it in audacity to limit it. That solved the problem.
Once that was working, I started to plug in the Steam Audio attenuation processing to make the sound more dynamic:
(Unmute if you want to hear)
Finding the right balance between fast processing and avoiding buffering is tricky. You can hear the slight delay when I zoom in on the sound location (near the world origin) and the volume goes up.
Maybe it's good enough, I will see if it is more jarring with occlusion, but it looks like it requires a lot more work (I need a separate thread to update sound and occlusion apparently according to the docs).
(March 9)
I'm trying to add more effects in the audio processing part of the engine. For some reason Steam Audio really doesn't like the missile sound file (see demos above). I had to implement a basic clamp on the output sample to avoid crackling.
Now the goal is to get get binaural, air absorption and attenuation working together, but I'm dealing with enums shenanigans between Lua and the C api which is a bit annoying (I have to do bit operations to merge enums, etc.).
(March 10)
I faced a few bugs today while continuing my work on Steam Audio. I noticed the binaural audio effect was acting weirdly. After checking again the doc I noticed this mention:
The direction from the listener to the source is specified in the listener’s coordinate system.
A little matrix multiplication later and that fixed it fortunately. However with the binaural effect the latency is even more obvious to me now.
Another issue that took some time to figure out was related to the spatial blend, which allows progressively blending some effects on/off on sounds, wasn't working on my sounds.
After digging into the source code I noticed that it was expecting a source with two channels (stereo) and not a single one (mono). My quick fix for this was to duplicate the data into a stereo buffer.
My use case (as explained on the github issue I raised) is that I want to smoothly blend in/out some filters on sounds depending on the player location to the sound, to make some effects less aggressive to the ears.
I'm quite sensible to sounds myself, so this is something I pay attention to.
![]()
(I also added a new icon to see where the sound entities are.)
Here is a short demo with multiple effects working at once:
(Unmute if you want to hear)
This has:
All in all, Steam Audio is pretty cool. :)
(March 12)
I'm now looking in doing proper attenuation curves to fade sounds over the distance with a custom radius.
Looking at what Steam Audio expect, it seems I need to provide a callback function, which will be called during the evaluation of each sample of the audio buffer I feed.
Callback functions can be tricky with LuaJit, so I'm thinking of making another little wrapper/C library to make the interface easier and stay performant as well.
(March 16)
Okay I made a new wrapper library for Steam Audio, made in a similar way to what I did when I integrated Jolt. So I got it working quickly. Right now it is just here to hook the callback functions for the attenuation.
The audio latency is killing me however, so I definitely need to move to a separate thread now. Having the wrapper shared library already in place makes it also convenient to share data between the main thread and the audio thread.
Notably, as I'm starting to move the audio processing work into its own thread, I needed to pass some pointers. Love API doesn't allow that by default, and instead of doing some magic via byte based objects I instead stored the pointers into my wrapper which gets loaded by both threads and then share the same global variables. This took me less time to figure this that having to workaround Love limitations.
(March 17)
While prepping more stuff with the audio thread, I needed to cleanup my log module. It's one of those modules that have been there since the beginning and barely changed. So it's filled with weird code because I was still learning how to use Lua at the time.
Now that I want to print stuff into a file from different threads, it needs rework. So it's time for a good cleanup.
(March 23)
I'm finishing moving the audio logic into its own thread. I'm stumbled upon quite a few weird bugs that were happening because of my Log module refactoring, but I should be good now.
The great news is that the audio latency is (mostly) gone !
The latency was exacerbated by the fact my main thread was locked waiting for vsync. So each time I updated the player's camera and sent the update, I would only hear the result after the screen had displayed a new frame. Even on a 144Hz screen this created an important delay.
Now I can send the update as soon as I process the inputs, and the audio can react even if the screen doesn't show yet the result visually.
(March 24)
I got audio mixing working (aka merging multiple sounds together). I had some weird clipping I could hear, but it was coming from a sound that wasn't repeating properly.
(March 31)
I'm continuing to move forward with Steam Audio. The goal now is to find a way to hook the scene meshes into the BVH of Steam Audio so that I can use occlusion.
(April 2)
For the occasion, I'm building a new test scene to try out the audio stuff in a more real context.

(For some reason the engine wasn't seeing any of my meshes...)
After digging a bit I noticed it was because Blender API changed a bit after an update. The change introduced a regression (regarding how you can specify smooth/faceted normals on meshes). So I temporarily went back to an old version for now.
Now that building the map was working again, I decided to play around with my fake GI:


(April 3)
Steam Audio allows to dump the current BVH using for raytracing the audio scene into an OBJ file on disk. That makes things easier to debug. So I used it and then imported the mesh into Blender:

While the meshes look okay, they seem to be incorrectly placed. I thought I was applying the mesh transformation but it looks like it didn't work.
After investigating I noticed that when I register my meshes to store them into the BVH, their transform is with default values. It gets modified only afterward. That's fine for physics because I can always update the transform later. But Steam Audio requires it to be set at creation time.
I'm not happy with my currently solution: basically when I register a mesh for Steam Audio I intercept it and dump the mesh data into ram and do the transformation of the vertices on the CPU. That new result is stored and then sent to Steam Audio afterward (and discarded afterward).
I don't think there is a much better way to do it in itself, but the way that code is called and executed doesn't seem very clean to me. I'm still trying to connect things together, so hopefully I will figure out a better way later.
At least it works now !


(Left is in-engine, right is the BVH dumped into the OBJ file.)
(April 4)
I often got remarks about how my "GI looks good". The thing is that it's completely fake (and cheap).
To recap how it works:
In the end, my idea is very similar to what was done at the time for Gears of War, with some extra tweaks of my own:


(Slides from "Rendering techniques in Gears of War 2".)
This is tedious work however, and cannot really handle moving lights. That's why early this year I was hoping for a more automatic solution.
Outside of being tedious, it can also be quickly messy in the level editor:


(Left is TrenchBroom, right is Ombre.)
Another issue is that fill lights currently can bleed through walls, since they don't cast shadows themselves.
Okay back to development. I'm now adding and tweaking the cubemaps in the scene to enhance the lighting:

(Doesn't it look pretty ?)
(April 5)
I did a slight refactoring and cleanup today, mainly to implement removing sounds and meshes from Steam Audio BVH. This way I can switch between scenes/levels so nothing remains.
I wasn't planning that initially, but as I'm moving slowly toward computing occlusion, I was needing some reorganization of the code.
(April 6)
After some extra fiddling (and getting bamboozled by incorrectly set structs fed to Steam Audio initialization) I have occlusion working:
(Unmute if you want to hear)
This feels odd as-is however because I don't have transmission enabled nor reverb, so it's only direct audio.
A small sidequest I did today as well was looking into, once again, a possible optimization for the compute shader that does the mesh processing for my shadow volumes.
The idea is to avoid doing multiple calls to the atomicAdd functions and instead regroup changes into some local memory temporarily and perform the atomic operation once at the end of the processing. In my head it should perform better because I would lock access to the memory less often.
Of course at first I simply broke the shadows.
Once I got it working, well, performance got worse. :(
On Sponza it simply doubled the processing time. Once again, trying to be clever ended-up being the wrong solution. GPU go brrrrr.
(April 9)
Okay, I have more ideas to try out on the shadow volumes, so I'm taking the opportunity to refactor some code and do some cleanup. I have a lot of dead (and unused) stuff in my shadow file. It's time for Spring cleaning.
When I tried out my idea the code worked, so I launched the engine. Then had to reboot because I crashed the system. Kinda wild knowing I'm running on OpenGL.
The next run became a proper crash and didn't take down the system fortunately:
amdgpu: The CS has cancelled because the context is lost. This context is guilty of a soft recovery.
./run.sh: line 15:  6384 Aborted (core dumped) ( cd "$SCRIPT_DIR/bin/12/linux/bin" && "./love" "$SCRIPT_DIR/data/" )
The visual result was fun:

(Borked shadows give fun glitches)
I wanted glitches, so I'm pleased, but this is supposed to be shadows.
Initially I wasn't sure why stuff was crashing, but I isolated a part that wasn't at least. So since it was still related to reducing the amount of atomicAdd call I do, I thought it was worth trying out and see if just that would improve performance.
Unfortunately it doesn't, I got a steady 0.01ms increase on that current test scene.
I thought about not debugging further, feeling like it would be a hassle if there are no benefits. But I still looked for the issue, because I'm stubborn, and figured I had a wrong index counter somewhere so I was going out of bounds when writing into the mesh buffer. Fixing this didn't impact performance.
In the end the result was the same as my other test: twice as slow. Was worth testing out, but the GPU won again.

(Damn you smart GPU !)
Last thing I did today before going to bed was plugging in the transmission component of Steam Audio, so now I can hear sounds through walls. Right now I use the same generic material definition everywhere.
(Unmute if you want to hear)
There is a bit of latency still, which annoys me, but I'm not sure how I could lower it down. To make transitions smooth I perform multiple samples/raytrace so I hope this won't become too costly.
Right now this is performed on the main thread, so I need to move occlusion/transmission into another thread. I'm postponing that for now.
(April 11)
In the shower this morning I had a big "thonk". (Made me almost late to work.)
I'm starting to get more and more frustrated at Trenchbroom. I'm really considering building my own "map editor", directly in-engine.
I see two big chunks to overcome to achieve this:
The first point is doable however, so that would be a good first step. Anyway, that's what happens in the morning shower. Right now it's night and brain is mushy.
(April 12)
With the help of a colleague I tried another variant of my shadow volume compute shader pass to try to optimize it. I was still slower than my original by a few 0.Xms, but it's a lot closer.
(April 14)
I decided to finish a bit more audio stuff today. I figured it would be nice to hook some stuff together as a demo (like clicking on button playing a sound then opening a door revealing occluded sounds, walking around with foot steps, etc).
So during lunch I started adding reflections from Steam Audio. I'm a bit confused on some points, but I guess I will figure it out as I go. It's mostly about adding flags here and there so far.
And then running the simulation, which made the CPU timing jump to 20ms in some cases (instead of the usual 4ms). Huh.
So yeah, running reflections on the main thread isn't a great idea. Worst part is that I'm not even consuming the result, so it's all for nothing right now.
(April 15)
I had some questions about reverb/reflections in Steam Audio, so I opened a github issue to get some answers. So while I wait, I switched topics and started working on a translation manipulator.

(Testing the new gizmo/manipulator mesh in-engine.)
I went with a mesh because that was very easy to do in Blender, using UV coordinates to know which axis is which so that I could draw it in one drawcall and a single shader.
Of course right-now it's renderer as a regular object in the scene, so the bloom makes it slightly glow.
(April 18)
I'm refactoring a bit some code, mesh selection and editor camera are working again. Now I should be able to insert the logic of the manipulator in the middle of all of this without too much trouble.
It's pretty handy to rely on ImGui to track the state of widgets. For example my invisible widget that cover the viewport helps get the mouse state and other stuff very easily:
function EDITOR.BackgroundInteraction( Position, Size )
    IMGUI.SetCursorPos( Position )

    IMGUI.InvisibleButton(
        "CameraClick",
        Size
    )

    EDITOR.STATE.IsHovered = IMGUI.IsItemHovered()
    EDITOR.STATE.IsActive = IMGUI.IsItemActive()

    EDITOR.STATE.IsPrimaryClicked = IMGUI.IsItemClicked(0)
    EDITOR.STATE.IsPrimaryDown = IMGUI.IsMouseDown(0)
    EDITOR.STATE.IsPrimaryDragging = IMGUI.IsMouseDragging(0)

    EDITOR.STATE.IsSecondaryClicked = IMGUI.IsItemClicked(1)
    EDITOR.STATE.IsSecondaryDown = IMGUI.IsMouseDown(1)
    EDITOR.STATE.IsSecondaryDragging = IMGUI.IsMouseDragging(1)
end
That should make the manipulator interaction quite easy to add from here.
I got confused with transparency drawing, so initially my mesh looked wrong:


(Depth issues when drawing my custom manipulator.)
Given the manipulator is one of the last things I draw, enabling depth write seems safe (I was relying on the depth pre-pass result before). I somehow expected the mesh itself would have self-sorting, but I forgot how rasterizing actually works.
And then, this is what I got:

(Stare at the void too long and ants start crawling in your eyes...)
What is going on ?
Well, this is a borked raymarching signed distance field shader. Because of the mesh rendering issues with the gizmo, I decided to render an SDF instead, to have more controls. I was trying to figure out the right inverse matrix to apply to make the shader align with the world space object.

(I got it working quickly fortunately.)
From there, getting some simple shapes working was easy (especially using Inigo Quilez nice references).

(Axes with handles using simple tube and cone shapes.)
When chatting about this elsewhere, I got linked to this interesting article that goes over implementing custom manipulators too.
(April 19)
Now I'm working on handling the mouse position and converting it into a world-space position in prevision of interacting with the manipulator in the scene.
I borked something while doing this however. My camera data was all invalid. Lua bit my ass once again:
local EDITOR = {
    IsDragging = false
}

function EDITOR.IsDragging()
    return EDITOR.IsDragging
end
Guess who was returning a function instead of a bool ? Because of this, the camera update was never called.
After that I got "collision" detection working, which is simply about porting the SDF function on the CPU and doing a ray intersection from the camera and mouse position.
Next is to write all the fluff to handle the state and mesh/object data.
I'm not too worried about the mouse drag start/end. As far I understand it's mostly a plane intersection test and then figuring out how far the hit point is from the initial position of the gizmo to compute the delta.
(April 20)
I noticed a weird regression with blues lights in my test scene with Sponza:


(The weird haloing with blue lights.)
I'm thinking this could be a regression introduced in Mesa. I don't see what could have changed on my side to produce this bug. To verify this, I switched to Zink (OpenGL emulated on Vulkan) and the problem was gone. So I guess I need to update my drivers (I'm on Mesa 24.2.8 currently).
(April 21)
I now have a basic state machine (fancy name for basic if/else) working on the manipulator, which makes it possible to switch between objects:
(Switching between objects, including entities like sounds.)
I can even go beyond: I can animate it now !
The shader is already 200 lines, mostly because of all the fancy animations. It's a bit verbose. I also added some depth test to fade the gizmo when it is hidden by some geometry. That makes it easier to read.
Next step was implementing the drag offset, but so far I'm not sure why it is not aligned with the mouse:
(The purple line shows the drag value (invalid) position and distance.)
(April 22)
I got the initial drag position working, from there updating objects in the scene was easy.
(So more debug drawing to check everything is right.)
(Moving objects for the first time with viewport interactions.)
There are some quirks when the axis and the camera are under certain angles. I recall some software behave differently if you go up/down or left/right in screen space, maybe I will need to check that out and see if I need to switch between planes to avoid that lock up.
I also had a mesh slide far away by mistake twice when the mouse targets something far away. Maybe I need to apply some kind of log curve to calm down the distance traveled.
(Got an answer from Valve about my reverb/reflection questions, great timing !)
(April 23)
Adding relative scaling seemed easy, so I did:
This way the manipulator is not tied to the scene size anymore and instead is relative to the viewport. So moving around is easier.
I also made the axes "boing boing" even more, because it's fun.
Next was adjusting a bit more the look, and I started looking at the scale mode:
![]()

(Translate vs Scale look on the manipulator.)
(April 24)
As always when I have a nice shader to play with, I end-up tweaking it for days. So here it the improved look for the manipulator:
(Notice that the animation has been adjusted a bit too.)
I'm also trying to add some anti-aliasing, but with SDFs I find it a bit annoying to do (well, I haven't figured it out yet).
(April 26)
Clair Obscur: Expedition 33 came out !
I'm working a bit more on the manipulator:
(Guess who is scaling the scale manipulator instead of the actual object ?)
That was easy to fix fortunately.
While fiddling around with the manipulator to try it out, I played a bit with my test scene. So enjoy some screenshots:


It's nice seeing the editor with the manipulator now. I think I will try to add a feedback under the mouse over as well, to see better what is going to be selected.
I have been thinking about doing this to also display the object name and a quick summary of it as a tooltip next to the mouse. I need to look into asynchronous GPU readback for the picking buffer however.
(April 27)
Getting the mesh under the mouse information was pretty easy. Using my fancy blurred background make it look pretty:

(April 29)
Selection overlay when hovering objects with the mouse now works:
You can see that the manipulator also interrupts the hover effect, to avoid confusion about what is going to happen, etc. I'm pretty happy about this.
(April 30)
I'm adding a new simple entity that manages rotations of other entities/objects. It's the classic rotator:
The rotator entity is separate, so I can still edit normally the target object (here the mesh looking like a fan) and move it around.
I'm also thinking making the "editor" more useful now, like being able to add/remove lights and other stuff. Edit colors too. Right now it's quite limited to experiment with things. Then I could build new kinds of entities to animate a bit more my levels.
I noticed a new shadow bug today. Digging into my shadow volume compute shader I noticed that this:
    precise vec4 BackPositions[3] = vec4[3](
        OffsetPositions[0],
        OffsetPositions[1],
        OffsetPositions[2]
    );

    for( int i=0; i < 3; i++ )
    {
        precise vec3 LightOffsetDirection = vec3(0.0);

        if( LightInfo.Type == LIGHT_TYPE_DIRECTIONAL )
        {
            LightOffsetDirection = LightDirection;
        }
        else
        {
            precise vec3 PositionToLight = LightInfo.Position - Positions[i].xyz;
            LightOffsetDirection = normalize( PositionToLight );
            float OffsetDistance = InDistanceByBounds;
            BackPositions[i].xyz -= LightOffsetDirection * OffsetDistance;
        }
    }

    AddTriangle(
        BackPositions[2],
        BackPositions[1],
        BackPositions[0],
        -1
    );
which should be this instead:
    precise vec4 BackPositions[3] = vec4[3](
        OffsetPositions[0],
        OffsetPositions[1],
        OffsetPositions[2]
    );

    for( int i=0; i < 3; i++ )
    {
        precise vec3 LightOffsetDirection = vec3(0.0);

        if( LightInfo.Type == LIGHT_TYPE_DIRECTIONAL )
        {
            LightOffsetDirection = LightDirection;
        }
        else
        {
            precise vec3 PositionToLight = LightInfo.Position - Positions[i].xyz;
            LightOffsetDirection = normalize( PositionToLight );
        }

        float OffsetDistance = InDistanceByBounds;
        BackPositions[i].xyz -= LightOffsetDirection * OffsetDistance;
    }

    AddTriangle(
        BackPositions[2],
        BackPositions[1],
        BackPositions[0],
        -1
    );
basically I wasn't updating properly the shadow volume mesh extruded triangles in the case of a directional light. So when moving around the bounds of a small directional lights it would randomly flicker/disappear because the mesh was incorrectly made.
Enjoy the fancy rotator and moody shadows now:
(May 1)
Shadows volumes can't be fun if they are not slightly broken every once in a while.
At first I thought the issue was only with directional lights, but spot lights also have the issue with the weird flicker. My current guess is that my atomic counter isn't incremented when it should, so it inverts the shadow. It's always a joy to debug that freaking compute shader.
I quickly found what was going on fortunately: the camera position is intersecting one of the shadow volume triangle, so it gets near clipped:
(Here I'm looking down and moving forward/backward with the camera)
In the shower, I was thinking of two possible solutions:
Tweaking the near/far helps a bit, but it's not perfect, I can still find cases where it's glitching.
A few hours later I finally understood what was going on.
I would have thought that depth_clamping should have solved my problem, which is something I had put in place in the past already.
Somehow it wasn't applied anymore ? Well, that's because following an update of Love framework, the default graphic backend became Vulkan instead of OpenGL. So that means my GL calls to override/enable some features were disabled (since I cannot easily hack the graphic state with Vulkan command buffers).
Switching back to OpenGL fixed my issue.
I spent an hour on another "regression" from Love. Now when going to fullscreen it triggers an update, so I ended up with an update() call inside an update() call of the engine. Chaos ensued (mostly ImGui complained). Took me a while to understand that one.
(May 10)
Between Helldivers, Expedition 33 and now Baldur's Gate 3, I'm not spending a lot of time working on Ombre. I decided to fix that today.
I went to work on a color picker widget/window to be able to edit the color of my lights in the scene:

The banding here got quickly fixed, I forgot to use a srgba8 buffer.
(May 11)
I'm porting some code I had in another project to handle colors and that made the color basics working:
(Hue and gradient bitmap generated on the fly by a shader.)
I finished porting all the functions and this is what I got in the end:

Also it's 1am and instead of going to bed I decided to make pancakes:

(May 13)
I found an old trick shared by Omar/ocornut regarding ImGui to create a resizeable section in a window. So that made me start working on my assets/resource browser window:

If you remove the default borders of the style, it gets very silly:
(Hidden separator, just magic !)
It looks like the detection area is 4 pixels wide, seems good enough to me. So I just need to draw a custom thing over it to make it actually visible. Time for a custom button !
(May 14)
Currently working on the tree view to list the folder inside the game and engine project:

(May 15)
This is full of hacks, but I'm starting to get a nice look out of that tree view:

(May 16)
Now I'm listing files insides folders and displaying icons for each assets (based on their type):


The general look of the editor is starting to be quite nice:

(May 17)
Today I worked on displaying folders into the file list view and adding a tooltip when hovering files:

I also got the first steps of drag and dropping files working:
(Right now it only shows the viewport waiting for the drop.)
(May 18)
A few iterations later and drag and drop of meshes started to work:

(My victory pose.)
I noticed some weird bugs with the manipulator state however:
("Catch me if you can !")
(May 19-20)
Focus was now on navigating up and down folders in the main area of the assets manager. I was wondering how to automatically expand the tree view.
I could use the SetNextItemOpen() from ImGui, but that means I need to store more data myself to track the state of things.
Meanwhile I got breadcrumbs working, which makes it easy to jump back into a parent folder (I personally use that a lot in Dolphin):

(Breadcrumbs are nice when quickly jumping back up a few folders.)
Here are some bonus beauty shot of Ombre with the recent changes:


(May 22)
This time I started to work on my demo level, with the goal of showcasing it for the GP Direct showcase.
Right now I'm trying out basic volumes to get an idea of how much space I wanna cover. The goal is to try to match some of the early areas from Riddick, in order to plays nicely with the shadows.

(First step of the demo level.)
Basically it's a pretty corridor, with the animated fan and some glass to showcase the refraction. I will try to keep the scope as small as possible, and not try to build too many different textures. The goal is to be smart so that I can safely reach the deadline (end of July).
Riddick looks like that, it's basic shapes with detailed textures on top:


(Screenshots from the first level of the game Riddick remastered campaign.)
(May 23)
I have a good idea on how to showcase most of the engine features, except physics and the depth of field. I took some time this afternoon to work on a floor tiles material otherwise:

(A little preview of floor tiles I'm making in Substance 3D Designer.)
Then I put the material in the scene:

I don't really have a workflow right-now to easily refresh textures, contrary to map and meshes. I will need to see if that's difficult to do or not. It would be nice to have some sort of live link to test out textures while I'm working on them.
Anyway, still happy with this one for something that took only 2 hours.
(May 24)
I just noticed I was using the DirectX normal map format, and not OpenGL. So I started to doubt which one was right for my own engine. I solved it by using a simple texture fortunately with a text on it:

(The text is showing the right direction of the bump in the normal map.)
Next I tried to add material drag and drop, so that I could replace some stuff on the fly in-editor. At first the drop wasn't happening where it should, so I had to look at the async readback I was doing on the buffers.
The two new materials have just basic details, my focus has been on getting the shapes in the normal map right mostly. Once I get the patterns I like, I will take the time to improve them.


(May 25)
I have shadow related bugs, once again...
After digging I found that my index counter when generating the shadow volume would get some uninitialized values sometimes. After 30 minutes I noticed I was using a uint instead of int, but the counter could be negative. A classic overflow.
There was still another bug, which I discovered by displaying the debug wireframe:

The volume on the right didn't go far enough, and because the camera isn't inside the light volume (white box) I don't draw backfaces. So that shifts the shadow volume counter which then flip the shadow mask.
I need to think about what is the right solution here. The first one would be to properly compute the distance the shadow volume triangles should go, the floor on the left is going too far so it's wasteful, while the wall on the right isn't extruded enough.
But also I wonder if for directional light I should always draw backfaces. For a spot/point light if you aren't in its radius it means you can never overlap the shadow volume (in theory) but with the directional light here, that's not the case.
I continued to edit the test scene and started playing more with lights and shadow:


I definitely need more textures to add details.
I was also checking again Riddick, and I'm really impressed by how good their normal maps are. They get really far with flat surfaces, like here:


(Front and side view of a wall texture, showing how flat the actual geometry is.)
Adding a note for later: I should group objects together, right now they are all separate brushes (which means individual drawcalls, including the shadow volume processing).
I also had weird bugs with the import process and mirrored brushes from Trenchbroom. Trenchbroom annoys me quite a bit too, I can't wait to replace it. Selection isn't great, and the shortcuts confuse me compared to my engine everytime I do back and forth.
Given all lights are dynamic I should implement flickering, and look into using triggers to switch some on/off. That would add some dynamism to the demo.
It would be cool to walk and enter a room, then have all the light turn off and have an alarm triggers, both with the sounds and and a rotating red light. It's classic but a nice show off.
Another texture iteration/pass, making some surfaces more metallic:

(May 26)
Here we go:
(A flickering spotlight.)
I took inspiration from the old quake light flickering/brightness animation patterns.
Because the flicker patterns are based on a global time value, I can assign the same one to several lights and they will be synchronized.
So here the red spot and its fill light flickers automatically together, I didn't have to add a link system or else to sync them. Which will happen in the future I guess, if I had the ability to switch on/off light dynamically, fill light will have to be tied to them.
Anyway, flickering works, that was as easy as I thought, so that's pretty cool. :)
The cubemaps/reflection probes are another story however. I could at least add some logic to switch them on/off by tying to the main light of the room. That would be good enough in most cases. Or bake several versions of a cubemap and swap between them, but that would be quite annoying to manage.
(May 27-29)
I did some quick modifications of my rotator entity, so now it is compatible with lights:
Make it two spot lights and you get a cool alarm light:
I'm trying to think about what I want to showcase and how :
- Room A
    - Alarm
    - Rotating spot lights red
    - Opening door with trigger
- Corridor A
    - Flickering red light
    - Fence shadows
- Room B
    - Starting fan
    - Wind pushing boxes
    - Falling stairs
- Corridor B
    - Music on radio (with spatial localization)
- Room C
    - Refraction
    - Glass
    - Hologram !
I'm also thinking I could make a very dumb particle system by using additive blending. This way no need for sorting, and I could pre-compute the animation by storing it in a texture (so it would just be a cached replay).
Mostly for things like steam, but sparkles are also a good contender. It might be hard to keep it natural with a looping cache however.
As always however, I'm struggling with "level design". I have the classical blank page syndrome, don't know how to get something good going even for a dumb test level.
To get unstuck I tried to play a bit more with shapes, shadows and lights:


I iterated a bit more, and I'm starting to feel I'm going somewhere now:

I think I figured out a way to showcase the depth of field : when the emergency door will open (with the two red spot lights) the DOF far away will be a full strength and as the camera will move forward it will go down to 0 in intensity. That will give a fake "cinematic" transition.
Otherwise, in term of missing feature that I have to implement right now I see:
(May 30)
Some extra tests with a spot light and a fan, instead of using a directional light:
(I'm really happy with that result, it's quite moody.)
(May 31)
Working on another texture today in Substance Designer:

(This will probably produce a lot of aliasing once in-engine...)
I'm also adding more complex shapes to play with shadows:

I noticed a big with my scissor and spot lights when setting up another room in my level:
It is related to how I project the bounds of the spot light, because its corners go outside the screen they are not clamped properly. I need to fix that by clipping them against the camera frustum. Not for today however.
Anyway, the goal was to try out this kind of setup:
I went back to the other part of the level to try out some materials and added cubemaps to see how it could look:

(Shiny metal everywhere !)
While editing a bit more the level, I stumbled upon another bug:
My hunch is that somehow this wall is hitting the "hit by 10 lights" limit (it's a hardcoded limit that I haven't updated in a while). Switching another light off fixes that wall, so it's probably what is happening. I'm surprised I have that many light overlapping here already.
(June 1)
I added some debug output to catch a bit more when the case of too many lights overlap an object:
[2025-06-01|17-17-40][renderer_draw_opaque]
    A Chunk has more than 10 lights affecting it:
    game/mesh/demo/worldbrush173__dev-dev_wall_2m_character.chunk
    (x:-16.000, y:2.750, z:-13.875)
    (Chunk is affected by 14 lights)
[2025-06-01|17-17-40][renderer_draw_opaque]
    A Chunk has more than 10 lights affecting it:
    game/mesh/demo/worldbrush174__dev-dev_wall_2m_character.chunk
    (x:-18.000, y:2.750, z:-14.125)
    (Chunk is affected by 11 lights)
For now I think I'm just going to increase the array size in the shader to allow for up to 15 lights. It's a temporary fix until I implement Tiled/Clustered light culling.
(June 2)
I'm trying out more materials today. For example I tried again my frosted/blurry glass materials:


Also I removed the room with the two fans rotating, I didn't like how it looked at the end of the corridor and instead I'm going with a room that turns by 90 degrees.
(June 3)
During lunch today I was looking at Jolt and some of it discussions, to see how I can simulate the wind from the fan pushing stuff. I wasn't sure yet what to use (direct velocity, impulse, force, etc). I didn't know the nuances until I read a bit more about it.
Impulse seems to be designed for stuff like explosion and all, while force is more for a continuous effect. I think similar results can be achieved with both depending how it is implemented however.
(Test of a wind volume pushing a physics simulated cube around.)
The "object blocking on invisible stuff" is a bit annoying, but I recall reading about this in Jolt manual. I think it's related to how object simulation is done near other objects edges.
(June 4)
Regarding the invisible collision, I think I was right. They seem to be "ghost collisions". The C wrapper of Jolt doesn't have settings for this exposed currently. Looks like I will need to update Jolt.
Meanwhile I'm trying to convert the logic of my trigger volumes into a new entity to make a "wind volume". It could be fun in the future to project the player up (quake/unreal style).
At first this didn't work, because for some reason I had the Jolt callbacks disabled. So no wonder the trigger wasn't working. No idea why I disabled that, i don't recall it at all. That was easy to fix fortunately.
So here we go:
(Yellow is the wind volume, always pushing objects in a given direction.)
I noticed that I have a strange bug sometimes when simulated objects stop updating for some reason. I don't know why.
(June 5)
I fixed a bug with the physics. My computer at work is a bit slower, specifically because of the disk time access (HDD instead of SSD).
So when reloading the level the test cube I had was going through the floor for some reason. I noticed I wasn't stopping the physics update just after loading, this means the delta time was big, so the physics step ended-up being too big and the cube missed the floor.
My quick fix was to skip the first physics update after a level loading, seems reasonable
ideally I should have adjusted the sub-stepping, but here context fully changed so having continuous physics update doesn't make sense
Meanwhile I'm building a new room, putting in place the area where the wind entity will be activated:


It looks a bit crappy right now, but I like the shape/volume of the area, so it should turn out well with proper textures.
Throwing out some random material on the surfaces, I really like how they react to the cubemap reflections:

The reflections are not 100% well aligned, but as long as I don't do mirror like surfaces, it will turn out okay. Also I should add a flag on meshes to be able to exclude them from being captured by cubemaps.
For the demo I think I'm going to play it safe and do the level setup and events by code only, aka via Lua. Ideally I would have preferred implementing properly trigger volumes and some other stuff to make it purely driven by the level setup, but that would requires exposing more stuff in Trenchbroom. I feel it's going to be a bit of a waste of time and prone to errors.
I'm going to add another room but that will be the last one. Basically where I'm going to put Armadillo inside a "test tube" with the frosted glass. This will be fun for a fake sci-fi setting.
Next I adjusted a bit the fog:


I love how the Fog Blur post-process gives a (fake) volumetric feel.
(June 6)
I ran during the night my Blender script to convert the Armadillo mesh into the format compatible with my engine. The total mesh conversion time only took 1h49m haha.
Then I put the mesh in the scene:

The framerate took a hit as expected, but we are still above 60, so it's a green light !
Next I started adding some layered refraction:


I'm discovering more bugs by the way, the map parser didn't want to assign different materials on the two blue glasses at first.
I also added a bit of movement and flickering on one of my lights in the corridor, just to make it look cool:
Next I decided to do a side step to fix a bug that has been bothering me for a while: the DOF create thin black pixels when there is a high contrast (between in-focus and out-of-focus).
I made it obvious here with the Fog in a test scene:

After looking around a bit, I noticed something I was doing wrong in my upsample pass:
    vec4 CocFarDownsample = textureGather(
        ColorCocDownsampleBuffer,
        iUV1,
        3 // alpha
    );
should have been instead:
    vec4 CocFarDownsample = vec4(
        texelFetch( ColorCocDownsampleBuffer, iUV1, 0 ).a,
        texelFetch( ColorCocDownsampleBuffer, iUV2, 0 ).a,
        texelFetch( ColorCocDownsampleBuffer, iUV3, 0 ).a,
        texelFetch( ColorCocDownsampleBuffer, iUV4, 0 ).a
    );
which immediately fixed the issue:

So I tried it out in a real context:


(Really happy about how it turned out.)
I'm noticing that the nearest filtering doesn't play nice with the DOF, it gets crunchy in some places. I think I need a way to do bilinear filtering except when circle of confusion is close to 0.
(June 7)
I put in place some dummy objects in the fan room to create the physics demo:
(June 9)
I'm still having issues with physics object getting kinda broken when loading the engine (but it's fine after a map reload). I really need a better approach to deal with slow computers.
Ideally I should properly start/stop the physics system. I guess like Unreal/Unity with the play/pause/stop level system.
I have been thinking about this for the level editing part, where you don't want the gameplay to run while editing, but that means I need an editor "state" somewhere. Haven't really though about this more than that for now.
I'm trying to keep the editor and game logic separate still, but here it is starting to get tangled.
(June 11)
I just hooked up the logic to play the engine logo. It's basically another kind of entity, so in the future I could trigger it from anything. Right now I just manually press a keyboard shortcut.
I could even trigger it just after the engine startup if I wanted, like a real game. >:]
Since it's a shader, it's an unskippable logo hehe.
So far this is how I handle setting flickering on some of the level's lights:
SceneWorld._LightList[1]._FlickeringMode = LIGHT.FLICKER_TYPE.FLICKER2
SceneWorld._LightList[8]._FlickeringMode = LIGHT.FLICKER_TYPE.FLICKER2

SceneWorld._LightList[11]._FlickeringMode = LIGHT.FLICKER_TYPE.TORCH
SceneWorld._LightList[12]._FlickeringMode = LIGHT.FLICKER_TYPE.TORCH

SceneWorld._LightList[21]._FlickeringMode = LIGHT.FLICKER_TYPE.FLUORESCENT_FLICKER

SceneWorld._LightList[35]._FlickeringMode = LIGHT.FLICKER_TYPE.FLICKER1
This is done in Lua after loading the map. It's quite hacky and breaks every time trenchbroom decides to shuffle the IDs around. But I'm too lazy to make it better for now...
(June 22)
I was away traveling the past few days, so I wasn't able to get in front of the computer. So I just toyed around today. I mostly been trying out some materials, looking for a specific vibe:


(Don't mind the scale of these textures, I was just trying things out.)
(June 25)
I'm currently trying to add basic particle entities, just to add a bit of steam here and there
but I'm not sure what it the best approach to combine that with rendering transparent meshes, since I need sorting. Right now the engine logic is really not meant to mix stuff like that.
I think I'm going to use an old trick I did for other things: simply storing only a list of indices, but with different range depending on the type of the object. Meshes could be 0 to 10000, and 10001 to 20000 would be entities. From parsing that list I could guess the type just by the ID range, this way no need to store stuff into an intermediate array. That could automatically work as well when accessing elements to sort them.
However I'm thinking for the demo I should do a hack instead and just build a combo of custom meshes with a custom shader. Doing it the proper way might take too long with all I have to finish.
Guess what happen when you reference object in code by their index... and then the map change ?
Exactly. :D
A light was supposed to be rotating, not the fence.
So I went to add functions to retrieve objects by name. Right now it's a simple "for loop", which is fine for now since it's only done during loading of the level.
(June 26)
I'm still tweaking lights and materials to adjust the mood of the scene:


Right now I'm super lazy, so I assign material by hand in-engine, which gets lost once the engine shuts down. Ideally I should assign the materials directly inside TB, but for that I need to have the material rendered as single texture to be able to load them in it. Then when I process the map I need to convert the texture ID back into a material.
This is so annoying (even if I figure out a way to automate it in the future). That's why I wanna just get rid of TrenchBroom.
Also processing the map file currently takes 30s (because it regenerates the whole map each time, it's difficult to do only a delta). When iterating this is too slow, so that's another reason to go directly in-engine.
Anyway, work for another time, demo first !
(Still no particles because I ended fiddling with other stuff and fixing what I broke.)
Another thought: I need to find a way to smooth out the meshes generated from the brushes, like for the pipes for example. Right now I have hard edges everywhere but that doesn't fit well every types of shapes.
I'm thinking either to add a tag in the object in TrencBroom, or to convert them into a special kind of "entity" (only in TrenchBroom). The problem is then to know how to process the resulting OBJ when I run my custom exporter in Blender.
I thought of adding a custom commented line at the top of the OBJ file that includes extra tags I will have to parse. I don't want to deal with extra files on the side to provide specifications, that would be annoying to manage.
I went ahead with that idea, and it worked out pretty well:


(June 29)
I will try to cook something about particles today, with maximum laziness in mind !
Right now I'm building a dumb mesh in blender to animate it as a particle system via a shader, because I'm too lazy to look into instanced rendering (since I want to draw a bunch of simple quads together).
It's not easy to think with the current heat wave, my brain is a bit mushy.
(July 05)
I'm starting to regret going with the hack thing, given the little time I got this week, I feel like doing the right thing from the start would have been better. Still, it's too late to change my mind.
So I started hacking:

(Baby steps.)
Above is a mesh with a bunch of quads generated by code. However the UVs are wonky, the missing texture checker is stretched out.

(Each quad aligned in the mesh add up to create a long band.)
It looks buggy but as expected: each quad has different UV coordinates and I'm using that to identify them. So for testing it out I'm offsetting them. I figured why UVs were broken, it's because I forgot my tangents were vec4 and not vec3, so the UV data was offset by one float.
(July 07)
I found another issue that was blocking me for a bit. I forgot I was creating the quads in strip mode, instead of individual/separated triangles:

(Moving away quads on another axis makes the triangle strip setup more obvious.)
Once fixed my quad were looking good, with proper UVs and all:

(July 08)
I need to think as well about how I want to handle animating them. I wonder if I should store the animation as keyframes (and use basic linear interpolation) in a big array. Because I need a begin/end state for each quad in the particle but also a in-between state (for example for something that is invisible, become visible, then fade away).
Textures could be interesting to store data, I would just need to advance the sample position over time and not have to care too much about interpolation.
Now that all the quads are working, it is time to work on making them behave like billboards (aka facing the camera). I got it working quickly fortunately:
(Each quad looks at the camera from its own origin.)
(July 09)
So I'm generating a texture to store the particle animation:

(A texture seen in RenderDoc showing several lines storing animation data for the particle system quads.)
With the data being roughly:
    RGBA = vec4(
        TimeScale + Offset,
        Angle (start to end),
        Size (start to end).x,
        Size (start to end).y
    )
    RGBA = vec4(
        Position (start to end).x,
        Position (start to end).y,
        Position (start to end).z,
        ?
    )
    RGBA = vec4(
        Color (start to end).r,
        Color (start to end).g,
        Color (start to end).b,
        Color (start to end).a,
    )
(July 10)
I'm reading the texture in my custom vertex shader now to animate the quads, but it's quite unstable for some reasons:
(Strange instability...)
To make things easier to debug I started to use "random" colors on the quads to differentiate them:

30 minutes later I figured it out fortunately: I forgot that I needed to skip some lines when reading the texture. Data for a single quad is 3 lines of pixels. So I was reading data for another quad from the wrong place.
But even with that bug fixed, I was still noticing some jittering... which took another 2 hours to figure out.
Of course particles are unstable when you generate random value for them EACH FRAME.
With that solved, it started to look promising:
Which means I started tweaking things more and more:
(July 11)
I'm continuing to tweak my "particle system" (big words given the hack it is):
I'm surprised I don't see any kind of sorting issues so far.
Then during lunch I loaded a custom texture to finally start to get that smoke effect:
The pattern is obvious, but I could add support for atlas textures later to add more variations.
So how does it work ?
It's a custom mesh with a fixed amount of quads. Each quad has UV coordinates shifted by one range, and that's what I use the identify them (it gives me an index). The texture I generate store the data that fit the exact number of quad in the mesh.
So it's all static, and the looping happens thanks to the data from the texture, which has random time duration and offset stored for each quad. If you don't have enough quads the repetition is quite obvious. which is already the case in the videos above, the loop is roughly 2s. And right now I have 32 quads in total in that mesh.
(July 12)
I added depth fading, which means reading the depth buffer and comparing it to the current particle position to make it smoothly fade against other surfaces:
(Example where I'm switching on/off the fading.)
I also changed the particle texture to store a different pattern on each RGBA component
I then select it using this trick a colleague suggested:
float Mask = texture( texture_mask, UV )[ ParticleIndex & 3 ];
Later I added a few other tweaks with the depth fade, and make the particle time offset based on the position, this way I can have the same shader on two different meshes and they won't be in sync:
(July 13)
I plugged into the vertex shader the model matrix, which means I can now use that information to rotate and scale the particle:

I still need to fix the non-uniform scaling of the particle quad, the scaling axis is aligned with the camera and not the particle system, so it create weird shape under certain angles (like in the image above with the left one).
(July 14)
I'm tweaking a bit more the particle, I'm quite happy about the result even with its current flaws:
Another advantage of the way I animate my particles, aka via a "timeline", is that I can drop the framerate without creating any issues/gaps. It's deterministic in way, but not fully. I could use a seed to define the random values I use to build the texture data, but right now it's not the case.

(Me getting emotional after seeing how good this looks.)
I did a fix regarding how I was computing the normal smoothing in Blender. Now I properly support cylinders:

Next today I looked into making the color grading persistent (aka define some settings to apply when loading the level) so I'm playing with the values a bit:


I also been reworking the dirt mask texture for my bloom/lens-flare with the help of a member of my discord server

(July 16)
You can never go too subtle with lights (I have reworked the lighting in this small room):


Next I put textures in random places to try some things out. I like how the cubemap reflections seem to extend the room size. I definitely need to play with that more.


[2025-07-16|13-49-05][renderer_draw_opaque]
    A Chunk has more than 15 lights affecting it:
    game/mesh/demo/worldbrush226__emissive-emissive_white_20.chunk
    (x:-27.969, y:3.969, z:-21.000)
    (Chunk is affected by 16 lights)
Bleh, I hit that limit once again. I will really need to fix this after the demo (finally time for some light clustering ?).
(July 20)
I wasn't able to be in front of the computer for a few days.
Today I did a quick fix for the light limit issue: since the problematic objects are fully emissive surfaces (aka neons) and already had a blend mode identified as "unlit", I now discard lights for these objects.
Hopefully this won't trigger unforeseen side effects.
(July 21)
I woke up early since I wasn't able to sleep properly, so I decided to make some beauty shots:


(This is straight from the engine, with my fine tuned post-processes.)
I started working on some new textures, but I noticed some banding in smooth surfaces with a normal map. I thought using 16bit png as input for my DDS normal map conversion process would have avoided banding, but it seems it's not the case.


(Banding, the line stepping, is visible in the specular reflection of the box.)
Maybe I should try to do normal map in 8bit but with dithering instead. I should look into making a filter in Substance 3D Designer for that.
Next texture I started was some some of clean/flat panels:


I went back to the box texture after that, by the end of the day I was starting to have something I was happy with:


(July 22)
I'm still toying with textures, it really adds life:


(July 24)
I finally made a little python script to copy the materials available in-engine into TrenchBroom texture folder. This way I can now assign the new textures directly in TB and don't have to redo it every at launch of the level.
I will be able to setup meshes and UVs properly as well now, and start taking advantage of the trim textures. I went with normals map because albedo textures can be fully black for metals, so that wasn't helpful for working.

(July 25)
I noticed a bug in my map parser/generator:
{
    "name": "worldbrush273",
    "type": "static",
    "chunks": [
        {
            "name": "dev-dev_wall_2m_character",
            "mesh": "game/mesh/demo/worldbrush273__dev-dev_wall_2m_character",
            "material": "engine/material/dev/dev_wall_2m_character"
        },
        {
            "name": "demo-demo_panels",
            "mesh": "game/mesh/demo/worldbrush273__demo-demo_panels",
            "material": "game/material/demo/demo_panels"
        }
    ],
    "collisions": [
        {
            "type": "mesh"
        }
    ]
}
Above is a little json file that defines a mesh: its chunk of geometry and the associated material, followed by collision mode/type. As you can see, the list of collision definition only has a single item, it should be an array of two to match the number of chunks defined.
After investigating a bit I found the reason. I'm surprised that all this time I never faced this bug, because it's quite obvious in retrospect.
I did a quick fix for that case, but I think that flaw is present as well on another part of my script. Basically I assumed that a brush (a single "volume") could have only one unique material, instead of one per face. Since I split the geometry per material, I would end-up with only one collision setup while several chunks could be present.
So far I got lucky because I rarely mixed materials. Only case where I did was to designate faces with a special material to remove the geometry during processing (classic "nodraw"). It didn't create issues since it wouldn't output geometry and therefore would give no collisions.
Anyway, that was the room I was working on yesterday before it started crashing:

After that I continued to edit the level, adding small details like:

I also put the box texture on a wall, to fake out a door:

I was fighting a bit against my shadow volumes in some places. Because the meshes made in TrenchBroom often end-up being simple boxes, they don't have enough geometry to properly deform, create holes in the shadows.
I decided to do a dirty fix this: I now pre-subdivide my shadow volume mesh if they are under a certain amount of polygons when I'm processing the mesh in Blender. Performance impact seems negligible at first glance.
The debug wireframe is quite messy to look at now however:

I really need to implement better culling at some point, there is no reason why I should compute that many lights here when I'm simply facing a wall.
(July 26)
I removed the bumps on the floor tiles, I think that works better overall:


I might still use the bumpy version, but only in a few places. Meanwhile I'm quite happy of the results I'm getting in some places:

I also copied the steam particles into the room with Armadillo, it wouldn't feel like a spooky test tube without them:

Now that I'm flying through the level to get a sense of how things look like overall, and with the new materials especially, specular aliasing is now quite noticeable:
(Specular aliasing visible on the floor and the frame.)
(July 26-27)
Me: "okay, let's find a simple radio mesh on Sketchfab, this way I will be able to put some spatialized audio in the level."
The mesh:

Borked shadows are always fun... I don't have the time to fix it unfortunately (also that normal map is flipped anyway).
So I made a very basic and dirty one in TrenchBroom, taking advantage of my trim textures:

To continue on sounds, I added a sound entity definition so that in TrenchBroom I could setup them more easily:

After adding a few sounds, here is a demo:
(Unmute if you want to hear)
(July 28)
Today I'm tweaking a bit the level entry part:

(July 29)
Now I'm adding "locator" points to make the camera track path:


And in-engine I made them visible, with a way to see how they are linked:
Once I got this working, I started scratching my head over the best way to do interpolation between the points to get smooth movements. Quadratic curves based on lerps are annoying because they require a lot of extra points.
(July 30)
Yeah, camera animation isn't going well so far:
I figured something out still, while not perfect it's working.
I started recording videos to make the final showcase. Once I had a few shots at hand, I launched Blender to do some editing:

It will be a lot more jank that I would like it to be, but heh at least it will be honest.
(July 31)
I submitted my final video for the GP Direct.
I posted it as well in the discord server my early entry and I got nice comments about it. I'm quite happy. That was a long journey.

I hit a wall.
This is why nothing happened during these months. I need rest and to refresh my mind.
That's it !
I'm stopping here for this time. Thank you for taking the time to read all of this (if you did), I hope it was entertaining.
See you next year !

(Kiss kiss!)
If you want to follow the day to day progress of my work, you can check out:
- My threads on Mastodon: thread 1 & thread 2
- My thread on Bluesky
- My dev-blog on the Graphic Programming discord server
- The wip channel on my own discord server